
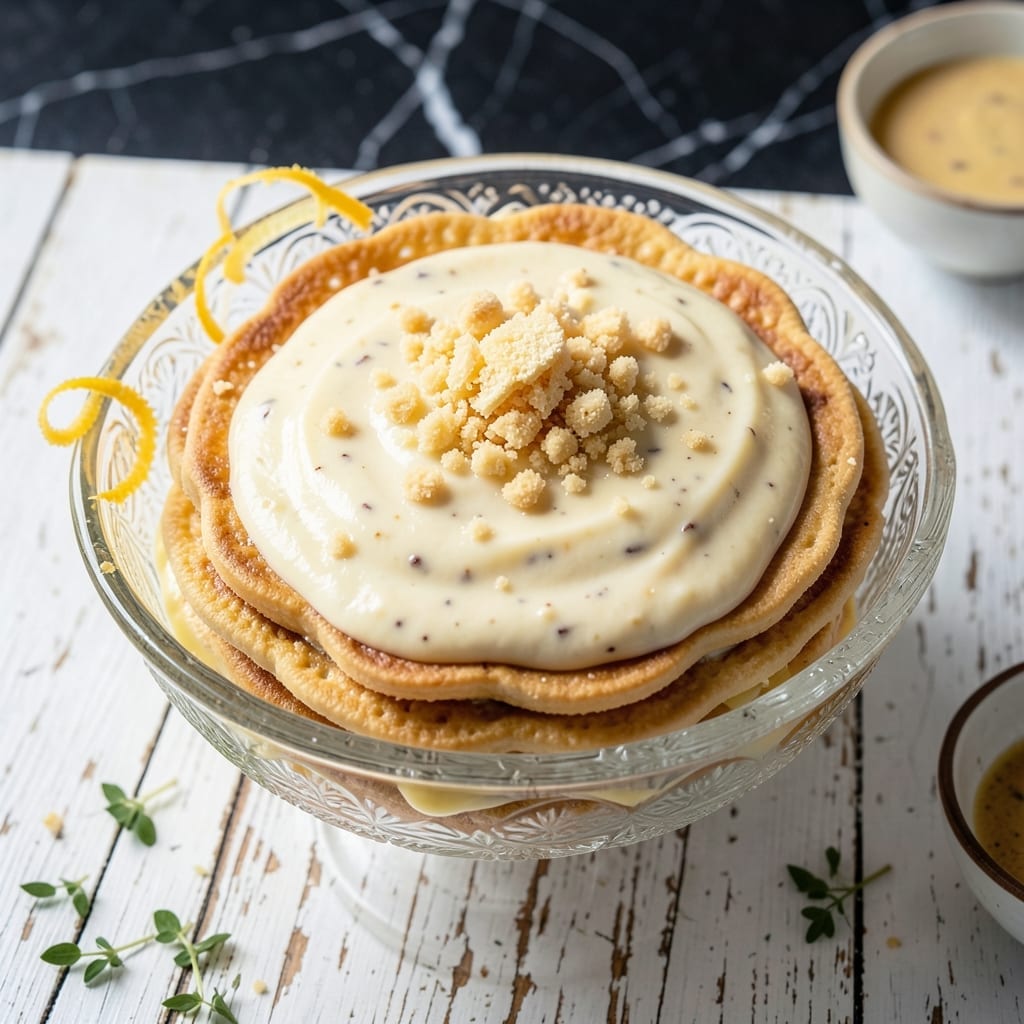
This no-fruit twist on classic pudding delivers all the creamy comfort you crave with a clever twist. Layers of vanilla wafers and rich custard create a dessert that’s just as satisfying as the original.
The secret lies in the custard’s smooth texture, achieved through a simple stovetop method with eggs, sugar, and milk. No bananas means the vanilla and wafer flavors shine even brighter.
Each bite offers a perfect balance of soft cookies and velvety custard, making it a crowd-pleaser for any occasion. The layers hold their shape beautifully, whether served immediately or chilled overnight.
This version proves that sometimes, what’s missing makes the dish even better. Here’s how to make it.
Ingredients for Banana Pudding Recipe No Bananas
Classic pudding flavors shine in this clever dessert with vanilla wafers and creamy custard layers.
| Ingredient | Amount | Notes |
|---|---|---|
| Vanilla Wafers 🍪 | 12 oz | About 48 wafers, full box |
| Whole Milk 🥛 | 3 cups | Full-fat for creaminess |
| Granulated Sugar 🍚 | ¾ cup | Divided for custard and layers |
| All-Purpose Flour 🌾 | ¼ cup | For thickening custard |
| Large Eggs 🥚 | 4 whole | Room temperature preferred |
| Unsalted Butter 🧈 | 2 tbsp | For rich custard texture |
| Pure Vanilla Extract 🌿 | 2 tsp | For depth of flavor |
| Salt 🧂 | ¼ tsp | Balances sweetness |
| Heavy Whipping Cream 🥣 | 1 cup | Whipped for topping |
| Vanilla Wafer Crumbs 🍪 | ½ cup | For layering between custard |
The custard is the star here. Whole milk and heavy cream deliver that velvety texture—don’t skimp on the fat content. I use Nilla Wafers (the blue box) because they hold up best to soaking. For the vanilla extract, pure extract makes a difference—imitation tastes artificial. Most grocery stores carry all these, but Costco has great prices on bulk vanilla wafers.
No whole milk? 2% works in a pinch but the texture won’t be as rich. Out of vanilla wafers? Shortbread cookies are a decent swap, though slightly buttery. For the custard, cornstarch can replace flour at a 1:1 ratio if needed. The whipped cream topping is optional but highly recommended—it adds that final creamy touch that makes this feel like the real deal.
Assemble in a 9×13-inch dish for easy serving. Keeps in the fridge for 3-4 days—the wafers soften the longer it sits. Freezing isn’t ideal (custard separates), but leftovers hold up well covered. Best served chilled after at least 4 hours of setting time.
Why You’ll Love This Recipe
- No Stovetop Needed: I mix the milk, sugar, and eggs in one pot on the stove—no fancy equipment, just a whisk and 15 minutes of gentle stirring.
- Vanilla Wafer Magic: Those crispy wafers soak up the creamy custard like a dream, giving every bite that nostalgic crunch and sweetness.
- Potluck Hero: I bring this to gatherings and it’s always the first dish gone—no bananas means no last-minute browning worries.
- Budget Dessert: A box of wafers and pantry staples stretch into a dessert that feels indulgent but costs pennies per serving.
Step-by-Step Instructions for Vanilla Wafer Layers With Creamy Custard
Here’s the method. Straightforward, tested, works every time.
Step 1: Create the Custard Base
In a medium saucepan, whisk together the 3 cups Whole Milk, 0.75 cup Granulated Sugar, and 0.25 cup All-Purpose Flour until smooth. This is the foundation of your creamy custard, so ensure the flour is fully dissolved to prevent lumps.
Place the saucepan over medium heat and cook, stirring constantly with a wooden spoon, until the mixture thickens and comes to a gentle boil. This usually takes about 5-7 minutes. You’ll know it’s ready when it coats the back of the spoon and leaves a clear path when you run your finger through it.
Step 2: Temper and Cook the Eggs
In a separate bowl, beat the 4 whole Large Eggs lightly. Slowly pour about 1 cup of the hot milk mixture into the eggs while whisking constantly. This tempering process prevents the eggs from scrambling when added to the hot liquid.
Pour the tempered egg mixture back into the saucepan with the remaining milk mixture. Add the 2 tbsp Unsalted Butter, 2 tsp Pure Vanilla Extract, and 0.25 tsp Salt. Cook over medium heat for another 2-3 minutes, stirring constantly, until the custard thickens further and reaches a pudding-like consistency.
Step 3: Prepare the Vanilla Wafer Layers
Line the bottom of a 9×13-inch baking dish with a single layer of vanilla wafers. I use about half of the 12 oz Vanilla Wafers for this base layer. Sprinkle 0.5 cup Vanilla Wafer Crumbs evenly over the whole wafers.
Pour half of the hot custard over the wafer layer, spreading it evenly. Add another layer of vanilla wafers, using the remaining whole wafers, and then pour the remaining custard on top. The wafers will soften beautifully as they absorb the custard’s moisture.
Step 4: Chill and Add the Whipped Cream Topping
Cover the dish with plastic wrap, pressing it directly onto the surface of the pudding to prevent a skin from forming. Refrigerate for at least 4 hours, or preferably overnight. This chilling time allows the flavors to meld and the wafers to fully soften.
Just before serving, whip the 1 cup Heavy Whipping Cream to stiff peaks. Spread or pipe the whipped cream over the chilled pudding. The contrast between the creamy custard, soft wafers, and light whipped topping creates the perfect texture in every bite.
Pro Tips For Making Banana Pudding Recipe No Bananas
- Temper the Eggs: Slowly whisk about 1/2 cup of the hot milk mixture into the eggs before combining everything—this keeps them from scrambling. I learned this the hard way after ruining two batches with lumpy custard.
- Use Fresh Wafers: Stale vanilla wafers turn to mush too fast. If yours have been sitting open for weeks, toast them lightly at 300°F for 5 minutes to crisp them up before layering.
- Whisk Constantly: From the moment the milk hits the pan until it thickens, keep that whisk moving. After burning one pot of pudding, I finally realized how quickly the flour can stick and scorch at the bottom.
- Chill Completely: Give it at least 4 hours in the fridge—overnight is even better. Sounds tedious, but the wafers soften perfectly and the flavors actually meld when you wait.
Make-Ahead Tips for Leftovers
Overnight Assembly
I always assemble this dessert the night before serving. The vanilla wafers need at least 4 hours to soften properly in the custard. Simply layer everything in your 9×13-inch dish, cover tightly, and refrigerate overnight. The flavors meld beautifully while you sleep. ✨
Custard Prep Ahead
The custard can be made 1-2 days in advance and stored in the fridge. When ready to assemble, gently reheat it on the stove over low heat while stirring constantly. This prevents a skin from forming and makes layering easier.
Wafer Storage
Keep your vanilla wafers in an airtight container until assembly to maintain their crispness. If they absorb moisture before layering, they’ll turn mushy in the final dish. I use the original box sealed with a chip clip.
Whipped Cream Timing
Whip the heavy cream just before serving – it stays fluffy for about 2 hours in the fridge. For longer events, stabilize it with 1 tsp powdered sugar per cup of cream. This keeps it from weeping.
Portion Control
For individual servings, use 8-oz mason jars to layer the components. These can be assembled 2 days ahead and stored in the fridge. The presentation is adorable and perfect for potlucks.
Make-Ahead Tips
If making for a crowd, double the recipe and use a 10×15-inch pan. The baking time remains the same, but you’ll need to increase chilling time to 6 hours minimum for proper setting.
Nutrition Facts
Frequently Asked Questions
Can I use a different cookie instead of vanilla wafers?
Yes! Shortbread or butter cookies work well as substitutes. They have a similar texture and hold up to the custard. Avoid very soft or chewy cookies as they may turn mushy.
Why does the custard need to chill for so long?
Chilling for 4+ hours lets the wafers absorb moisture and soften perfectly. It also allows the custard to set, creating clean layers when sliced. Overnight chilling enhances the flavors even more.
What if my custard doesn’t thicken?
Cook it longer over medium-low heat while stirring constantly. If it still won’t thicken, mix 1 tbsp cornstarch with 1 tbsp cold milk, then stir into the custard and cook for 2-3 more minutes.

- Pea Shoots Recipe Salad: Fresh Greens With Asian-Inspired Dressing - October 9, 2026
- Peanut Butter Bark Recipe With Pretzels: Sweet and Salty Holiday Treat - October 9, 2026
- Peach Crisp Recipe With Fresh Peaches: Buttery Oat Topping Over Juicy Summer Fruit - October 9, 2026