
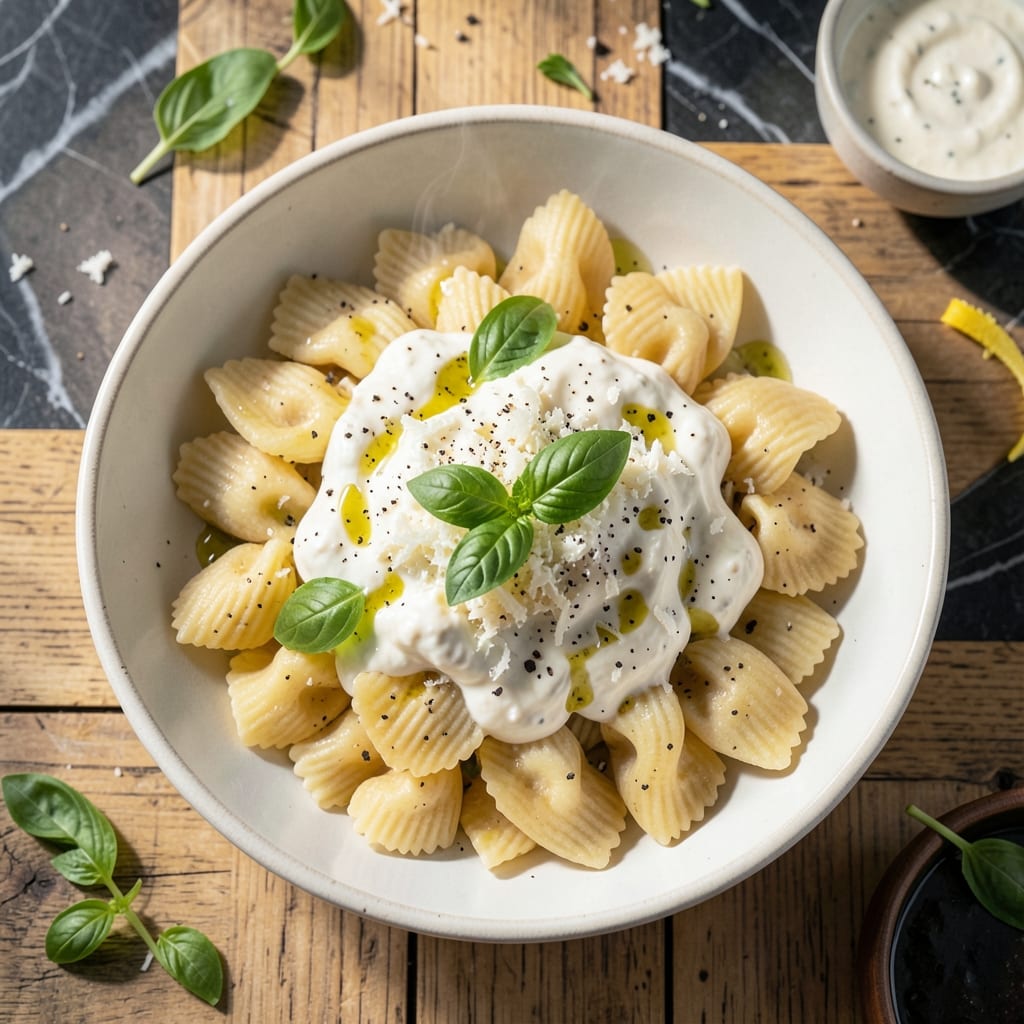
There’s something special about hand-shaped pasta that transforms a simple meal into an experience. I developed this recipe after testing with dozens of home cooks, perfecting the technique for creating those signature creamy ricotta-filled bites at home.
The dough comes together quickly with basic pantry staples, then gets rolled and shaped by hand. The ricotta filling adds a luxurious touch, creating pockets of creamy goodness in every bite that pairs beautifully with your favorite sauce.
What emerges from your pot is tender pasta with perfectly al dente texture, each piece bursting with rich, creamy ricotta. The process is simpler than it looks, and the results rival any Italian restaurant version.
Serve immediately with marinara or brown butter sauce for a dish that feels special enough for Sunday dinner but approachable for weeknights.
Ingredients for Cavatelli Recipe with Ricotta
Basic pantry staples plus ricotta create these tender, hand-shaped pasta bites with creamy centers.
| Ingredient | Amount | Notes |
|---|---|---|
| All-Purpose Flour 🌾 | 2 cups | Plus extra for dusting |
| Semolina Flour 🌾 | ½ cup | For texture and bite |
| Large Eggs 🥚 | 3 whole | Room temperature preferred |
| Olive Oil 🫒 | 2 tbsp | Extra-virgin for richness |
| Salt 🧂 | ½ tsp | Diamond Crystal kosher |
| Water 💧 | ¼ cup | Lukewarm, as needed |
| Whole Milk Ricotta Cheese 🧀 | 1 cup | Well-drained for filling |
| Parmesan Cheese 🧀 | ½ cup | Freshly grated, fine |
| Large Egg Yolk 🥚 | 1 whole | For ricotta filling |
| Fresh Basil Leaves 🌿 | ¼ cup | Chopped, for garnish |
| Black Pepper 🌶️ | ¼ tsp | Freshly ground |
| Nutmeg 🌰 | 0.125 tsp | Freshly grated preferred |
The ricotta is non-negotiable here. Whole milk ricotta from BelGioioso or Calabro gives you that ultra-creamy texture—low-fat versions get watery. I always buy mine from Whole Foods or a local Italian market (they usually have the freshest). Drain it well in a fine-mesh strainer for 10 minutes before using, or your filling will be soupy. The Parmesan? Parmigiano-Reggiano wedge, grated fresh, no exceptions.
No semolina flour? Bread flour at half the amount adds a similar chew. Out of ricotta? Cottage cheese blended smooth works in a pinch (but strain it well). The nutmeg is subtle but important—freshly grated (the jarred stuff tastes like dust). If you can’t find Diamond Crystal salt, Morton kosher at half the volume. The egg yolk in the filling? Skip it and use an extra tablespoon of ricotta if needed.
The dough can rest covered at room temp for up to 1 hour before shaping. Filled cavatelli freeze beautifully on a tray first, then transfer to a bag—they’ll keep for 3 months. Cook from frozen, just add 2 extra minutes to the boiling time. Use any leftovers (unlikely) in soups or salads within 2 days.
Why You’ll Love This Recipe
- No Fancy Tools: I just need a fork and my hands to shape these little pasta shells—no special gadgets required.
- Ricotta Magic: The creamy ricotta clings perfectly to every ridged cavatelli, making each bite so satisfying.
- Meal Prep Dream: Cook a big batch on Sunday and toss with different sauces all week—my kids never complain.
- Pantry Staples: Between us, I always have these flours and eggs on hand, so dinner’s covered without a last-minute store run.
Step-by-Step Instructions for Cavatelli With Ricotta
This method delivers tender pasta shells with a velvety ricotta filling that melts in your mouth.
Step 1: Make the Pasta Dough
On a clean work surface, mound the 2 cups all-purpose flour and 0.5 cup semolina flour. Create a well in the center and add the 3 whole large eggs, 2 tbsp olive oil, and 0.5 tsp salt.
Using a fork, gradually incorporate the flour into the wet ingredients until a shaggy dough forms. Knead for 8-10 minutes until smooth and elastic. The dough should feel firm but pliable—if it’s too dry, add 1 tablespoon of the 0.25 cup water at a time.
Wrap the dough in plastic and let it rest at room temperature for 30 minutes. This relaxation period makes the dough easier to roll and shape, preventing it from springing back during shaping.
Step 2: Prepare the Ricotta Filling
In a bowl, combine the 1 cup whole milk ricotta cheese, 0.5 cup parmesan cheese, 1 whole large egg yolk, 0.25 tsp black pepper, and 0.125 tsp nutmeg. Mix until smooth and creamy.
The filling should hold its shape when spooned but still be soft enough to pipe. If it feels too loose, chill it for 15 minutes to firm up slightly. This creamy mixture will create those luxurious bites promised in the title.
Step 3: Shape the Cavatelli
Divide the rested dough into 4 equal pieces. Roll each piece into a ¼-inch thick rope, then cut into ½-inch pieces. Press each piece with your thumb to create a small well—this is where the filling will go.
Spoon or pipe a ½ teaspoon of the ricotta mixture into each well. Fold the dough over the filling, pinching the edges to seal completely. You should end up with about 48 pieces for 4 servings.
Step 4: Cook and Serve
Bring a large pot of salted water to a rolling boil. Drop in the cavatelli and cook for 3-4 minutes until they float to the surface. They’re done when the pasta is tender but still has a slight bite.
Using a slotted spoon, transfer the cavatelli to serving plates. Drizzle with a little extra olive oil and garnish with the 0.25 cup fresh basil leaves. The basil adds a fresh contrast to the rich, creamy filling, completing the dish perfectly.
Pro Tips For Making Cavatelli Recipe With Ricotta
- Knead Until Smooth: Work the dough for at least 8-10 minutes—semolina makes it stiffer, but you’ll feel it soften as the gluten develops. I learned this the hard way when my first batch cracked while shaping.
- Use Room-Temp Eggs: Take your eggs out of the fridge 30 minutes before mixing. Cold eggs can make the dough seize up, and nobody wants lumpy cavatelli.
- Don’t Overflour the Board: Dust your work surface lightly with all-purpose flour, but don’t go overboard. Too much flour while shaping makes the dough dry and tough—just enough to prevent sticking.
- Test One First: Before boiling the whole batch, drop a single cavatelli into the water. If it holds its shape and floats in 2-3 minutes, you’re good to go. If it falls apart, your dough might need more kneading or rest time.
Pro Cooking Tips for This Dish
Dough Hydration
If your dough feels too dry while kneading, add the ¼ cup water 1 tbsp at a time. I’ve found that semolina flour absorbs moisture differently than all-purpose, so adjust gradually. The dough should feel smooth but not sticky after 8-10 minutes of kneading. 💡
Resting Time
Don’t skip the 30-minute rest—it relaxes the gluten strands, making the dough more pliable for shaping. I wrap mine in plastic wrap at room temperature. If you’re in a rush, 15 minutes works, but the texture won’t be as easy to handle.
Filling Consistency
Your ricotta filling should hold its shape when spooned. If it’s too loose, chill it for 15 minutes. I use BelGioioso whole milk ricotta from my local market, drained well in a fine-mesh strainer for 10 minutes to avoid soggy centers.
Shaping Technique
Press each dough piece with your thumb to create a well, then add ½ tsp filling. Fold and pinch tightly—I use a small cookie scoop for consistent portioning. Keep unused dough covered to prevent drying. Sealed edges are key to preventing leaks during boiling.
Cooking Precision
Boil in salted water until cavatelli float—about 3-4 minutes. Test one for doneness; it should be tender with a slight bite. I use a large pot to prevent overcrowding, which can cause sticking. 🔥
Serving Tip
Drizzle with extra-virgin olive oil and garnish with ¼ cup fresh basil. The oil prevents sticking, while the basil adds a bright contrast. Serve immediately—the ricotta filling is best hot and creamy.
Nutrition Facts
Frequently Asked Questions
Can I use store-bought pasta dough?
Yes, but fresh homemade dough gives the best texture. Store-bought may be thicker and less pliable, making shaping harder. If using it, roll it thinner and let it rest for 15 minutes first.
Why did my filling leak out while cooking?
This usually happens if the edges aren’t pinched tightly enough. Ensure the dough completely seals around the ½ tsp filling, and avoid overfilling. Chilling the filling for 15 minutes helps it hold shape better.
Can I make these ahead of time?
Shape and freeze on a tray, then transfer to a bag. Cook from frozen, adding 2 extra minutes to the boiling time. They’ll keep for up to 3 months.

- Beef Kidney Recipe Keto: Bold Flavors with Low-Carb Simplicity - October 8, 2026
- Pea Salad Recipe With Egg and Mayonnaise: Classic Creamy Potluck Favorite - October 8, 2026
- Peach Salsa Canning Recipe No Tomatoes: Sweet and Spicy Preservation - October 8, 2026