
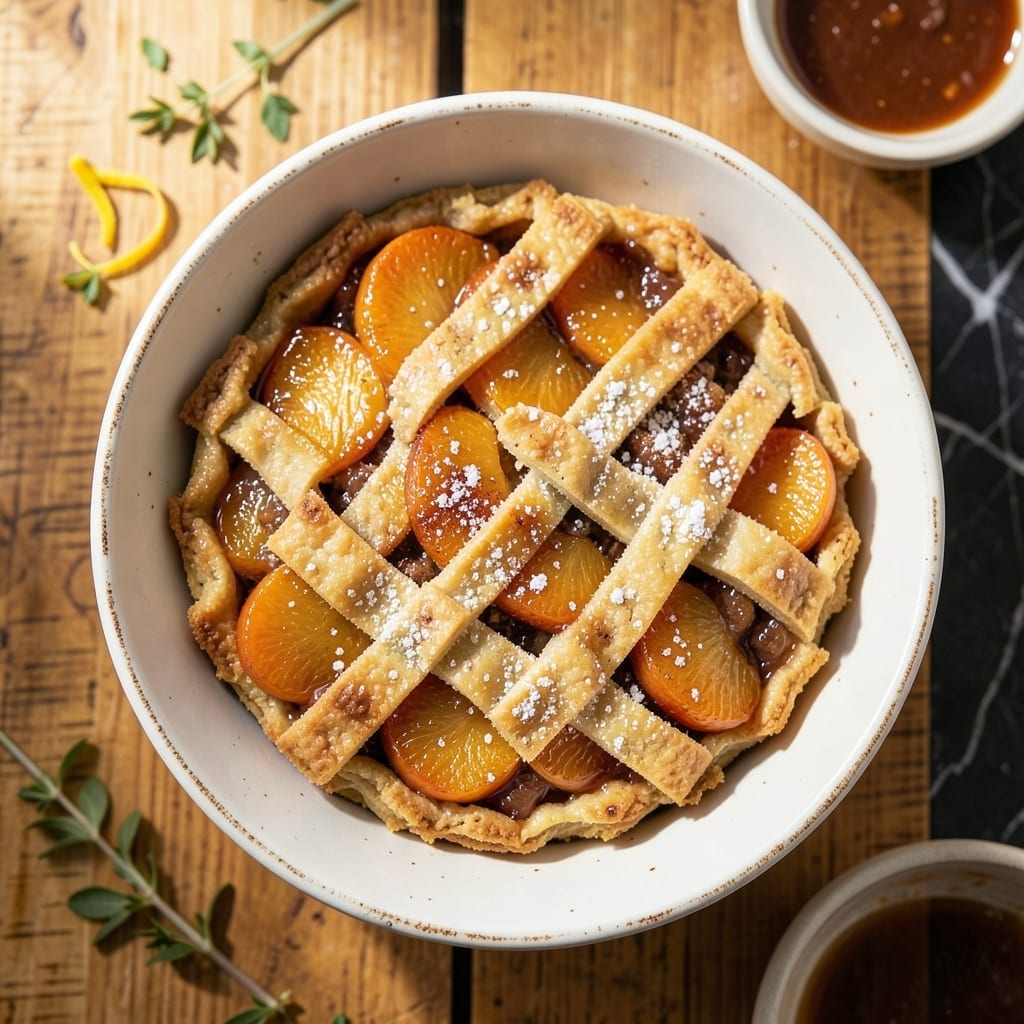
This peach cobbler delivers homemade flavor with minimal effort, using canned peaches and store-bought pie crust for a foolproof dessert. The shortcut doesn’t compromise on taste or texture.
Canned peaches work perfectly here, their sweetness enhanced by a buttery crust that bakes to golden perfection. The assembly is straightforward, making it ideal for busy cooks or last-minute gatherings.
In under an hour, you’ll have a warm, bubbling cobbler with a flaky top and juicy peach filling. It’s comfort food at its simplest and most satisfying.
Serve with vanilla ice cream for the ultimate treat. This dessert proves that homemade doesn’t have to mean from scratch.
Ingredients for Peach Cobbler Recipe Canned Peaches Pie Crust
Short list. Big flavor. Pantry staples plus a quick stop at the frozen aisle.
| Ingredient | Amount | Notes |
|---|---|---|
| Canned Peach Slices 🍑 | 2 cans | 15 oz each, drained |
| Store-Bought Pie Crust 🥧 | 1 package | 2 crusts, thawed if frozen |
| Granulated Sugar 🍚 | ¾ cup | For sweetening peaches |
| Brown Sugar 🟤 | ½ cup | Packed, for topping |
| All-Purpose Flour 🌾 | ¼ cup | For thickening filling |
| Ground Cinnamon 🌿 | 1 tsp | For warm spice flavor |
| Unsalted Butter 🧈 | ½ cup | Cold, cubed for topping |
| Vanilla Extract 🌿 | 1 tsp | Pure for best flavor |
| Lemon Juice 🍋 | 1 tbsp | Fresh for brightness |
| Salt 🧂 | ¼ tsp | Enhances sweetness |
| Vanilla Ice Cream 🍦 | 1 cup | For serving (optional) |
The canned peaches are key—Del Monte or Libby’s have the best texture. Look for slices in heavy syrup (not light) for maximum sweetness. The pie crust can be any brand, but Pillsbury is my go-to (the refrigerated kind, not frozen). Check the date on the butter—old butter loses that rich flavor we need for the topping.
No pie crust? Biscuit dough works in a pinch—just press it into the pan. Out of brown sugar? White sugar plus molasses at a 1:1 ratio. The cinnamon can be skipped, but it adds that cozy warmth (worth the extra 30 seconds to measure). Frozen peaches would work too—thaw and drain them first.
Assemble the cobbler right before baking—no need to prep ahead. Leftovers? Cover and refrigerate for up to 3 days. Reheat in the oven (microwave makes the crust soggy). Honestly, it’s best served warm, same day.
Why You’ll Love This Recipe
- No-Fuss Assembly: I just dump the canned peaches into the pan, top with store-bought crust, and let the oven do the rest.
- Sweet & Buttery: That flaky crust soaks up the syrupy peaches and brown sugar for a gooey, caramelized bite every time.
- Potluck Hero: I bring this to summer gatherings and it’s always the first dish gone—no one believes it’s this simple.
- Budget Friendly: Canned peaches and a pie crust cost pennies, and one batch makes enough for leftovers. Honestly, it’s my cheapest crowd-pleaser.
Step-by-Step Instructions for Peach Cobbler with Canned Peaches and Pie Crust
This method delivers that homemade taste with minimal effort and maximum flavor.
Step 1: Prepare the Peach Filling
Drain the 2 cans Canned Peach Slices thoroughly in a colander, pressing gently to remove excess liquid. In a large bowl, combine the peaches with 0.75 cup Granulated Sugar, 0.25 cup All-Purpose Flour, 1 tsp Vanilla Extract, 1 tbsp Lemon Juice, and 0.25 tsp Salt.
Stir until the peaches are evenly coated and the mixture thickens slightly. The flour helps absorb the juices so your cobbler isn’t watery. I like to let this sit for 5 minutes while I prepare the next elements—it gives the sugar a chance to start drawing out the peach juices.
Step 2: Layer the Filling and Topping
Preheat your oven to 375°F. Transfer the peach mixture to a 9×13-inch baking dish and spread it out evenly. Sprinkle 1 tsp Ground Cinnamon over the top for that warm, cozy spice flavor.
Now, unroll the 1 package Store-Bought Pie Crust and cut it into strips or squares. You can get fancy with a lattice pattern, but I usually just scatter the pieces over the peaches for a rustic look. It’ll bake up golden and crisp regardless.
Step 3: Add the Brown Sugar Butter Topping
In a small bowl, mix 0.5 cup Brown Sugar with 0.5 cup Unsalted Butter that’s been cubed and slightly softened. The mixture should resemble wet sand. Sprinkle this evenly over the pie crust pieces.
This step is what takes this cobbler from good to unforgettable. As it bakes, the butter and sugar melt together, creating a rich, caramelized topping that seeps into every bite. Don’t skip this—it’s the secret to that bakery-style finish.
Step 4: Bake Until Golden and Bubbly
Bake for 35-40 minutes until the topping is deep golden brown and the filling is bubbling around the edges. You’ll see the butter mixture transform into a crisp, sugary crust that cracks slightly when touched.
If the top starts browning too quickly, loosely tent with foil for the last 10 minutes. Let it rest for 10 minutes after removing from the oven—this gives the juices a chance to thicken slightly so your first serving isn’t runny.
Step 5: Serve Warm with Ice Cream
Scoop the cobbler into bowls while it’s still warm. The contrast between the hot, spiced peaches and the cool, creamy 1 cup Vanilla Ice Cream is what makes this dish irresistible. I always serve it with a spoon so I can dig deep and get a little of everything in each bite.
This cobbler tastes even better the next day, if you can wait that long. Just reheat individual portions in the microwave for 20-30 seconds and top with fresh ice cream.
Pro Tips For Making Peach Cobbler Recipe Canned Peaches Pie Crust
- Drain the Peaches: I learned this the hard way—drain and lightly pat dry the canned peaches to prevent a soggy crust. About 5 minutes in a colander does the trick.
- Chill the Crust: After burning one too many edges, I now let the pie crust sit in the fridge for 15 minutes before baking. It holds its shape better.
- Skip the Overmixing: Stir the flour and sugar topping just until combined—overmixing makes it dense instead of crumbly.
- Use Cold Butter: Sounds weird, but it works: cut 2 tablespoons of cold butter into the dry topping mix for a flakier texture with minimal extra effort.
Pro Cooking Tips for This Recipe
Drain Thoroughly
Press the canned peach slices in a colander for 2-3 minutes to remove all syrup. Excess liquid makes the filling watery and prevents the crust from crisping. I use a wooden spoon to gently press out every last drop. 💡
Prevent Soggy Bottom
Sprinkle 1 tbsp of the flour from the recipe directly into your 9×13-inch dish before adding the peaches. This creates a barrier that absorbs juices and keeps the crust flaky, not soggy.
Butter Temperature
Use cold, cubed butter for the topping—it should be straight from the fridge. As it melts during baking, it creates pockets that make the topping extra crispy. Land O’Lakes is my preferred brand for consistent results.
Even Browning
Rotate the dish 180 degrees halfway through baking at the 20-minute mark. This ensures even browning, especially if your oven has hot spots. Watch closely after 30 minutes to prevent burning.
Crust Perfection
For extra flakiness, brush the pie crust pieces with 1 tbsp melted butter before adding the brown sugar topping. This adds another layer of richness and helps the crust brown beautifully.
Resting Time
The 10-minute rest after baking isn’t just for cooling—it allows the juices to thicken so your cobbler holds its shape when served. Skipping this step means a runny, less impressive presentation. ✨
Nutrition Facts
Frequently Asked Questions
Can I use fresh peaches instead of canned?
Yes! Use 6-8 ripe peaches, peeled and sliced. Simmer them with 1/4 cup sugar for 5 minutes to soften before assembling.
Why did my crust get soggy?
This usually happens if the peaches weren’t drained well or the dish wasn’t preheated. Sprinkle 1 tbsp flour in the pan first to create a barrier.
Can I make this ahead of time?
Assemble everything but don’t bake. Cover and refrigerate for up to 12 hours. Add 5-10 minutes to baking time if cold.

- Peanut Brittle Recipe With Dry Roasted Peanuts: Crunchy Caramelized Sweetness - October 7, 2026
- Peanut Butter and Banana Bread Recipe UK: Moist Crumb With Nutty Swirls - October 7, 2026
- Frittata Recipe Oven: Fluffy Eggs with Crisp Golden Top - October 7, 2026