
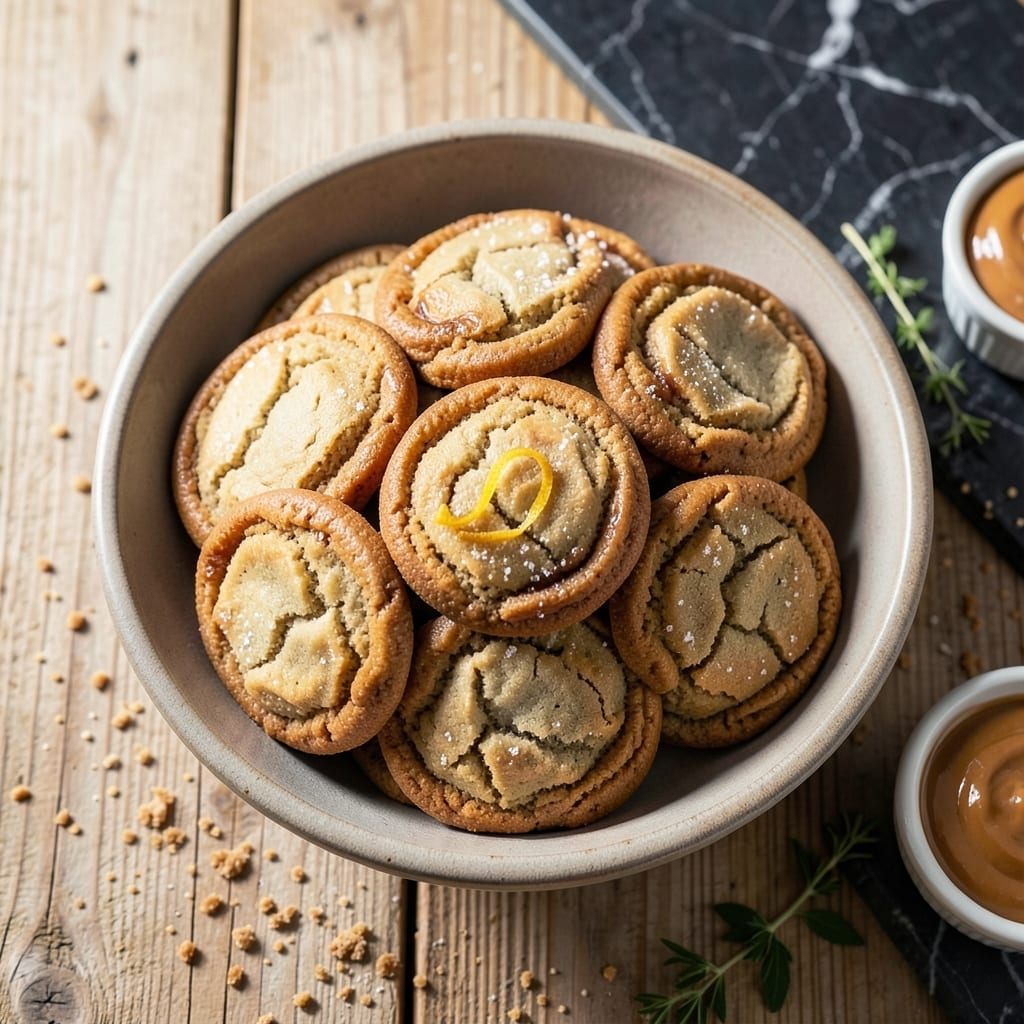
This recipe delivers perfectly chewy peanut butter cookies with minimal effort, all thanks to self-rising flour as the leavening agent.
I developed this method after realizing self-rising flour eliminates the need for separate baking powder in the dough. The result is a simpler process with consistent, tender centers every time.
The cookies bake up golden with cracked tops, maintaining that classic peanut butter flavor we all love. No special equipment required—just a bowl, a spoon, and 30 minutes from start to finish.
Serve warm for gooey centers or let cool for a firmer texture. This approach proves great cookies don’t need complicated techniques.
Ingredients for Peanut Butter Cookie Recipe Using Self Rising Flour
Short list of pantry staples. Ready in one bowl with no mixer needed.
| Ingredient | Amount | Notes |
|---|---|---|
| Creamy Peanut Butter 🥜 | 1 cup | Natural or commercial both work |
| Granulated Sugar 🍚 | ¾ cup | White or raw cane sugar |
| Light Brown Sugar 🟤 | ¾ cup | Packed firmly into cup |
| Large Egg 🥚 | 1 whole | Room temperature preferred |
| Vanilla Extract 🌿 | 1 tsp | Pure vanilla for best flavor |
| Self-Rising Flour 🌾 | 1 ¼ cups | All-purpose flour substitute fails here |
| Unsalted Butter 🧈 | ½ cup | Softened but not melted |
| Baking Soda 🧂 | ¼ tsp | Optional for extra lift |
| Salt 🧂 | ¼ tsp | Fine sea salt preferred |
| Chopped Peanuts 🥜 | ½ cup | Optional for texture contrast |
The peanut butter is doing the heavy lifting here—Jif or Skippy work great, but natural brands need a good stir first. I always use Domino for the sugars (the brown sugar clumps less). The self-rising flour is non-negotiable—White Lily or Softasilk if you can find them. Regular all-purpose won’t give you that perfect chew. And yes, the butter needs to be soft enough to dent when pressed (not melted, not rock hard).
No self-rising flour? Mix 1.25 cups all-purpose + 1.5 tsp baking powder + 0.25 tsp salt. Swap the peanut butter for almond if that’s your jam (texture stays the same). Brown sugar can be all white in a pinch, but you’ll lose some moisture. The egg? Flax egg works (1 tbsp ground flax + 3 tbsp water), though the cookies will spread more. Skip the peanuts if allergies are a concern.
Dough keeps 3 days wrapped in the fridge, or freeze for 3 months. Baked cookies stay fresh in an airtight container for 5 days (the centers soften over time, which honestly I prefer). For extra chew, underbake by 1-2 minutes.
Why You’ll Love This Recipe
- One-Bowl Wonder: I just dump the peanut butter, sugars, egg, and vanilla in a single bowl—no measuring flour or leavening since the self-rising does the work.
- Rich & Nutty: That creamy peanut butter base with both white and brown sugar gives them a caramelized depth that’s downright crave-worthy.
- After-School Hero: My kids grab these straight from the rack, and honestly, they’re just as good packed in lunchboxes the next day.
- Pantry MVP: I always have these ingredients on hand, so I can bake a fresh batch on a whim without a grocery run.
Step-by-Step Instructions for Peanut Butter Cookies Using Self-Rising Flour
Here’s the straightforward method. Works every time with minimal effort.
Step 1: Cream the Peanut Butter and Sugars
In a large mixing bowl, beat the 1 cup Creamy Peanut Butter with the 0.75 cup Granulated Sugar and 0.75 cup Light Brown Sugar until smooth and fluffy. I use a hand mixer on medium speed for about 2-3 minutes—this incorporates air for that signature chewy texture.
The mixture should lighten slightly in color and pull away from the sides of the bowl. Don’t cut this step short; proper creaming ensures the sugars dissolve evenly, preventing graininess in your finished cookies.
Step 2: Incorporate the Wet Ingredients
Add the 1 whole Large Egg and 1 tsp Vanilla Extract to the peanut butter mixture. Beat again on medium speed for 1-2 minutes until fully combined. The batter will thicken noticeably as the egg emulsifies with the peanut butter.
Scrape down the sides of the bowl with a spatula to ensure everything is evenly mixed. You’ll see the batter take on a glossy sheen—that’s your cue it’s ready for the dry ingredients.
Step 3: Fold in the Dry Ingredients
Gradually add the 1.25 cups Self-Rising Flour, 0.25 tsp Baking Soda, and 0.25 tsp Salt to the wet mixture. Mix on low speed just until the flour disappears—overmixing develops gluten, which makes cookies tough.
If using, fold in the 0.5 cup Chopped Peanuts by hand with a spatula. The dough will be thick and slightly sticky, but it should pull away from the bowl cleanly. If it feels too dry, the self-rising flour is doing its job—trust the process.
Step 4: Shape and Chill the Dough
Roll the dough into 1-inch balls and place them on a parchment-lined baking sheet. I like to flatten them slightly with the tines of a fork, creating the classic crisscross pattern that helps them bake evenly.
Refrigerate the shaped dough for at least 30 minutes. Chilling solidifies the 0.5 cup Unsalted Butter in the peanut butter, which prevents excessive spreading in the oven and keeps the centers soft and chewy.
Step 5: Bake to Golden Perfection
Preheat your oven to 350°F. Bake the chilled cookies for 10-12 minutes, or until the edges are just beginning to turn golden brown. The centers will look slightly underdone, but they’ll firm up as they cool.
Let the cookies rest on the baking sheet for 5 minutes before transferring them to a wire rack. This brief rest allows them to set without crumbling. The result? Thick, chewy cookies with crackly tops and rich peanut butter flavor in every bite.
Pro Tips For Making Peanut Butter Cookie Recipe Using Self Rising Flour
- Chill the Dough: After mixing, refrigerate the dough for 20-30 minutes—I learned this the hard way when my first batch spread into flat, sad puddles. Self-rising flour needs this pause to firm up the fat from the peanut butter.
- Use Room-Temp Egg: Pull your egg out 30 minutes before baking. Sounds weird, but it works: the yolk blends smoothly into the peanut butter without leaving streaks, and the cookies hold their shape better.
- Watch the Oven Time: Start checking at 9 minutes—self-rising flour makes these cookies rise fast, and they’ll look underdone when they’re actually perfect. Pull them when the edges are just golden; they’ll firm up as they cool.
- Press with a Fork: Flatten each ball of dough with a fork in a crisscross pattern before baking. My grandmother swore by this, and she was right: it helps the cookies bake evenly and gives them that classic peanut butter cookie look.
Storing and Reheating This Recipe
Room Temperature Storage
Let cookies cool completely before storing in an airtight container at room temperature. They’ll keep for up to 5 days, with centers softening over time—I actually prefer them this way. Separate layers with parchment paper to prevent sticking. ❄️
Refrigerator Storage
For longer freshness, store cooled cookies in the fridge for up to 1 week. Place in a sealed container with parchment between layers. Bring to room temperature before serving to restore that fresh-baked texture.
Freezing Dough Balls
Shape dough into balls and freeze on a tray before transferring to a freezer bag. They’ll keep for 3 months. Bake directly from frozen, adding 1-2 minutes to the baking time. No need to thaw!
Reheating Method
Revive cookies in a 300°F oven for 5-7 minutes to restore warmth and freshness. This works especially well for day-old cookies. Watch closely to prevent over-browning.
Microwave Quick Fix
For a single cookie, microwave for 10-15 seconds to soften. Place a damp paper towel over it first to add moisture. This is my go-to when I want a warm cookie without waiting for the oven. 💡
Nutrition Facts
Frequently Asked Questions
Can I use natural peanut butter for this?
Yes, but stir it well first to incorporate the oil. Natural brands work, though cookies may spread slightly more.
Why chill the dough before baking?
Chilling for 30 minutes prevents excessive spreading and keeps centers soft. Skip it only if you prefer thinner, crispier cookies.
How do I get the classic fork pattern?
Press dough balls with fork tines in a crisscross before baking. This also helps them bake evenly and look traditional.
Can I make these without an electric mixer?
A wooden spoon and strong arm work fine. Expect to mix for 4-5 minutes to achieve the same fluffy texture.

- Pea Shoots Recipe Salad: Fresh Greens With Asian-Inspired Dressing - October 9, 2026
- Peanut Butter Bark Recipe With Pretzels: Sweet and Salty Holiday Treat - October 9, 2026
- Peach Crisp Recipe With Fresh Peaches: Buttery Oat Topping Over Juicy Summer Fruit - October 9, 2026