
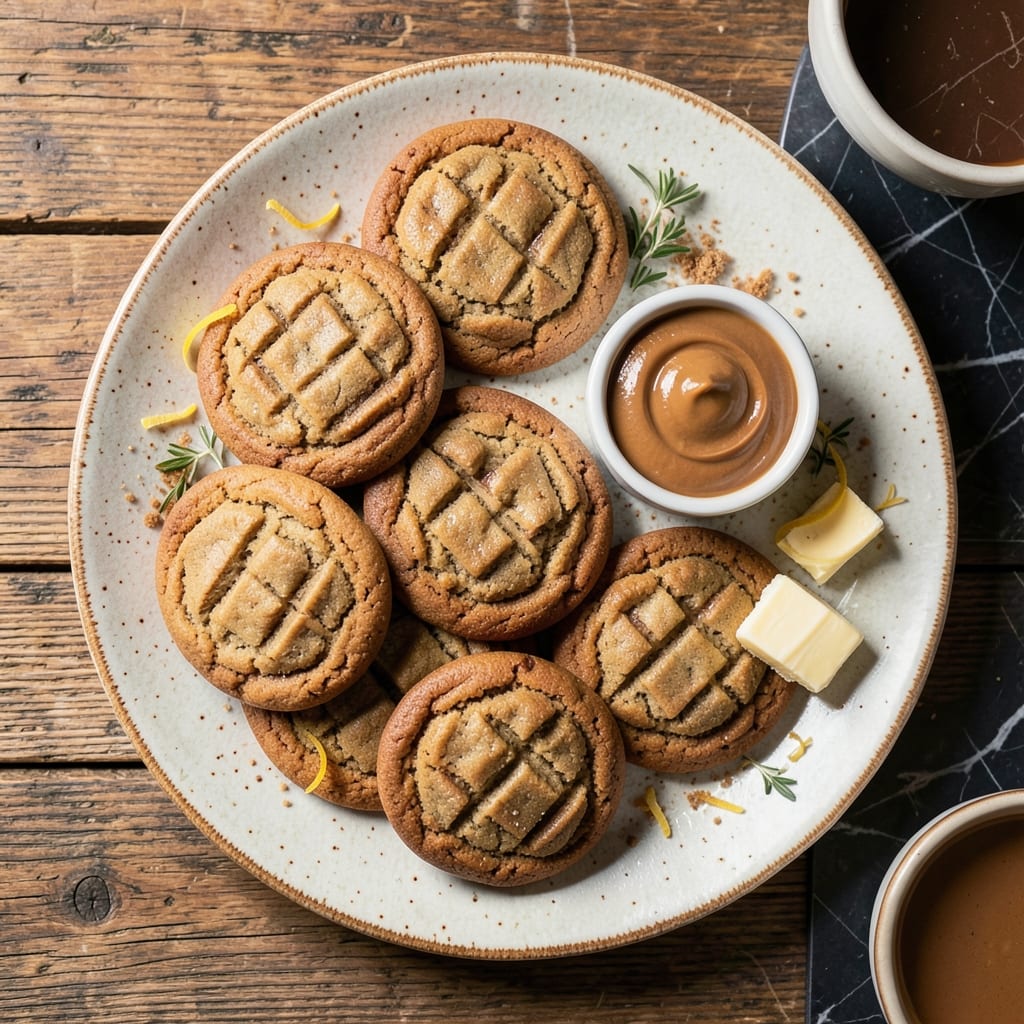
There’s something timeless about a classic peanut butter cookie with its signature crisscross pattern and rich, nutty flavor. This recipe delivers chewy centers and golden edges every time, using simple ingredients you likely already have on hand.
The secret lies in using real butter and the right balance of brown and white sugar for that perfect texture. I’ve tested this method countless times to ensure it produces consistent results—soft, tender cookies that hold their shape beautifully.
What sets these apart is the way the dough comes together effortlessly, requiring no chilling time. The aroma alone as they bake is enough to draw a crowd. Once cooled, they stay fresh for days, making them ideal for sharing.
Perfect for holidays, bake sales, or whenever you need a reliable treat. Here’s how to make them.
Ingredients for Peanut Butter Cookie Recipe with Butter
These classic cookies come together with pantry staples and real butter for rich flavor.
| Ingredient | Amount | Notes |
|---|---|---|
| Creamy Peanut Butter 🥜 | 1 cup | Natural or conventional, unsweetened |
| Unsalted Butter 🧈 | ½ cup | Softened to room temperature |
| Granulated Sugar 🍚 | ¾ cup | Fine white sugar |
| Light Brown Sugar 🟤 | ¾ cup | Packed firmly into cup |
| Large Egg 🥚 | 1 whole | Room temperature preferred |
| Vanilla Extract 🌿 | 1 tsp | Pure vanilla for best flavor |
| All-Purpose Flour 🌾 | 1 ½ cups | Spoon and level method |
| Baking Soda 🧂 | ½ tsp | Ensures proper rise |
| Salt 🧂 | ¼ tsp | Fine table salt |
| Granulated Sugar 🍚 | ¼ cup | For rolling dough balls |
The peanut butter is key—Jif or Skippy give that classic taste, but natural works if you stir it well first. Butter should be real and unsalted so you control the salt content. The brown sugar adds moisture for chewiness, so don’t skip it. Most grocery stores carry everything you need, no specialty trips required (the baking aisle has it all).
No light brown sugar? Dark brown sugar works too (just slightly more molasses flavor). Out of vanilla? Almond extract at half the amount adds a nice twist. For gluten-free, swap the all-purpose flour for a 1:1 gluten-free blend. The egg binds everything—no great substitute exists, but flax eggs can work in a pinch (texture changes).
Dough keeps in the fridge for 3 days or freezes beautifully for 3 months. Baked cookies stay fresh 5 days in an airtight container. Freeze baked cookies for up to 2 months—revive in a warm oven.
Why You’ll Love This Recipe
- I’ll be real: I always double the batch and freeze the dough for fresh cookies anytime.
- One Bowl Wonder: I just dump the peanut butter, butter, sugars, and egg in one bowl—no mixer, no fuss.
- Crispy Edges, Soft Centers: That combo of brown and white sugar gives them the perfect chewy middle with a buttery crunch.
- Lunchbox MVP: Between us, these disappear faster than store-bought snacks and cost half as much.
Step-by-Step Instructions for Peanut Butter Cookies With Butter
This tested method delivers cookies with crisp edges, chewy centers, and that signature crisscross pattern.
Step 1: Cream Butter and Sugars Until Light
In a large mixing bowl, beat the 0.5 cup Unsalted Butter with the 0.75 cup Granulated Sugar and 0.75 cup Light Brown Sugar using an electric mixer on medium speed. The mixture should become pale and fluffy after about 3-4 minutes.
This creaming process incorporates air, which creates those desirable cracks on the surface during baking. Stop when the mixture holds its shape briefly when the beaters are lifted. The light brown sugar adds moisture for that perfect chewy texture.
Step 2: Incorporate Wet Ingredients
Add the 1 cup Creamy Peanut Butter, 1 whole Large Egg, and 1 tsp Vanilla Extract to the butter mixture. Beat on medium speed for 1-2 minutes until fully combined and smooth.
Scrape down the sides of the bowl with a spatula to ensure all ingredients are evenly distributed. The peanut butter should be fully integrated with no visible streaks. The dough will look slightly sticky at this stage.
Step 3: Combine Dry Ingredients
In a separate bowl, whisk together the 1.5 cups All-Purpose Flour, 0.5 tsp Baking Soda, and 0.25 tsp Salt. Gradually add this dry mixture to the wet ingredients, mixing on low speed until just combined.
Be careful not to overmix—stop as soon as the flour disappears. Overworking the dough develops gluten, which can make the cookies tough instead of tender. The dough will be thick and slightly sticky but should hold together when pressed.
Step 4: Shape and Prepare for Baking
Preheat your oven to 350°F and line baking sheets with parchment paper. Roll the dough into 1-inch balls and place them 2 inches apart on the prepared sheets.
Roll each ball in the remaining 0.25 cup Granulated Sugar to coat completely. This extra sugar creates a crisp exterior and enhances the classic crisscross pattern. Use a fork to make the signature crosshatch design, pressing down firmly to flatten slightly.
Step 5: Bake to Golden Perfection
Bake for 10-12 minutes until the edges are light golden brown but the centers still look slightly soft. The cookies will continue to set as they cool on the baking sheet.
Let them cool on the pan for 5 minutes before transferring to a wire rack. They’ll firm up as they cool. The centers should remain soft and chewy while the edges develop that satisfying crispness. Serve warm for the ultimate texture contrast.
Pro Tips For Making Peanut Butter Cookie Recipe With Butter
- Chill the Dough: Pop the dough in the fridge for 30 minutes before baking—I learned this the hard way after my first batch spread into flat pancakes.
- Use Room-Temp Butter: Let the unsalted butter sit out for an hour so it creams smoothly with the peanut butter and sugars; cold butter makes for dense, uneven cookies.
- Measure Peanut Butter Right: Pack the creamy peanut butter into the measuring cup firmly, then level it off—this stuff is thick and air pockets throw off the texture.
- Pull Early: Take the cookies out when the edges are just golden but the centers still look soft; they’ll finish cooking on the tray and stay chewy.
Pro Cooking Tips for This Dish
Butter Temperature Matters
Your butter should be soft but not melted—about 65-67°F. Press a finger into it; it should leave a slight indentation. Too soft and your cookies will spread excessively. I pull mine from the fridge 1-2 hours before baking. 🌡️
Creaming Technique
Beat the butter and sugars for the full 3-4 minutes until pale and fluffy. This aerates the dough, creating those signature cracks. Use a stand mixer or hand mixer—I recommend KitchenAid for consistent results.
Peanut Butter Choice
Stick with creamy peanut butter like Jif or Skippy for classic texture. Natural peanut butter can separate, affecting the dough’s consistency. Stir it well if using natural, but expect slightly different results.
Dough Ball Size
Roll dough into 1-inch balls for even baking. Use a cookie scoop for uniformity—I love the OXO 1-tbsp scoop. Space them 2 inches apart to prevent merging during baking.
Fork Pattern Trick
Dip your fork in granulated sugar before pressing the crisscross pattern. This prevents sticking and adds extra crunch. Press firmly for a defined design that bakes beautifully. 💫
Baking Time Precision
Pull cookies at 10-12 minutes when edges are golden but centers look soft. They’ll firm up as they cool. Overbaking dries them out—this is the most common mistake I see with peanut butter cookies.
Nutrition Facts
Frequently Asked Questions
Can I use margarine instead of butter?
Stick with real butter for best flavor and texture. Margarine has higher water content, which can make cookies spread too much and lack richness.
Why do my cookies turn out dry?
Overbaking is the likely culprit. Pull them at 10-12 minutes when edges are golden but centers still look soft. They’ll continue cooking as they cool.
Can I make them gluten-free?
Yes! Swap the all-purpose flour for a 1:1 gluten-free blend. The texture may vary slightly, but they’ll still be delicious.
How do I get the perfect crisscross pattern?
Dip your fork in sugar before pressing. This prevents sticking and creates sharp, defined lines that bake beautifully.

- Pea Shoots Recipe Salad: Fresh Greens With Asian-Inspired Dressing - October 9, 2026
- Peanut Butter Bark Recipe With Pretzels: Sweet and Salty Holiday Treat - October 9, 2026
- Peach Crisp Recipe With Fresh Peaches: Buttery Oat Topping Over Juicy Summer Fruit - October 9, 2026