
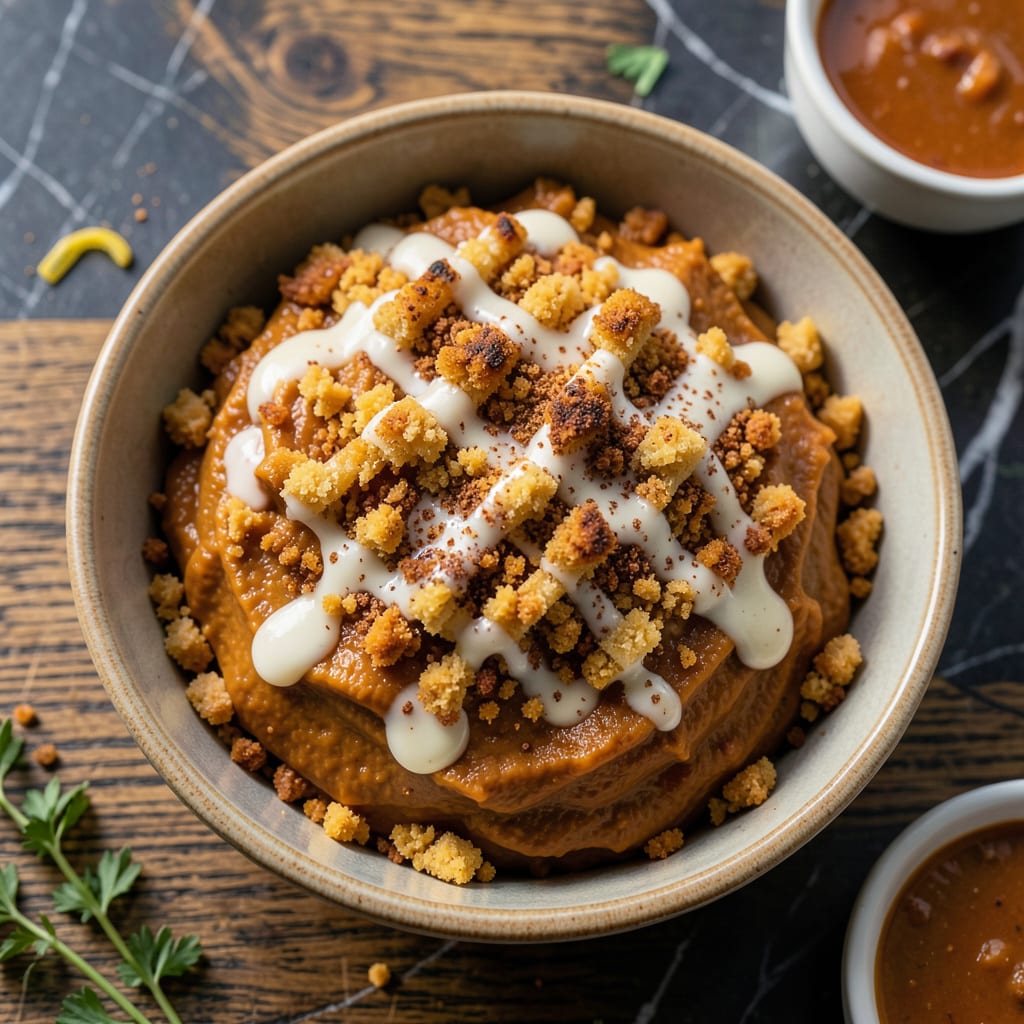
This Hawaiian-inspired dessert combines the warmth of spiced pumpkin with the satisfying crunch of a buttery topping. The layers create a perfect balance of textures and flavors in every bite.
Baking this dish fills your kitchen with the aroma of cinnamon and nutmeg, while the golden crust forms a perfectly crisp contrast to the creamy pumpkin below. It’s a simple yet impressive treat that captures the essence of island comfort.
Ingredients for Aiea Bowl Pumpkin Crunch
Pantry staples and a few fresh items bring this island-inspired treat to life beautifully.
| Ingredient | Amount | Notes |
|---|---|---|
| Canned Pumpkin Puree 🎃 | 2 cups | Plain, not pie filling |
| Granulated Sugar 🍚 | 1 ½ cups | Divided for layers |
| Evaporated Milk 🥛 | 1 can | 12 oz size preferred |
| Ground Cinnamon 🌿 | 1 ½ tsp | Freshly opened for best aroma |
| Ground Nutmeg 🌰 | ½ tsp | Freshly grated if possible |
| Ground Ginger 🌶️ | ½ tsp | Adds warmth to filling |
| Salt 🧂 | ½ tsp | Balances sweetness |
| Large Eggs 🥚 | 2 whole | Beaten for topping |
| All-Purpose Flour 🌾 | 1 ½ cups | Unbleached works best |
| Old-Fashioned Oats 🌾 | 1 cup | For texture in topping |
| Unsalted Butter 🧈 | 1 cup | Melted, for topping |
| Chopped Pecans 🌰 | ½ cup | Optional for extra crunch |
| Vanilla Extract 🌿 | 1 tsp | Pure extract preferred |
| Baking Powder 🧂 | 1 tsp | For lift in topping |
The pumpkin puree is key—Libby’s is my go-to at any grocery store, but store brands work fine if that’s what’s on the shelf. Evaporated milk can be tricky to find sometimes; look near the baking aisle or with canned milk. The spices should be fresh and fragrant—if your cinnamon smells like dust, it’s time to replace it.
No evaporated milk? Half-and-half works in a pinch (use the same amount). Out of pecans? Walnuts or almonds add the same crunch. Want more spice? Add a pinch of cloves to the pumpkin layer. The flour can be swapped for gluten-free 1:1 blend if needed, but the texture will be slightly different.
This keeps well at room temperature for 2 days (covered). For longer storage, refrigerate for up to 5 days or freeze for 2 months. Reheat individual portions in the microwave for that just-baked feeling.
Why You’ll Love This Recipe
- Five Ingredient Magic: I love that I only need pumpkin puree, sugar, evaporated milk, and those warm spices to make this happen.
- Warm Spice Heaven: The cinnamon and nutmeg with the creamy pumpkin filling taste like fall in every bite.
- Potluck MVP: It’s my go-to for gatherings because it’s always a hit and feeds a crowd effortlessly.
- Budget-Friendly Treat: Canned pumpkin and pantry staples keep this dessert wallet-friendly without sacrificing flavor.
Step-by-Step Instructions for Pumpkin Crunch
This layered dessert comes together simply—just mix, layer, and bake to perfection.
Step 1: Prepare the Pumpkin Filling Base
In a large bowl, whisk together the 2 cups Canned Pumpkin Puree, 1 cup Granulated Sugar, 1 can Evaporated Milk, 1.5 tsp Ground Cinnamon, 0.5 tsp Ground Nutmeg, 0.5 tsp Ground Ginger, and 0.5 tsp Salt until smooth and fully combined.
This is where all the warm, spiced flavor develops. The mixture should look thick and uniform with no streaks of spice visible. I like to let it sit for 5 minutes while I prep the next layer to let those spices really wake up.
Step 2: Create the Crunch Topping
In a separate bowl, combine the 1.5 cups All-Purpose Flour, 1 cup Old-Fashioned Oats, 0.5 cup Chopped Pecans, 0.5 cup Granulated Sugar, 1 tsp Baking Powder, and 1 cup Unsalted Butter (melted). Stir until the mixture resembles coarse crumbs with some larger clumps.
The melted butter should coat everything evenly. If it seems too dry, add another 1 tablespoon of melted butter, but don’t overmix—you want texture in that crunch layer. Real talk: this is the part people fight over.
Step 3: Layer and Add the Egg Mixture
Spread the pumpkin filling evenly into a greased 9×13-inch baking dish. Then sprinkle the crumb topping evenly over the pumpkin layer, pressing down lightly so it adheres but doesn’t sink into the filling.
In a small bowl, beat the 2 whole Large Eggs with the 1 tsp Vanilla Extract until frothy. Drizzle this evenly over the crumb topping. This egg wash helps bind the crunch layer and gives it a beautiful golden finish.
Step 4: Bake to Golden Perfection
Bake in a preheated 350°F oven for 50-60 minutes or until the top is golden brown and the center is set. You’ll know it’s done when a toothpick inserted in the center comes out clean and the edges are bubbling slightly.
About halfway through baking, I like to rotate the pan for even browning. If the top starts browning too quickly, tent it loosely with foil. The aroma of cinnamon and pumpkin will fill your kitchen—it’s the best part of this process.
Step 5: Cool and Serve Warm
Let this cool for at least 15 minutes before serving. The filling needs time to set properly, and the crunch topping will firm up as it cools slightly. I know waiting is hard, but it’s worth it.
Serve warm with a scoop of vanilla ice cream or a dollop of whipped cream. The contrast between the creamy pumpkin layer and the crisp, buttery topping is what makes this dish so special. Leftovers keep well covered at room temperature for 2 days.
Pro Tips For Making Aiea Bowl Pumpkin Crunch
- Use full-fat evaporated milk: I learned this the hard way—low-fat versions make the filling thin and watery. The full-fat kind gives that rich, custardy texture the dish needs.
- Pre-toast the crunch topping: Spread the crunch mixture on a tray and bake for 8-10 minutes before assembling. It stays crispier longer instead of turning soggy under the pumpkin layer.
- Drain the pumpkin puree: Sounds weird, but it works: strain canned pumpkin in a fine mesh sieve for 10 minutes to remove excess liquid. This prevents a runny filling that soaks the crust.
- Spice it while hot: Mix cinnamon and nutmeg into the warm pumpkin mixture right after combining with sugar. The heat blooms the spices, deepening their flavor in the final dish.
Creative Variations of This Dish
Tropical Coconut Twist
Swap 1 cup of the pumpkin puree for coconut cream to infuse island flavors. Add ½ cup toasted coconut flakes to the crunch topping for extra texture. The coconut pairs beautifully with the warm spices, creating a true Hawaiian experience.
Chocolate Chip Surprise
Mix ½ cup mini chocolate chips into the crunch topping before baking. The melty chocolate pockets complement the spiced pumpkin perfectly. I love how the chocolate adds a gooey contrast to the crisp topping.
Macadamia Nut Luxe
Replace pecans with ½ cup chopped macadamia nuts for an authentic Hawaiian touch. These buttery nuts elevate the crunch layer with their rich, delicate flavor. It’s a small change that makes a big difference. 🌺
Pineapple Pumpkin Fusion
Stir ½ cup crushed pineapple (well-drained) into the pumpkin filling for a sweet-tart twist. The pineapple’s natural sweetness enhances the spiced pumpkin without overpowering it. This variation is surprisingly refreshing.
Brown Sugar Crunch
Substitute ½ cup brown sugar for the granulated sugar in the topping. The molasses notes add depth and a slight chewiness to the crunch layer. I find it gives the dessert a more caramelized flavor.
Gingerbread Spice
Add 1 tsp ground cloves and ½ tsp allspice to the pumpkin filling for a gingerbread-like profile. This variation tastes like the holidays in Hawaii—warm, fragrant, and absolutely irresistible. 💛
Nutrition Facts
Frequently Asked Questions
Can I use fresh pumpkin instead of canned?
Yes, but roast and puree 2 cups of fresh pumpkin first. Strain excess liquid to match canned consistency for best results.
Why did my topping stay soggy?
This usually happens if the dish wasn’t baked long enough. Ensure the center tests clean with a toothpick and bake at 350°F for the full 50-60 minutes.
Can I make this gluten-free?
Swap the all-purpose flour for a 1:1 gluten-free blend. The texture may vary slightly but will still be delicious.
How do I know when it’s done baking?
The top should be golden brown and a toothpick inserted in the center should come out clean. The edges will bubble slightly when ready.

- BBQ Sausage Recipe Oven: Smoky Depth Without the Grill - September 28, 2026
- BBQ Chicken Bowl Recipe Rice: Smoky Sweetness Over Fluffy Grains - September 28, 2026
- Beef Cutlet Recipe Ideas: Crispy Breaded Patties With Bold Seasonings - September 28, 2026