
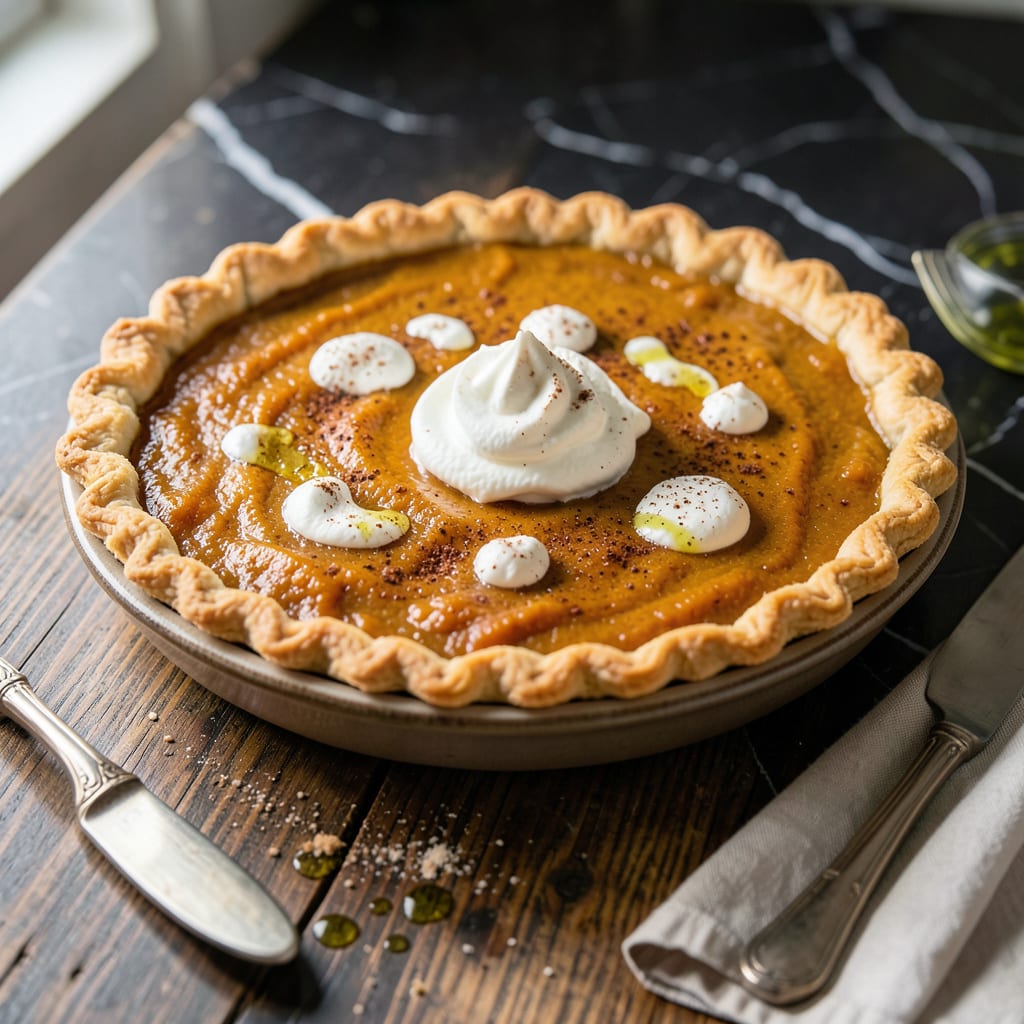
This recipe delivers the flaky crust and silky custard that define a perfect pumpkin pie. America’s Test Kitchen perfected the balance of spices and texture through rigorous testing.
You’ll achieve a smooth, rich filling with just the right amount of warmth from cinnamon, ginger, and nutmeg. The result is a pie that’s as impressive as it is delicious.
Ingredients for America’s Test Kitchen Pumpkin Pie
Classic ingredients for a flaky crust and silky spiced custard filling everyone loves.
| Ingredient | Amount | Notes |
|---|---|---|
| All-Purpose Flour 🌾 | 1 ¼ cups | Plus extra for dusting |
| Salt 🧂 | ½ tsp | Fine table salt |
| Granulated Sugar 🍚 | 1 tbsp | For crust sweetness |
| Unsalted Butter 🧈 | ½ cup | Cold, cut into cubes |
| Ice Water 💧 | 6 tbsp | Plus more as needed |
| Canned Pumpkin Puree 🎃 | 15 oz | Not pumpkin pie filling |
| Heavy Cream 🥛 | 1 cup | Full-fat for richness |
| Whole Milk 🥛 | ¾ cup | Or evaporated milk |
| Large Eggs 🥚 | 2 whole | Room temperature |
| Light Brown Sugar 🍯 | ¾ cup | Packed firmly |
| Granulated Sugar 🍚 | ¼ cup | For filling sweetness |
| Ground Cinnamon 🌿 | 1 ½ tsp | Freshly opened for potency |
| Ground Ginger 🌿 | ½ tsp | Warm spice essence |
| Ground Nutmeg 🌰 | ¼ tsp | Freshly grated best |
| Table Salt 🧂 | ½ tsp | For filling balance |
| Vanilla Extract 🌿 | 1 tsp | Pure, not imitation |
The crust hinges on cold butter—Land O’Lakes or Plugrá if you want to splurge. King Arthur Flour is my go-to for the base, but any all-purpose works. Don’t skip the ice water (the colder, the better). For the pumpkin, Libby’s 100% pure pumpkin is the gold standard—consistent texture, no surprises. Always check the label to avoid pie filling by mistake.
No heavy cream? Full-fat coconut milk works, but the flavor shifts slightly. Swap the brown sugar for all granulated in a pinch (texture changes a bit). The spices are non-negotiable for that classic warmth, but if you’re out of nutmeg, allspice at half the amount gets close. Evaporated milk can replace whole milk—just use the same volume.
Crust dough keeps in the fridge for 2 days or freeze for 1 month (thaw overnight before rolling). The pie itself is best day-of but holds at room temp for 2 days—cover loosely with foil. Leftovers? Refrigerate for up to 4 days.
Why You’ll Love This Recipe
- No-Fuss Crust: I love that the buttery all-purpose flour crust comes together in minutes with just ice water and a pinch of salt—no fancy techniques required.
- Rich, Balanced Sweetness: The granulated sugar hits that perfect sweet spot, letting the pumpkin shine without overpowering it.
- Holiday Ready: This is my go-to for Thanksgiving, but honestly, it’s so good I bake it just because.
Step-by-Step Instructions for Pumpkin Pie in a Flaky Crust
Here’s how to nail the flakiest crust and silkiest filling every time.
Step 1: Pulse the Crust Dough
In a food processor, pulse 1.25 cups all-purpose flour, 0.5 tsp salt, and 1 tbsp granulated sugar until combined. Add 0.5 cup unsalted butter cut into cubes and pulse until the mixture resembles coarse crumbs with some pea-sized butter pieces visible.
With the processor running, drizzle in 6 tbsp ice water 1 tbsp at a time just until the dough starts to come together. It should look shaggy, not smooth. Over-processing develops gluten, which makes the crust tough instead of flaky.
Turn the dough onto a lightly floured surface and gently press it into a disk. Wrap in plastic and refrigerate for 1 hour—this chills the butter so it creates those beautiful flaky layers when baked.
Step 2: Roll and Blind-Bake the Crust
On a floured surface, roll the chilled dough into a 12-inch circle. Transfer it to a 9-inch pie plate, press it into the bottom and up the sides, then trim the edges leaving a ½-inch overhang. Fold the overhang under and crimp decoratively.
Freeze the crust for 20 minutes to prevent shrinking. Preheat oven to 375°F. Line the crust with parchment paper, fill with pie weights or dried beans, and blind-bake for 15 minutes. Remove weights and parchment, then bake 5-8 minutes more until light golden brown.
Step 3: Whisk the Silky Filling
In a large bowl, whisk 15 oz canned pumpkin puree, 0.75 cup light brown sugar, 0.25 cup granulated sugar, 1.5 tsp ground cinnamon, 0.5 tsp ground ginger, 0.25 tsp ground nutmeg, and 0.5 tsp table salt until smooth.
Add 2 whole large eggs, 1 cup heavy cream, 0.75 cup whole milk, and 1 tsp vanilla extract. Whisk vigorously for 30 seconds until fully combined and slightly frothy. This incorporates air for a lighter texture.
Step 4: Bake to Perfection
Pour the filling into the pre-baked crust. Bake at 375°F for 50-60 minutes until the edges are set but the center still has a slight wobble when gently shaken. The center will finish setting as it cools.
If the crust edges brown too quickly, tent them with foil. Cool the pie completely on a wire rack for 2 hours before slicing—this prevents the filling from cracking and allows it to set properly.
Step 5: Chill and Serve
Once cooled to room temperature, refrigerate the pie for at least 4 hours (or overnight) to fully set the custard. This chilling step ensures clean slices and that perfect silky texture America’s Test Kitchen is known for.
Serve chilled with whipped cream. The crust should be golden and flaky, shattering slightly with each bite, while the filling stays creamy and perfectly spiced.
Pro Tips For Making America’S Test Kitchen Pumpkin Pie
- Chill the Dough: I learned this the hard way—let the dough rest in the fridge for at least 30 minutes before rolling. It keeps the butter cold so your crust stays flaky, not tough.
- Use Ice-Cold Water: Sounds obvious, but use actual ice water (not just cold tap water) for the dough. After a few soggy crusts, I finally figured out this is what keeps it crisp.
- Blind Bake Thoroughly: Don’t rush the pre-baking step—give the crust a full 15 minutes with pie weights or dried beans to prevent a gummy bottom under the filling.
- Weigh Your Flour: My grandmother swore by this: 1 cup of flour can vary by 20 grams, and weighing (200g for this recipe) guarantees the right texture every time.
Health Benefits of These Flavors
Vitamin A Boost
This pie is packed with beta-carotene from pumpkin, which your body converts to vitamin A. One slice provides over 200% of your daily needs, supporting vision, immune function, and skin health. I notice my skin feels more radiant during pumpkin season. 💛
Fiber-Rich Goodness
Pumpkin puree delivers 7 grams of fiber per cup, aiding digestion and promoting gut health. The combination of fiber and natural sugars in this dish creates a steady energy release, preventing blood sugar spikes. It’s a dessert that satisfies without the crash.
Bone Health Support
The calcium in milk and cream, combined with vitamin D from eggs, strengthens bones and teeth. One serving contributes about 15% of your daily calcium needs. It’s a sweet way to support long-term skeletal health.
Antioxidant Power
Spices like cinnamon and nutmeg are loaded with antioxidants that combat inflammation. Cinnamon alone contains polyphenols that may help regulate blood sugar levels. These warm spices do more than taste good—they’re working for your health. ✨
Protein and Healthy Fats
Eggs and dairy in the filling provide high-quality protein and healthy fats for sustained energy. The 6 grams of protein per slice helps keep you full, making it a more balanced dessert option than sugar-heavy alternatives.
Mood-Enhancing Nutrients
This dish contains magnesium and B vitamins from pumpkin and whole ingredients, which support brain function and mood regulation. The comforting spices also have natural mood-boosting properties, perfect for cozy gatherings.
Nutrition Facts
Frequently Asked Questions
Why do I need to blind-bake the crust?
Blind-baking prevents a soggy bottom by creating a barrier between the crust and wet filling. Bake at 375°F for 15 minutes with weights, then 5-8 minutes without for a crisp base.
Can I make this ahead of time?
Yes! Bake the pie 1 day ahead and refrigerate. Or prep the crust and filling separately 2 days in advance. Serve chilled for best texture.
What if my filling cracks while cooling?
A small crack won’t affect taste. To prevent it, avoid overbaking and cool the pie gradually on a wire rack for 2 hours.
Can I substitute evaporated milk?
Use the same volume as whole milk for comparable richness. The filling will set slightly firmer but remain creamy.

- BBQ Sausage Recipe Oven: Smoky Depth Without the Grill - September 28, 2026
- BBQ Chicken Bowl Recipe Rice: Smoky Sweetness Over Fluffy Grains - September 28, 2026
- Beef Cutlet Recipe Ideas: Crispy Breaded Patties With Bold Seasonings - September 28, 2026