
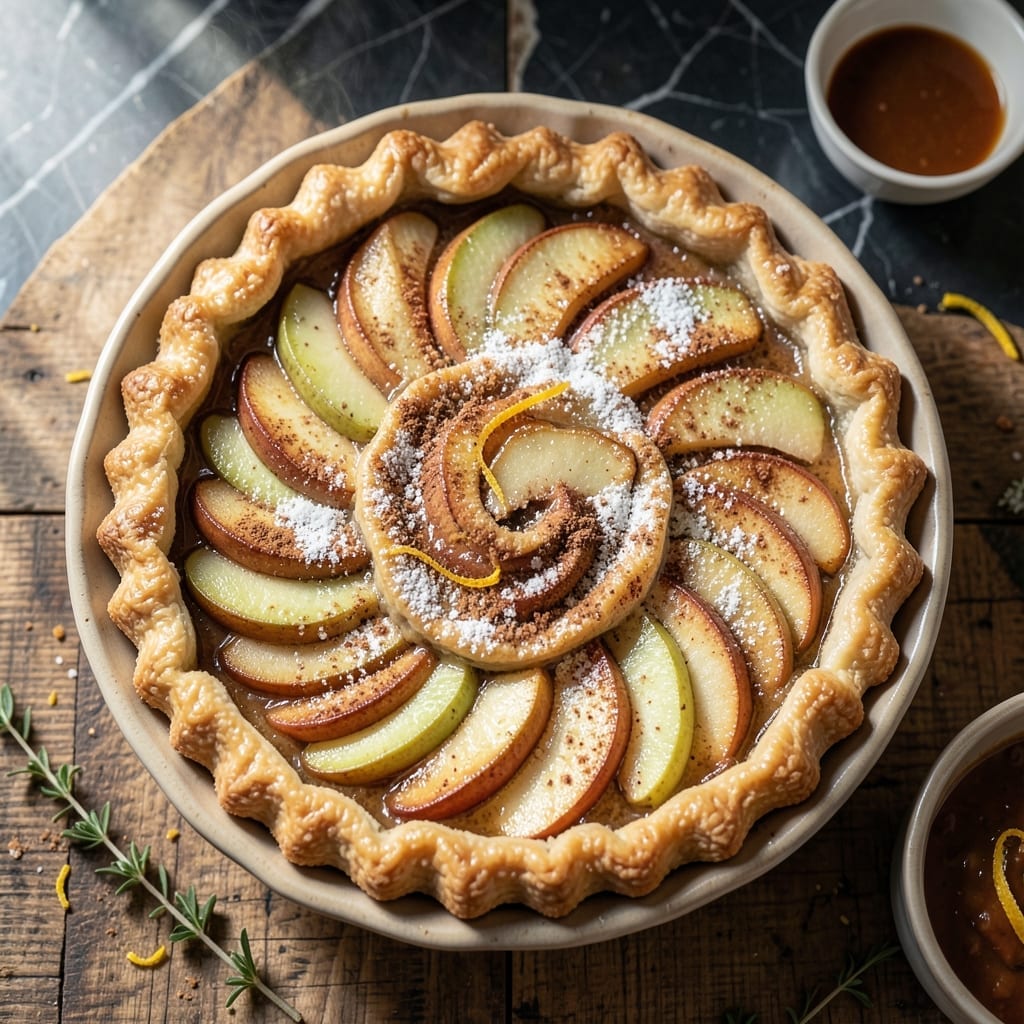
This recipe proves that exceptional apple pie doesn’t require homemade crust. With a few clever techniques, premade dough becomes the foundation for a flaky, golden masterpiece.
Spiced filling and a lattice top transform store-bought convenience into a dessert that tastes like it came from a country bakery. The aroma alone is worth the effort.
Ingredients for Apple Pie Recipe with Premade Crust
Premade crust plus fresh apples and warm spices create a bakery-worthy dessert with ease.
| Ingredient | Amount | Notes |
|---|---|---|
| Premade Pie Crust 🥧 | 2 sheets | Refrigerated, 9-inch rounds |
| Granny Smith Apples 🍏 | 6 whole | Peeled, cored, thinly sliced |
| Honeycrisp Apples 🍎 | 4 whole | Peeled, cored, thinly sliced |
| Granulated Sugar 🍚 | ¾ cup | Plus 1 tbsp for sprinkling |
| Light Brown Sugar 🟤 | ½ cup | Packed, for filling |
| Ground Cinnamon 🌿 | 1 ½ tsp | Freshly ground preferred |
| Ground Nutmeg 🌰 | ¼ tsp | Freshly grated for best flavor |
| All-Purpose Flour 🌾 | 2 tbsp | For thickening filling |
| Lemon Juice 🍋 | 1 tbsp | Freshly squeezed from 1 lemon |
| Unsalted Butter 🧈 | 2 tbsp | Cubed, for dotting filling |
| Large Egg 🥚 | 1 whole | For egg wash on lattice |
| Vanilla Extract 🫙 | 1 tsp | Pure extract recommended |
| Salt 🧂 | ¼ tsp | Fine sea salt preferred |
The crust quality matters significantly here. Pillsbury refrigerated pie crust is widely available and performs reliably, but Immaculate Baking Co. offers an organic option with superior flakiness. For the apples, Granny Smith provides tartness while Honeycrisp adds sweetness—this combination delivers the ideal balance. Ensure your pie crust sheets are cold when working with them to prevent shrinkage during baking.
Apple substitutions are possible—Jonagold or Braeburn work well if Honeycrisp isn’t available, though the texture may vary slightly. For a deeper spice profile, add 1/4 tsp ground allspice or cardamom. No lemon juice? Apple cider vinegar at half the amount provides similar acidity. The brown sugar can be replaced with coconut sugar, though the molasses notes will be less pronounced.
Assemble the pie just before baking for best results. Store-bought crust keeps in the fridge for 1-2 weeks or can be frozen for 3 months. The pie itself stays fresh at room temperature for 2 days or refrigerated for 5 days (the crust softens with refrigeration).
Why You’ll Love This Recipe
- I’ll be real: the second slice tastes even better the next morning with coffee, and the crust stays crisp.
- No-Fuss Crust: I skip the rolling pin and still get flaky layers thanks to the premade crust—honestly, it bakes up golden every time.
- Sweet-Tart Magic: Granny Smiths keep it zingy while Honeycrisps add that juicy sweetness, and the brown sugar caramelizes just right.
- Weeknight Hero: Between us, I’ve served this for Sunday dinner and Tuesday dessert—no one complains when warm apple pie shows up.
Step-by-Step Instructions for Apple Pie With Premade Crust
Here’s the method. Straightforward, tested, works every time.
Step 1: Prepare the Spiced Apple Filling
Combine the thinly sliced Granny Smith apples and Honeycrisp apples in a large bowl. Immediately drizzle with the lemon juice and toss gently to coat—this prevents browning and maintains the vibrant color. I’ve found that Granny Smiths provide the perfect tartness while Honeycrisp adds natural sweetness.
In a separate bowl, whisk together the granulated sugar, light brown sugar, all-purpose flour, ground cinnamon, ground nutmeg, and salt. Sprinkle this mixture over the apples and fold gently until evenly distributed. The flour helps thicken the juices, while the spices create that classic apple pie warmth. Let the filling sit for 10-15 minutes while you prepare the crust.
Step 2: Line the Pie Dish and Add Filling
Unroll one sheet of premade pie crust and carefully transfer it to a 9-inch pie dish. Press it gently into the bottom and up the sides without stretching—this prevents shrinking during baking. Trim any excess dough hanging over the edge, leaving about a ½-inch overhang.
Pour the apple filling into the crust-lined dish, mounding slightly in the center. The apples will soften and release juices as they bake. Dot the top of the filling with small pieces of the cubed unsalted butter. This adds richness and helps create a beautiful, bubbling filling. Drizzle the vanilla extract over the apples for an extra layer of depth.
Step 3: Create and Apply the Lattice Top
Unroll the second sheet of premade pie crust and cut it into 10-12 strips about ¾-inch wide using a sharp knife or pizza cutter. Arrange half the strips horizontally across the filling, spacing them evenly. Fold back every other strip, then place a vertical strip across them. Unfold the folded strips over the vertical strip.
Repeat this process, alternating which strips you fold back, until the entire pie is covered with a lattice pattern. Trim the ends of the strips flush with the bottom crust’s overhang, then fold the overhang up and over the lattice edges. Crimp the edges firmly with your fingers or a fork to seal. This creates a professional-looking finish and prevents the filling from leaking.
Step 4: Add Egg Wash and Bake to Perfection
In a small bowl, beat the large egg lightly with a fork. Brush this egg wash evenly over the lattice top and crimped edges using a pastry brush. This gives the pie a beautiful golden sheen. For extra sparkle and crunch, sprinkle the remaining 1 tablespoon granulated sugar over the egg wash.
Place the pie on a baking sheet lined with parchment paper to catch any drips. Bake in a preheated 375°F oven for 50-60 minutes, or until the crust is deep golden brown and the filling is bubbling through the lattice. If the edges begin to brown too quickly, cover them with a pie shield or strips of aluminum foil.
Remove from the oven and let cool on a wire rack for at least 2 hours before slicing. This allows the filling to set properly, ensuring clean slices and that perfect balance of flaky crust and tender apples in every bite.
Pro Tips For Making Apple Pie Recipe With Premade Crust
- Pre-bake the crust: Blind-bake the premade bottom crust for 8-10 minutes at 375°F before adding filling—prevents that soggy bottom no one wants. I learned this the hard way after pulling out three pies with undercooked crusts.
- Toss apples while warm: Mix your sliced Granny Smith and Honeycrisp apples with the sugars while they’re still warm from the pan—it helps them release juices and soften evenly before baking.
- Vent the top crust: Cut 4-5 small slits in the top crust before baking, not just one or two. Sounds obvious, but I skipped this once and my pie burst open like a volcano.
- Brush with egg wash: A quick egg wash (1 egg + 1 tbsp water) on the top crust before baking gives that golden, bakery-style finish. I was skeptical until I tried it—now it’s non-negotiable.
Pro Cooking Tips for Great apple pie recipe with premade crust
Crust Temperature Control
Always keep premade crust cold until ready to use. I let it sit at room temperature for just 10-15 minutes before unrolling to prevent cracking. Work quickly when assembling to maintain chill, which helps prevent shrinking during baking. 🌡️
Prevent Soggy Bottoms
For a crisp bottom crust, place your pie dish on a preheated baking sheet in the oven. The direct heat helps set the crust before juices can soak in. I also sprinkle 1 tbsp flour in the dish before adding the bottom crust for extra insurance.
Lattice Weaving Trick
Cut strips slightly longer than needed for your lattice. After arranging, chill the assembled pie for 15-20 minutes before baking. This firms up the butter in the crust, helping maintain the lattice structure. I use a ruler for perfectly even strips.
Venting the Pie
Don’t skip the lattice – it’s not just decorative. Those openings allow steam to escape, preventing a soggy filling. If making a full top crust instead, be sure to cut 4-5 slits in the center. This is crucial for the best texture.
Baking Time Adjustments
Check your pie at 40 minutes – if the crust is browning too quickly, tent with foil. I rotate the pie 180 degrees halfway through for even baking. The filling should bubble through the lattice when done. 💡
Cooling Patience
Resist slicing for at least 2 hours after baking. This lets the filling set properly. I place my pie on a wire rack to prevent the bottom from getting steamy. The wait is tough, but it’s worth it for clean slices.
Frequently Asked Questions
Do I need to thaw the premade crust first?
Let it sit at room temperature for 10-15 minutes before unrolling to prevent cracking. Work quickly to keep it cold for best flakiness.
How do I prevent a soggy bottom crust?
Place your pie dish on a preheated baking sheet. Sprinkle 1 tbsp flour in the dish before adding the bottom crust for extra crispness.
Can I use a full top crust instead of lattice?
Yes! Cut 4-5 slits in the center to allow steam to escape. This prevents a soggy filling and ensures even baking.
How long should I cool the pie before slicing?
Wait at least 2 hours to let the filling set. This ensures clean slices and the perfect texture.
Nutrition Facts

- BBQ Sausage Recipe Oven: Smoky Depth Without the Grill - September 28, 2026
- BBQ Chicken Bowl Recipe Rice: Smoky Sweetness Over Fluffy Grains - September 28, 2026
- Beef Cutlet Recipe Ideas: Crispy Breaded Patties With Bold Seasonings - September 28, 2026