
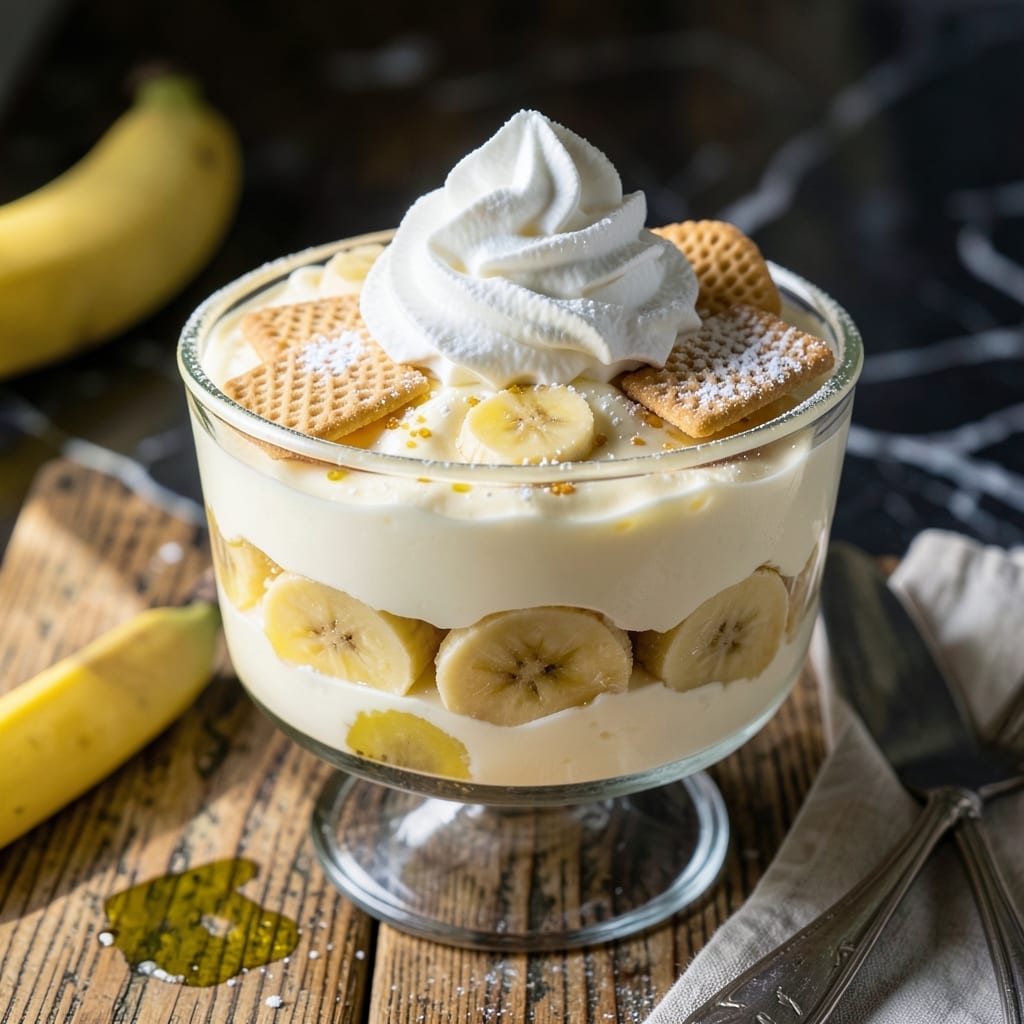
This classic dessert combines creamy vanilla pudding, ripe bananas, and crisp Nilla wafers in perfect harmony.
Each layer builds on the last, creating a foolproof treat that’s as easy to make as it is delicious. The result is a timeless dish that never fails to impress.
Ingredients for Banana Pudding Recipe with Pudding
Vanilla pudding, fresh bananas, and crispy wafers make this layered dessert a breeze.
| Ingredient | Amount | Notes |
|---|---|---|
| Vanilla Pudding Mix 🥣 | 2 boxes | Instant or cook-and-serve |
| Whole Milk 🥛 | 4 cups | Cold for instant pudding |
| Ripe Bananas 🍌 | 6 whole | Sliced just before layering |
| Nilla Wafers 🍪 | 1 box | About 48 wafers |
| Heavy Whipping Cream 🥛 | 1 ½ cups | Chilled for whipping |
| Powdered Sugar 🧈 | ¼ cup | For sweetened whipped cream |
| Vanilla Extract 🌿 | 1 tsp | Pure extract preferred |
| Granulated Sugar 🧂 | ¼ cup | Optional for extra sweetness |
| Salt 🧂 | 0.125 tsp | Pinch for balance |
| Butter 🧈 | 2 tbsp | Melted for pudding |
The Nilla wafers are non-negotiable here—Nabisco’s version has that perfect crisp texture that softens just right. For the pudding, Jell-O or Snack Pack instant mixes work great (just follow the box for milk amounts). Bananas should be ripe but firm—no brown, mushy ones. I grab mine from Trader Joe’s when they’re on the verge of spotting. Whole milk gives the creamiest pudding, but 2% will do in a pinch.
No instant pudding? Cook-and-serve works too—just let it cool completely before layering. Want to go dairy-free? Almond or oat milk can replace the whole milk (though it might set slightly softer). Short on Nilla wafers? Vanilla wafers from any brand will work, but the texture might differ. The whipped cream can be skipped, but honestly, it’s worth the extra 5 minutes.
Assemble this right before serving—it’ll keep in the fridge for 1-2 days, but the wafers lose their crunch fast. Leftovers? Cover tightly with plastic wrap pressed right on the surface. Best eaten within 24 hours for that perfect texture.
Why You’ll Love This Recipe
- No-Bake Magic: I just mix the pudding with milk, layer with bananas and wafers, and let it chill—no oven, no fuss.
- Creamy Dream: The vanilla pudding and whipped cream create this luscious texture that pairs perfectly with the soft bananas and crunchy Nilla Wafers.
- Crowd Pleaser: I bring this to potlucks and it’s always the first dish gone—kids and adults alike can’t resist it.
- Budget Friendly: A box of pudding mix and a few bananas stretch into a dessert that feels indulgent without breaking the bank.
Step-by-Step Instructions for Banana Pudding With Pudding
Here’s the method I use for perfect layers every time—simple, tested, works.
Step 1: Prepare the Vanilla Pudding Base
In a medium saucepan, combine the 2 boxes Vanilla Pudding Mix, 4 cups Whole Milk, and 2 tbsp Butter. If using instant pudding, whisk until smooth and let it thicken at room temperature for 5 minutes.
For cook-and-serve pudding, cook over medium heat, stirring constantly, until the mixture comes to a full boil. Boil for 1 minute, then remove from heat. Stir in the 0.25 cup Granulated Sugar and 0.125 tsp Salt if using. Let it cool completely at room temperature for 20-30 minutes.
Step 2: Whip the Cream
While the pudding cools, whip the 1.5 cups Heavy Whipping Cream with the 0.25 cup Powdered Sugar and 1 tsp Vanilla Extract. Use a hand mixer or stand mixer on high speed until stiff peaks form—this takes about 2-3 minutes.
Be careful not to over-whip. You want the cream to hold its shape when you lift the beaters, but it shouldn’t look grainy or separated. Once whipped, set it aside in the refrigerator to stay cold until you’re ready to assemble.
Step 3: Slice the Bananas and Layer the Ingredients
Just before assembling, slice the 6 whole Ripe Bananas into ¼-inch thick rounds. This prevents them from browning too quickly. Start with a layer of Nilla Wafers at the bottom of a large serving dish or individual glasses.
Next, add a layer of sliced bananas, then spread a portion of the cooled pudding mixture evenly over the bananas. Repeat the layers, ending with pudding on top. I like to do two full layers of bananas and pudding for the perfect ratio.
Step 4: Top with Whipped Cream and Chill
Spread or pipe the sweetened whipped cream evenly over the final pudding layer. For a decorative touch, add a few extra Nilla Wafers on top or around the edges. Cover the dish loosely with plastic wrap and refrigerate for at least 4 hours.
This chilling time is critical—it allows the wafers to soften slightly and the flavors to meld together. For best results, let it sit overnight. The pudding will thicken further, and every bite will be a perfect blend of creamy, fruity, and crispy textures.
Pro Tips For Making Banana Pudding Recipe With Pudding
- Chill the Pudding: Let the prepared vanilla pudding cool completely in the fridge for at least 30 minutes before layering—I learned this the hard way after my wafers turned soggy from warm pudding.
- Slice Bananas Last: Cut the bananas just before assembling to prevent browning, and toss them in a little lemon juice if you’re not layering immediately.
- Skip the Instant Mix: Use cook-and-serve pudding mix instead of instant for a thicker, creamier texture that holds up better to the wafers and cream.
- Whip Cream Cold: Chill your mixing bowl and beaters for 10 minutes before whipping the heavy cream—it’ll fluff up faster and hold its shape longer in the layers.
Best Sauces and Condiments for banana pudding recipe with pudding
Whipped Cream Toppings
For extra flair, drizzle 2 tbsp caramel sauce over the whipped cream before chilling. I love Smucker’s brand for its smooth texture and perfect sweetness. The caramel adds a buttery depth that pairs beautifully with the vanilla and banana layers.
Chocolate Additions
Sprinkle ¼ cup mini chocolate chips between layers for a chocolate-banana twist. I use Guittard chips for their rich flavor. Alternatively, a dusting of cocoa powder on top adds a subtle chocolate note without overwhelming the dish.
Fruit Enhancements
Add ½ cup toasted coconut flakes on top for a tropical touch. The crunch and nutty flavor complement the creamy pudding. For a fresher taste, top with 1 cup sliced strawberries just before serving. 🍓
Spiced Options
A pinch of ground cinnamon or nutmeg mixed into the whipped cream adds warmth. I use about ¼ tsp cinnamon for a subtle spice that enhances the vanilla. This works especially well in cooler months.
Crunchy Elements
For texture contrast, crush ½ cup pecans or walnuts and sprinkle between layers. I toast mine in a dry pan for 2-3 minutes to bring out their natural oils. The nuts add a satisfying crunch that balances the creamy filling.
Sauce Pairings
A drizzle of chocolate fudge sauce or strawberry syrup elevates this dish to dessert status. I warm the sauce slightly for easier pouring. Just 2-3 tbsp per serving is enough to add that extra indulgence. ✨
Frequently Asked Questions
Can I use cook-and-serve pudding instead of instant?
Yes! Cook-and-serve pudding works perfectly. Just let it cool completely to room temperature before layering to prevent melting the whipped cream. This takes about 20-30 minutes.
Why do my Nilla wafers get soggy too fast?
Assemble the dessert as close to serving time as possible. The wafers soften quickly from the pudding’s moisture. For best texture, refrigerate for no more than 4 hours before serving.
Can I make this ahead of time?
You can prep components separately. Make the pudding and whipped cream a day ahead, but slice bananas and assemble layers just 2-3 hours before serving to maintain freshness.
What’s the best way to layer the ingredients?
Start with wafers at the bottom, then bananas, pudding, and repeat. End with pudding and whipped cream on top. This order prevents the wafers from getting too soggy.
Nutrition Facts

- BBQ Sausage Recipe Oven: Smoky Depth Without the Grill - September 28, 2026
- BBQ Chicken Bowl Recipe Rice: Smoky Sweetness Over Fluffy Grains - September 28, 2026
- Beef Cutlet Recipe Ideas: Crispy Breaded Patties With Bold Seasonings - September 28, 2026