
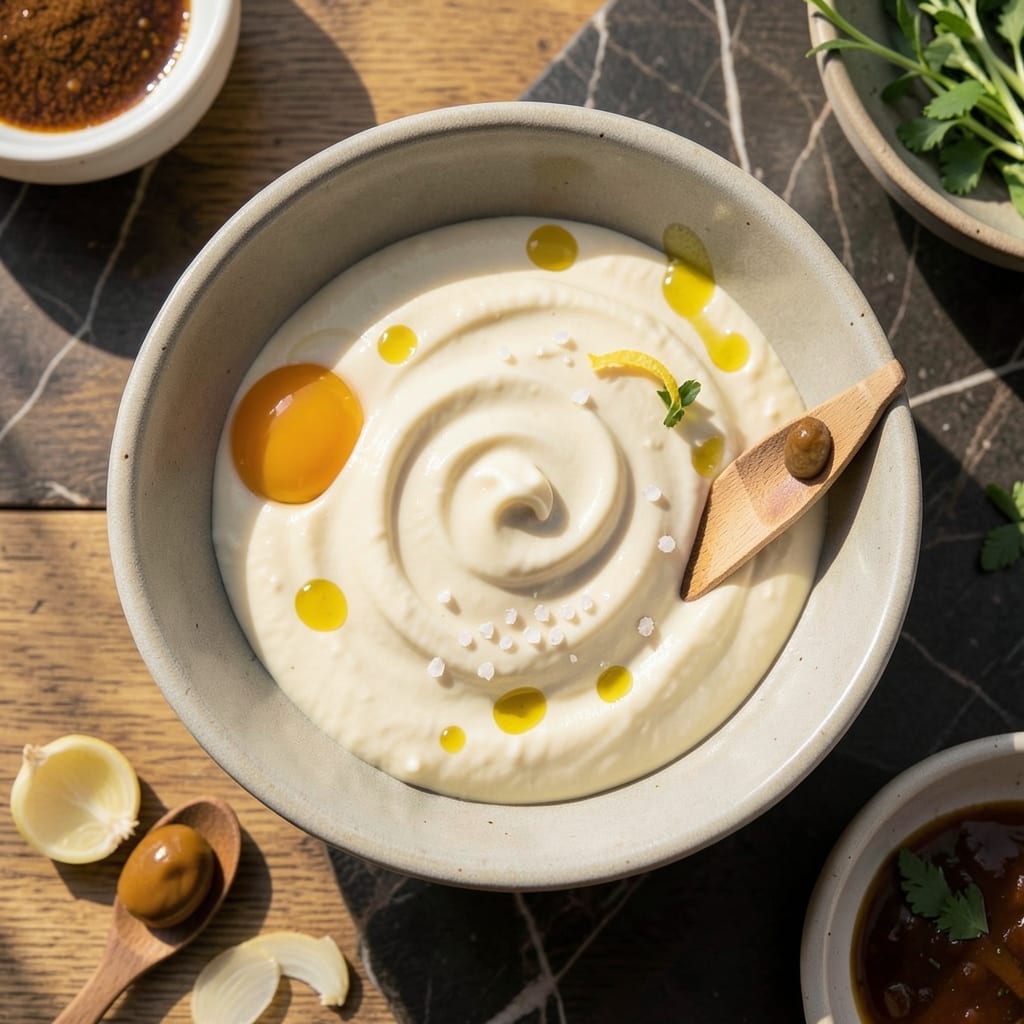
This classic aioli delivers the perfect balance of creamy richness and bold garlic flavor in just 10 minutes. No fancy techniques required—just simple ingredients and a little patience.
The key is slow emulsion, whisking oil into egg yolks one drop at a time until thick and velvety. This creates a stable, luxurious sauce that won’t separate or thin out.
What you get is a versatile condiment that elevates everything from sandwiches to seafood. Its smooth texture and punchy garlic taste make it far superior to store-bought versions.
Make a batch and keep it on hand for up to a week. The flavor only improves with time.
Ingredients for Basic Aioli
Eight ingredients transform into a rich, garlicky sauce that outshines any store-bought version.
| Ingredient | Amount | Notes |
|---|---|---|
| Egg Yolks 🥚 | 2 whole | Room temperature preferred |
| Garlic Cloves 🧄 | 3 cloves | Minced or pressed |
| Dijon Mustard 🟡 | 1 tsp | Smooth variety preferred |
| Lemon Juice 🍋 | 1 tbsp | Freshly squeezed |
| Salt 🧂 | ½ tsp | Fine sea salt preferred |
| White Wine Vinegar 🍷 | 1 tsp | Or apple cider vinegar |
| Neutral Oil 🛢️ | 1 cup | Avocado or light olive oil |
| Extra-Virgin Olive Oil 🫒 | ¼ cup | For finishing flavor |
The oil quality matters here. Avocado oil or a light olive oil work perfectly for the base—save the extra-virgin for the final touch. For garlic, fresh is essential; jarred minced garlic lacks the punch. Room temperature egg yolks emulsify more easily, so take them out of the fridge 30 minutes before starting.
No Dijon? Regular yellow mustard works in a pinch, though the flavor will be milder. Short on lemon juice? Lime juice or more vinegar can substitute. If avoiding raw eggs, pasteurized yolks are a safe alternative. The vinegar isn’t just for tang—it helps stabilize the emulsion.
Aioli keeps beautifully in the fridge for 1 week in an airtight jar. The flavors deepen over time, so making it a day ahead isn’t a bad idea. If it separates, just whisk in a splash of warm water to bring it back together.
Why You’ll Love This Recipe
- 5-Minute Whisk: I can make this while the pasta boils—just yolks, garlic, mustard, and a squeeze of lemon.
- Garlic Punch: The raw garlic mellows into this creamy, tangy sauce that’s honestly better than any store-bought.
- Dip or Spread: Slather it on sandwiches or dunk fries in it. Between us, I’ve used it on everything this week.
- Pennywise Luxury: Egg yolks and pantry staples turn into something that tastes gourmet. I’ll be real: it’s my secret to looking fancy on a budget.
Step-by-Step Instructions for Basic Aioli
Master the emulsion technique and you’ll create a rich, creamy aioli with perfect consistency every time.
Step 1: Prepare the Base Mixture
In a medium bowl, whisk together the 2 whole Egg Yolks, 1 tsp Dijon Mustard, 1 tbsp Lemon Juice, 1 tsp White Wine Vinegar, and 0.5 tsp Salt until smooth. I use room temperature egg yolks because they emulsify more easily with the oil.
The mustard acts as an emulsifier, helping the oil and liquids bind together. You’ll see the mixture turn pale yellow and slightly thicken after 30 seconds of vigorous whisking. At this stage, add the 3 cloves Garlic Cloves (minced or pressed) and whisk to incorporate evenly.
Step 2: Begin the Emulsion with Neutral Oil
With the whisk in one hand and the bowl steady in the other, start adding the 1 cup Neutral Oil in a very slow, thin stream. I mean drop by drop at first—this is critical. Whisk constantly as you pour, focusing on the area where the oil meets the egg mixture.
After adding about ¼ cup of the neutral oil, the mixture will start to thicken and lighten in color. This is your emulsion forming. Now you can increase the oil stream to a thin, steady pour while continuing to whisk vigorously. The aioli should become thick enough to see the path of the whisk for a second or two.
Step 3: Incorporate the Extra-Virgin Olive Oil
Once all the neutral oil is incorporated and you have a stable emulsion, switch to the 0.25 cup Extra-Virgin Olive Oil. Add it in the same slow, steady stream while whisking constantly. The extra-virgin olive oil adds depth of flavor but can be more challenging to emulsify, so maintain your steady motion.
If at any point the aioli looks too thick or starts to separate, whisk in 1 teaspoon of warm water to help bring it back together. The finished aioli should be thick, creamy, and pale with a glossy sheen. If it’s too thin, you may have added the oil too quickly—whisk vigorously for another 30 seconds to encourage thickening.
Step 4: Adjust Seasoning and Finish
Taste the aioli and adjust the seasoning if needed. I often find that the garlic flavor mellows slightly as the aioli rests, so if it’s not garlicky enough, you can mix in another minced clove. The texture should coat the back of a spoon thickly but still be pourable.
Transfer to a clean jar or bowl and cover. The aioli will keep in the refrigerator for up to 3 days. Before serving, give it a good stir as it may thicken slightly when chilled. For best flavor, let it sit at room temperature for 15-20 minutes before using, especially if you’ve stored it in the fridge.
Pro Tips For Making Basic Aioli
- Whisk Constantly: I learned this the hard way—drizzle the oil in a thin, steady stream while whisking nonstop to prevent the aioli from breaking into a sad, oily mess.
- Mince Garlic Fine: Sounds weird, but it works: press or finely mince the garlic to avoid harsh, bitter chunks that can overpower the creamy emulsion.
- Room Temp Eggs: After breaking two batches, I finally figured out that cold egg yolks resist emulsifying—let them sit out for 10 minutes first.
- Start with Mustard: My grandmother swore by this, and she was right: whisk the Dijon mustard into the yolks first—it stabilizes the base before adding oil.
Health Benefits of This Dish
Heart-Healthy Fats
This sauce provides healthy monounsaturated fats from olive oil, which support heart health and help reduce bad cholesterol. A 2-tbsp serving contains about 140 calories—mostly from these beneficial fats. I love knowing I’m getting good fats with every garlicky bite. 💪
Vitamin and Mineral Boost
Each serving delivers a dose of vitamin E and vitamin K from the olive oil. The garlic adds manganese and vitamin B6, which support metabolism and immune function. Fresh ingredients make all the difference here.
Antioxidant Power
Garlic is packed with allicin, a compound with powerful antioxidant properties. The lemon juice adds vitamin C, which helps your body absorb iron from plant-based foods. Together, they create a flavorful nutritional powerhouse.
Low-Carb Friendly
With only 1 gram of carbs per serving, this fits perfectly into low-carb and keto lifestyles. The fat content helps keep you full, making it a satisfying addition to meals. I often use it as a dip for veggies when I want a crunchy snack.
Rich in Choline
Egg yolks provide choline, an essential nutrient that supports brain health and liver function. Each serving contains about 20% of your daily choline needs. It’s a delicious way to get this often-overlooked nutrient.
No Artificial Additives
Unlike store-bought versions, homemade aioli contains no preservatives or artificial flavors. You control every ingredient, from the quality of oil to the freshness of garlic. This means you’re getting pure, wholesome nutrition in every bite. 💛
Nutrition Facts
Frequently Asked Questions
Can I make aioli without raw eggs?
Yes! Use pasteurized egg yolks for safety, or try a vegan version with aquafaba (chickpea brine) as the base. The technique remains the same, just substitute the egg yolks.
Why did my aioli break?
This usually happens if the oil was added too quickly. To fix it, start over with a fresh yolk in a clean bowl, then slowly whisk in the broken mixture. It’ll come back together!
How long does homemade aioli last?
Stored in an airtight container in the fridge, it stays fresh for 3-4 days. The flavor deepens over time, so it’s often even better the next day.
Can I use a blender instead of whisking?
A blender or food processor works well—just drizzle the oil in very slowly while blending. This method is faster but requires careful pouring to avoid breaking the emulsion.

- BBQ Sausage Recipe Oven: Smoky Depth Without the Grill - September 28, 2026
- BBQ Chicken Bowl Recipe Rice: Smoky Sweetness Over Fluffy Grains - September 28, 2026
- Beef Cutlet Recipe Ideas: Crispy Breaded Patties With Bold Seasonings - September 28, 2026