
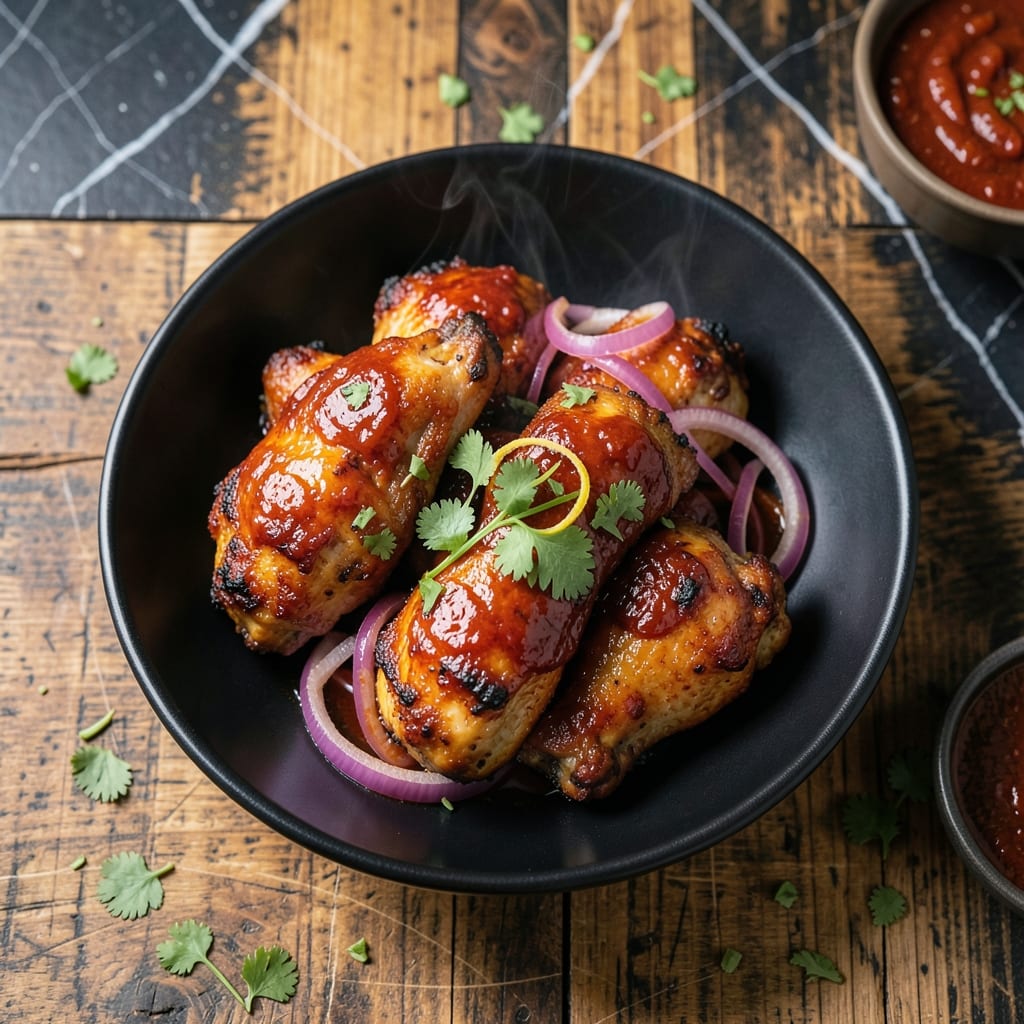
Achieving perfectly charred BBQ chicken without a grill seemed impossible until I tested this foolproof air fryer method. The results deliver smoky, caramelized flavor with minimal effort.
This technique uses high heat circulation to create that sought-after crispy exterior while keeping the meat juicy inside. A quick sauce application mid-cooking locks in moisture and builds layers of flavor.
The chicken emerges with a sticky, glossy glaze and tender flesh that rivals traditional grilled versions. Each bite delivers that familiar BBQ taste with none of the outdoor cooking hassle.
Serve with classic sides like coleslaw or cornbread for a complete meal. The air fryer handles everything in 20 minutes with almost no cleanup.
Ingredients for Bbq Chicken Recipe Air Fryer
Simple ingredients transform into smoky, glossy BBQ chicken with minimal effort in the air fryer.
| Ingredient | Amount | Notes |
|---|---|---|
| Chicken Thighs 🍗 | 2 lb | Boneless, skin-on preferred |
| BBQ Sauce 🍯 | 1 ½ cups | Quality brand or homemade |
| Olive Oil 🫒 | 1 tbsp | For brushing chicken |
| Kosher Salt 🧂 | 1 tsp | Diamond Crystal preferred |
| Black Pepper 🌶️ | ½ tsp | Freshly ground preferred |
| Garlic Powder 🧄 | 1 tsp | For dry rub base |
| Smoked Paprika 🌶️ | 1 tsp | Adds smoky depth |
| Onion Powder 🧅 | 1 tsp | Complements garlic powder |
| Brown Sugar 🍚 | 1 tbsp | For caramelization |
| Apple Cider Vinegar 🍏 | 1 tbsp | Balances sweetness |
| Worcestershire Sauce 🍶 | 1 tbsp | Adds umami complexity |
| Liquid Smoke 🔥 | ½ tsp | Optional for extra smokiness |
The chicken thighs are non-negotiable here. Boneless, skin-on delivers the best texture—crispy skin with juicy meat. Most grocery stores carry them pre-portioned. I prefer Costco for bulk purchases, but any supermarket works. Look for thighs with even sizing for consistent cooking. The skin should be smooth and slightly moist, not dried out.
No BBQ sauce? Ketchup plus brown sugar and vinegar works in a pinch. Want more heat? Add cayenne at one-fourth teaspoon. The smoked paprika is key—Penzeys has excellent quality. If you’ve got fresh garlic, use two minced cloves instead of powder. The liquid smoke is optional but Wright’s brand is reliable if you want that extra depth.
The BBQ sauce keeps for 1 month unopened, 2 weeks refrigerated after opening. Chicken thighs freeze beautifully for up to 9 months. Thaw overnight in the fridge before cooking for best results.
Why You’ll Love This Recipe
- Set and Forget: I toss the thighs with oil, salt, and pepper, let the air fryer do the work—no babysitting required.
- Sticky, Smoky Bliss: That caramelized BBQ glaze clings to every bite, with the thighs staying juicy underneath.
- Weeknight MVP: Between us, this is my go-to for busy evenings when I need dinner fast but still crave that grill-like flavor.
- Budget-Friendly Feast: Chicken thighs are cheap, and one batch stretches into sandwiches or salads the next day.
Step-by-Step Instructions for BBQ Chicken Air Fryer
Master the technique for achieving smoky, charred results with minimal effort and maximum flavor.
Step 1: Season the Chicken Thighs
Pat the 2 lb Chicken Thighs dry with paper towels to ensure crispy skin. In a small bowl, combine the 1 tsp Kosher Salt, 0.5 tsp Black Pepper, 1 tsp Garlic Powder, 1 tsp Smoked Paprika, 1 tsp Onion Powder, 1 tbsp Brown Sugar, and 0.5 tsp Liquid Smoke.
Rub this dry mix evenly over all surfaces of the chicken. I always press it into the meat firmly so it adheres well. Let the seasoned chicken sit at room temperature for 10 minutes while you preheat the air fryer.
Step 2: Preheat and Prepare the Air Fryer
Preheat your air fryer to 375°F for 5 minutes. This step is crucial for achieving that initial sear. While it heats, lightly brush the chicken with 1 tbsp Olive Oil to help the seasoning crisp up.
Arrange the chicken thighs skin-side down in the air fryer basket in a single layer, ensuring they don’t overlap. You may need to work in batches depending on your air fryer’s capacity. This proper spacing allows hot air to circulate effectively.
Step 3: Air Fry Until Golden and Crispy
Air fry the chicken at 375°F for 12 minutes. Then carefully flip the thighs and cook for another 8-10 minutes until the skin is deep golden brown and crispy.
Check that the internal temperature reaches 165°F using a meat thermometer. The juices should run clear when pierced. If needed, add 2-minute increments until fully cooked.
Step 4: Glaze with BBQ Sauce
In a bowl, mix the 1.5 cups BBQ Sauce with 1 tbsp Apple Cider Vinegar and 1 tbsp Worcestershire Sauce. Brush this mixture generously over the cooked chicken thighs on both sides.
Return the chicken to the air fryer and cook at 375°F for an additional 3-4 minutes until the sauce caramelizes and becomes sticky. Watch closely to prevent burning.
The sauce should bubble and develop a glossy sheen. This final step locks in moisture while adding that signature barbecue flavor.
Pro Tips For Making Bbq Chicken Recipe Air Fryer
- Preheat the Air Fryer: I learned this the hard way—skipping the preheat means uneven cooking and chicken that sticks. Crank it to 375°F for 3-5 minutes first.
- Pat Thighs Dry: Sounds weird, but it works: drying the chicken with paper towels guarantees crispy skin instead of steamed, soggy meat.
- Sauce Late, Not Early: After burning three batches, I finally figured out that brushing on BBQ sauce in the last 5 minutes prevents it from charring while keeping the flavor bold.
- Skip the Overcrowding: I was skeptical until I tried it, but leaving space between thighs ensures they cook through instead of steaming in their own juices.
Pro Cooking Tips for This Dish
Preheat for Success
Always preheat your air fryer to 375°F for 5 minutes before adding chicken. This ensures a proper sear and prevents sticking. I tested skipping this step once—disaster. The skin ended up pale and soggy. 🔥
Single Layer Only
Arrange thighs skin-side down in a single layer with space between each piece. Overcrowding steams rather than crisps. For my 5.8-quart Cosori, I can fit 4 thighs per batch. Work in batches if needed.
Flip at the Right Time
After 12 minutes at 375°F, flip the thighs to cook the other side. This timing ensures the skin crisps without burning. Use tongs to avoid piercing the meat and losing precious juices.
Sauce Strategy
Mix 1.5 cups BBQ sauce with 1 tbsp each of vinegar and Worcestershire for balanced tang. Apply sauce only after the chicken is fully cooked to prevent burning. Brush generously for maximum flavor impact.
Final Glaze Watch
Return sauced chicken to the air fryer for 3-4 minutes to caramelize. Watch closely—sugar burns quickly. The glaze should bubble and turn glossy. Remove immediately once it reaches that sticky perfection.
Rest Before Serving
Let the chicken rest for 5 minutes after cooking. This allows juices to redistribute, keeping every bite moist. I learned this the hard way after cutting into a piece too soon and watching the juices run all over my cutting board. 💡
Nutrition Facts
Frequently Asked Questions
Do I need to preheat the air fryer first?
Yes, preheating to 375°F for 5 minutes ensures a proper sear and prevents sticking. Skipping this step often leads to pale, soggy skin instead of crispy results.
Can I use chicken breasts instead of thighs?
You can, but thighs stay juicier due to their higher fat content. If using breasts, reduce cooking time to 10-12 minutes total and monitor closely to avoid drying out.
How do I prevent the sauce from burning?
Apply BBQ sauce only after the chicken is fully cooked. Return it to the air fryer for just 3-4 minutes to caramelize, watching closely as sugar burns quickly.
What’s the best way to check doneness?
Use a meat thermometer to confirm the internal temperature reaches 165°F. The juices should run clear when pierced, and the skin should be deep golden brown.

- Pav Bhaji Recipe Food Lab: Mumbai Street Food Magic at Home - October 6, 2026
- Peach Jelly Recipe Without Pectin: Naturally Set Sweet Spread - October 6, 2026
- Pasta Salad Recipe With Zesty Italian Dressing: Bright Herb-Kissed Medley for Picnics - October 6, 2026