
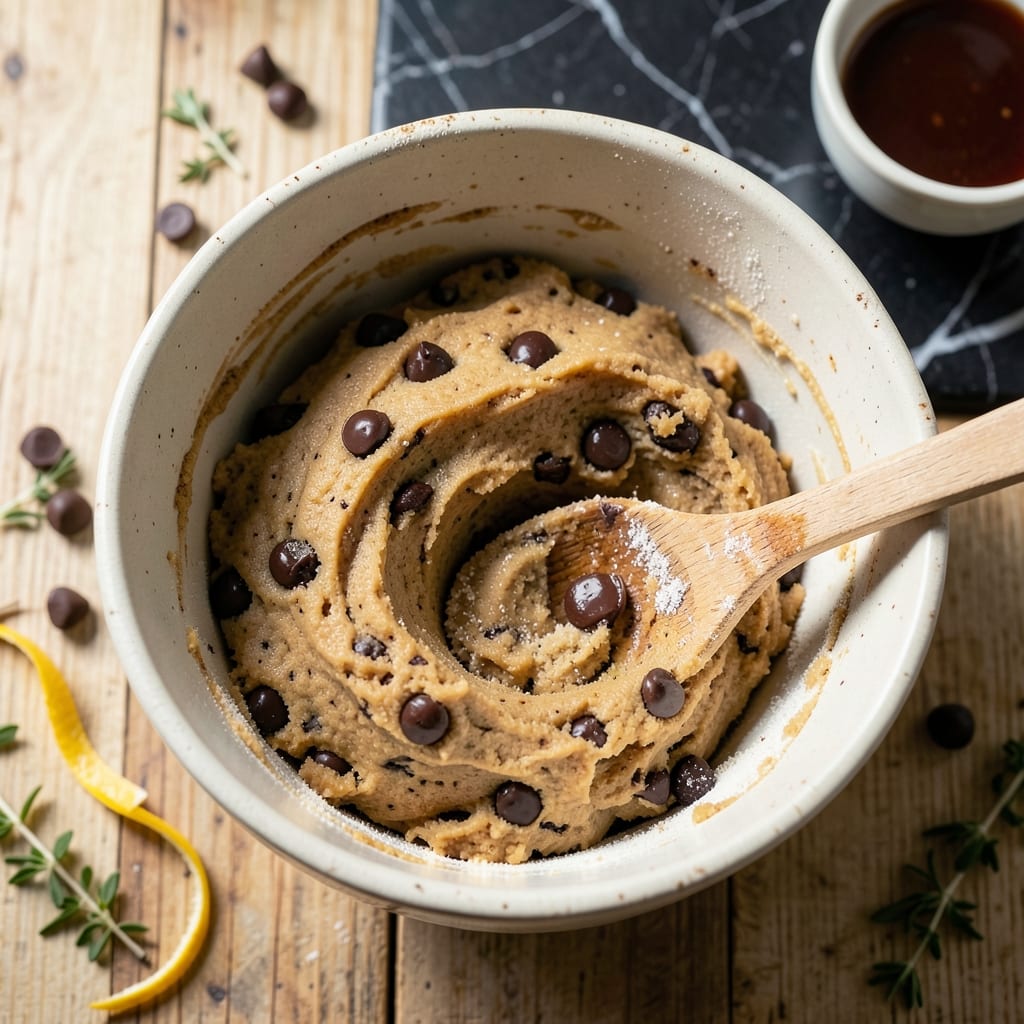
This one-bowl chocolate chip cookie recipe proves that bakery-style results are possible with just self-rising flour and a few pantry staples. The method eliminates extra steps while delivering that signature chewy texture.
The secret is in the flour’s built-in leavening, which creates perfect lift without additional baking powder. Brown sugar adds moisture for that coveted soft center, while vanilla deepens the flavor profile.
You’ll get golden edges, a tender middle, and pockets of melted chocolate in every bite. The dough comes together in minutes, requiring no special equipment—just a bowl and a spoon.
Bake until the edges are set but the centers still look slightly underdone for cookies that stay soft for days. This recipe redefines simplicity without sacrificing quality.
Ingredients for Chocolate Chip Cookie Recipe Self Rising Flour
A handful of pantry staples transforms into bakery-style cookies with minimal effort.
| Ingredient | Amount | Notes |
|---|---|---|
| Self-Rising Flour 🌾 | 2 ¼ cups | All-purpose self-rising for lift |
| Light Brown Sugar 🧈 | 1 cup | Packed, for moisture and chew |
| Granulated Sugar 🍚 | ½ cup | Fine white sugar preferred |
| Unsalted Butter 🧈 | 1 cup | Softened to room temperature |
| Large Eggs 🥚 | 2 whole | Room temperature for even mixing |
| Pure Vanilla Extract 🌿 | 2 tsp | High-quality for depth of flavor |
| Semi-Sweet Chocolate Chips 🍫 | 2 cups | Or chopped chocolate bars |
| Sea Salt 🧂 | ½ tsp | Fine grain for even distribution |
| Baking Vanilla Sugar 🍚 | 1 tsp | Optional for enhanced vanilla flavor |
The self-rising flour is non-negotiable—it provides the leavening without additional baking powder. White Lily is a reliable brand for consistent results, but most grocery store options work. Ensure the flour is fresh, as old flour loses its lifting power. The butter should be real unsalted—salted can throw off the balance, and margarine won’t deliver the same richness or texture.
No self-rising flour? Make your own by whisking 2.25 cups all-purpose flour, 1.5 tsp baking powder, and 0.5 tsp salt. Brown sugar can be substituted with coconut sugar, but the texture will be slightly denser. For a deeper flavor, use dark brown sugar instead of light. Chocolate chips can be swapped for chunks of your favorite chocolate bar (roughly chopped for melty pockets).
Store the dough covered in the fridge for up to 3 days or freeze for 3 months. Baked cookies keep in an airtight container for 5 days—though they’re best the first day. For longer storage, freeze baked cookies between layers of parchment paper.
Why You’ll Love This Recipe
- I’ll be real: leftovers taste just as good as fresh out of the oven, thanks to that perfect sugar and butter balance.
- One Bowl Wonder: I love that I can mix everything in a single bowl—no sifting, no extra steps. The self-rising flour does the work for me.
- Buttery Caramel Notes: The combo of light brown sugar and unsalted butter gives these cookies that rich, caramel-like depth I crave.
- Weeknight Hero: Honestly, I’ve baked these for school lunches, last-minute potlucks, and even midnight cravings. They fit everywhere.
Step-by-Step Instructions for Chocolate Chip Cookies with Self-Rising Flour
Master this one-bowl method for bakery-style texture with minimal effort and maximum flavor.
Step 1: Cream Butter and Sugars to Aerate the Base
In a large mixing bowl, beat the 1 cup Unsalted Butter with the 1 cup Light Brown Sugar and 0.5 cup Granulated Sugar using a hand mixer or stand mixer. Start on low speed to combine, then increase to medium-high and beat for 3-4 minutes until the mixture becomes pale and fluffy.
This creaming step is critical—it incorporates air that creates the cookie’s structure. The butter should be softened but not melted; if it looks greasy, chill the bowl for 10 minutes before proceeding. The light brown sugar adds moisture for that signature chew.
Step 2: Incorporate Eggs and Flavor Enhancers
Add the 2 whole Large Eggs one at a time, beating on medium speed for 30 seconds after each addition until fully emulsified. Scrape the bowl sides as needed to ensure even mixing.
Next, add the 2 tsp Pure Vanilla Extract and optional 1 tsp Baking Vanilla Sugar, then beat for another 15 seconds. The vanilla sugar intensifies the vanilla notes, but the extract alone delivers plenty of depth. The mixture should look glossy and slightly ribbony.
Step 3: Fold in Dry Ingredients and Chocolate
Sprinkle the 2.25 cups Self-Rising Flour and 0.5 tsp Sea Salt evenly over the wet mixture. Use a silicone spatula to fold everything together until just combined—a few flour streaks are fine. Overmixing develops gluten, which toughens the cookies.
Fold in the 2 cups Semi-Sweet Chocolate Chips until evenly distributed. The self-rising flour eliminates the need for separate leavening agents, streamlining the process while ensuring proper lift. The dough will be thick and slightly sticky.
Step 4: Chill for Optimal Texture
Cover the bowl with plastic wrap and refrigerate the dough for 30 minutes to 1 hour. This step prevents excessive spreading in the oven, as the cold butter solidifies and releases steam more gradually.
For even better flavor, let the dough chill overnight. The flour hydrates fully, and the flavors meld, resulting in a more complex taste. If you’re short on time, a 15-minute freeze works in a pinch, but the texture won’t be as consistent.
Step 5: Bake to Golden Perfection
Preheat the oven to 350°F and line baking sheets with parchment paper. Scoop the dough into 2-tablespoon portions (about 50 grams each) and space them 2 inches apart on the sheets. The self-rising flour gives them a slight dome.
Bake for 11-13 minutes until the edges are golden brown but the centers still look slightly underdone. They’ll set as they cool. Let the cookies rest on the baking sheet for 5 minutes before transferring to a wire rack. The sea salt enhances the chocolate’s richness without tasting overtly salty.
Pro Tips For Making Chocolate Chip Cookie Recipe Self Rising Flour
- Chill the Dough: After mixing, let the dough rest in the fridge for at least 30 minutes—I learned this the hard way when my first batch spread like pancakes. The self-rising flour needs that time to hydrate properly.
- Soften Butter Right: Use butter that’s soft but still holds its shape when pressed, about 65°F. After burning three batches with melted butter, I finally figured out it’s the texture, not the temperature, that ruins the spread.
- Skip Extra Leavening: Resist the urge to add baking soda or powder—self-rising flour already has leavening agents, and doubling up will make your cookies taste like bitter little hockey pucks.
- Use Room-Temp Eggs: My grandmother swore by this, and she was right: room-temperature eggs blend more evenly into the butter and sugar, so you won’t end up with streaks of raw egg in your dough.
Serving Suggestions for This Dish
Warm Milk Classic
There’s nothing like a cold glass of whole milk to complement these cookies. The creamy texture cuts through the sweetness perfectly. I always serve them this way for my kids—it’s their favorite after-school treat. 🥛
Coffee Pairing
A hot cup of black coffee or cappuccino balances the richness beautifully. The bitterness of dark roast contrasts the cookie’s sweetness, while a splash of cream in lighter roasts enhances the buttery notes.
Ice Cream Sandwich
Press two cookies together with a scoop of vanilla ice cream in the middle for an instant gourmet sandwich. Use slightly underbaked cookies for the best texture—they’ll soften around the ice cream without crumbling.
Fruit and Cheese
For an elevated twist, serve with sharp cheddar slices and apple wedges. The saltiness of the cheese and tartness of the fruit create a sophisticated flavor contrast that adult palates appreciate.
Dessert Charcuterie
Create a cookie board with chocolate-covered strawberries, caramel sauce, and whipped cream for dipping. This makes a fun centerpiece for gatherings—guests love customizing their bites. ✨
Warm with Toppings
Microwave cookies for 10-15 seconds and top with melted chocolate or crushed nuts. A dusting of powdered sugar adds a bakery-style finish that impresses without effort.
Nutrition Facts
Frequently Asked Questions
Can I use all-purpose flour instead?
Yes, but add 1.5 tsp baking powder and 0.5 tsp salt to every 2.25 cups to mimic self-rising flour. The texture will be nearly identical.
Why chill the dough?
Chilling for 30 minutes to 1 hour prevents excessive spreading and deepens flavor. Cold butter creates steam during baking for that perfect chewy texture.
How can I make them crispier?
Bake 2 minutes longer and flatten dough balls slightly before baking. Using less brown sugar also helps achieve a crispier edge while keeping the center soft.
Can I freeze the dough?
Scoop dough balls, freeze on a tray for 1 hour, then transfer to a bag. They’ll keep for 3 months—bake straight from frozen, adding 1-2 minutes to the time.

- Pav Bhaji Recipe Food Lab: Mumbai Street Food Magic at Home - October 6, 2026
- Peach Jelly Recipe Without Pectin: Naturally Set Sweet Spread - October 6, 2026
- Pasta Salad Recipe With Zesty Italian Dressing: Bright Herb-Kissed Medley for Picnics - October 6, 2026