
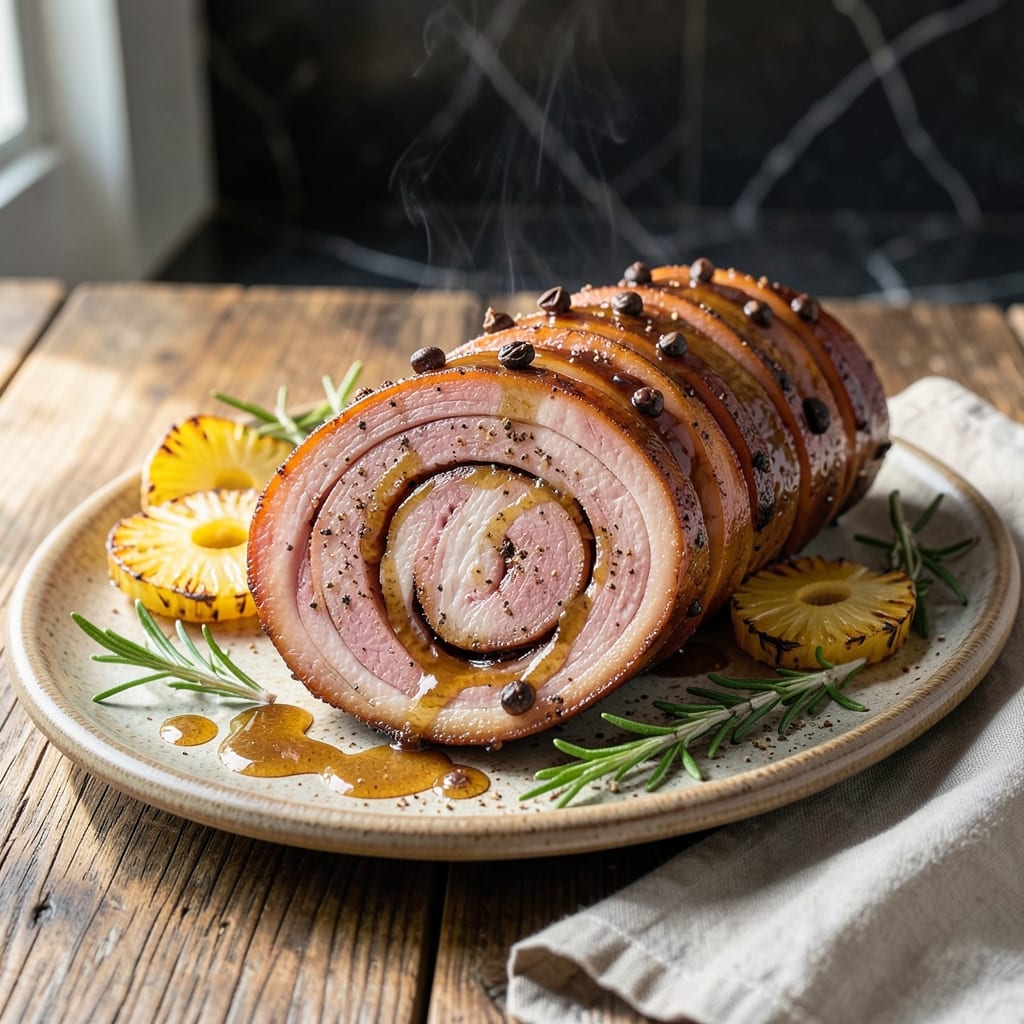
Helping Nana Mae in her Peachtree Street diner taught me that great ham deserves an exceptional glaze. This spiral-cut version transforms a holiday centerpiece into something extraordinary with minimal effort.
The oven does most of the work here, baking the ham at 325°F until heated through. The final touch is a smoky-sweet glaze brushed on during the last 30 minutes, creating caramelized edges that steal the show.
What emerges is tender, juicy ham with a sticky, glossy exterior that crackles slightly with each slice. The spiral cut ensures every bite gets a taste of that irresistible glaze.
Serve with classic sides like scalloped potatoes or green beans. The leftovers make incredible sandwiches the next day.
Ingredients for Bbq Ham Recipe Spiral
A fully cooked ham and a handful of pantry staples create that showstopping centerpiece.
| Ingredient | Amount | Notes |
|---|---|---|
| Spiral-Cut Ham 🍖 | 8 lb | Fully cooked, bone-in preferred |
| Brown Sugar 🍚 | 1 ½ cups | Light or dark variety |
| Honey 🍯 | ½ cup | For natural sweetness |
| Dijon Mustard 🟡 | ¼ cup | Smooth, not whole grain |
| Apple Cider Vinegar 🍏 | 2 tbsp | Balances sweetness |
| Smoked Paprika 🌶️ | 1 tbsp | For smoky depth |
| Garlic Powder 🧄 | 1 tsp | Freshly ground preferred |
| Onion Powder 🧅 | 1 tsp | Complements the glaze |
| Worcestershire Sauce 🫒 | 2 tbsp | Adds umami richness |
| Unsalted Butter 🧈 | ½ cup | Melted for glaze |
| Ground Black Pepper 🌶️ | ½ tsp | Freshly ground preferred |
| Cloves 🌿 | 10 whole | Optional for studding ham |
The ham is the star here. HoneyBaked or Cook’s spiral-cut hams (from Costco or your local grocery) are pre-cooked and ready to glaze—just look for one labeled fully cooked. Bone-in gives better flavor, but boneless works if that’s what you’ve got. Aim for about 1 lb per person to ensure leftovers (trust me, you’ll want them). The spiral cut saves you the trouble of carving.
No brown sugar? Maple syrup or molasses can step in, though the texture will be different. Swap Dijon for regular mustard in a pinch, but the depth won’t be as rich. Apple cider vinegar is irreplaceable here, but white vinegar works if that’s all you have. Skip the cloves if you don’t have them (they’re just for show). For extra smokiness, add a dash of liquid smoke.
Leftovers keep beautifully—5 days in the fridge, 3 months frozen. Wrap slices tightly in foil before freezing. Reheat gently in the oven to keep them juicy. The glaze can be made ahead and stored in the fridge for 1 week (just warm it slightly before brushing).
Why You’ll Love This Recipe
- I’ll be real: the sandwiches and omelets afterward might be the best part.
- Minimal Effort: Almost hands-off—just slather that honey-brown sugar glaze on the pre-cut spiral and let the oven do the work.
- Sweet & Tangy: The honey and brown sugar caramelize while the mustard and vinegar cut through with a little zing.
- Feeds a Crowd: Holiday centerpiece or Sunday supper, this ham serves 10+ with zero stress. (Yes, even on a Tuesday night)
Step-by-Step Instructions for BBQ Ham With Spiral Cut
Here’s my no-fail method for achieving that sticky, caramelized finish with minimal effort.
Step 1: Prep the Ham and Create the Glaze Base
Remove the spiral-cut ham from packaging and pat it dry with paper towels. Place it cut-side down in a roasting pan. I always let it sit at room temperature for 30 minutes before glazing—this ensures even cooking and better glaze adhesion.
In a saucepan, melt the ½ cup unsalted butter over medium heat. Whisk in the 1.5 cups brown sugar, ½ cup honey, and ¼ cup Dijon mustard until smooth. This base creates that signature sticky texture we’re after.
Step 2: Build Complexity in the Glaze
Add the 2 tbsp apple cider vinegar, 2 tbsp Worcestershire sauce, 1 tbsp smoked paprika, 1 tsp garlic powder, 1 tsp onion powder, and ½ tsp ground black pepper to the saucepan. Simmer for 3-4 minutes until slightly thickened.
The vinegar cuts through the sweetness while the Worcestershire adds umami depth. You’ll notice the glaze darken slightly and develop a glossy sheen—this tells you it’s ready. Don’t let it boil vigorously or it might separate.
Step 3: Apply and Bake the Glaze
Preheat your oven to 325°F. Brush the glaze generously over the ham, making sure to work it into all those spiral cuts. If using, press the 10 whole cloves into the surface for extra aroma—space them evenly across the top.
Cover the ham loosely with foil and bake for 1 hour 30 minutes. This low-and-slow approach allows the flavors to penetrate deeply without drying out the meat. The internal temperature should reach 140°F when done.
Step 4: Caramelize the Glaze to Perfection
Remove the foil and increase oven temperature to 375°F. Brush the ham with more glaze and return to the oven uncovered. Bake for another 15-20 minutes, brushing with glaze every 5 minutes.
Watch for the edges to turn deep mahogany with visible caramelization. The glaze should bubble slightly and form a sticky crust. If it starts to darken too quickly, tent with foil and reduce heat slightly.
Step 5: Rest and Serve
Transfer the ham to a cutting board and let it rest for 10-15 minutes before serving. This allows the juices to redistribute and the glaze to set slightly, making for cleaner slices.
The spiral cuts make serving effortless—just pull apart the slices. Each piece should glisten with that smoky-sweet glaze and have those coveted caramelized edges. Serve with the remaining pan juices spooned over the top.
Pro Tips For Making Bbq Ham Recipe Spiral
- Preheat the Ham: Take the spiral-cut ham out of the fridge 1-2 hours before cooking—cold ham cooks unevenly, and the glaze won’t stick as well to the chilled surface.
- Thin the Glaze: Mix the brown sugar, honey, and Dijon with a splash of apple cider vinegar (about 2 tablespoons) to loosen it—thick glaze slides right off the ham instead of coating it.
- Foil First, Glaze Later: Cover the ham with foil for the first hour at 325°F to keep it moist, then uncover and glaze for the last 30 minutes to caramelize without drying it out.
- Score the Slices: Lightly score the pre-cut spiral slices (just a shallow crosshatch) before glazing—it helps the sauce penetrate deeper and gives you that sticky, crispy edge on every piece.
Pro Cooking Tips for Perfect Results
Glaze Consistency Check
I always test my glaze thickness by dragging a spoon through it—if the line holds for 2-3 seconds before filling in, it’s perfect. Too thin and it’ll slide right off the ham. If yours is watery, simmer it longer over low heat. 💡
Preventing Dry Ham
David, my official taste-tester, taught me this: place a ½ cup water in the bottom of your roasting pan. This creates steam that keeps the ham moist during that 1 hour 30 minute covered bake. I also baste with pan juices every 45 minutes.
Even Glaze Coverage
Those spiral cuts are a blessing and a curse—they hide glaze in their crevices. Use a silicone pastry brush to really work the mixture into every nook. I rotate the ham 180 degrees halfway through baking to ensure even caramelization.
Clove Placement Hack
If using cloves, press them into the diamond patterns created by the spiral cuts. This looks professional and ensures they don’t fall off during baking. I use 10 whole cloves spaced evenly—any more and the flavor overpowers the glaze.
Oven Hot Spots
Since I test recipes on different equipment, I’ve learned to rotate my roasting pan 180 degrees when I increase the oven to 375°F. This prevents one side from caramelizing faster. Most home ovens have hot spots near the back.
Resting Matters
That 10-15 minute rest isn’t optional—it’s when the magic happens. The glaze sets into that perfect sticky texture, and the juices redistribute. If you cut too soon, you’ll lose half that beautiful caramelization to the cutting board. 🔥
Nutrition Facts
Frequently Asked Questions
Do I need to pre-cook a spiral-cut ham before glazing?
Most spiral-cut hams are fully cooked and just need reheating. Check the label for “fully cooked” to confirm. Preheating at room temperature for 30 minutes ensures even cooking.
Can I make the glaze ahead of time?
Yes! The glaze keeps well in the fridge for up to 1 week. Reheat gently before brushing to restore its smooth consistency. This saves time on busy cooking days.
Why did my glaze burn in the oven?
High heat or uneven application often causes burning. Bake at 325°F initially, then increase to 375°F only for the final 15-20 minutes. Brush glaze thinly and check frequently.

- BBQ Sausage Recipe Oven: Smoky Depth Without the Grill - September 28, 2026
- BBQ Chicken Bowl Recipe Rice: Smoky Sweetness Over Fluffy Grains - September 28, 2026
- Beef Cutlet Recipe Ideas: Crispy Breaded Patties With Bold Seasonings - September 28, 2026