
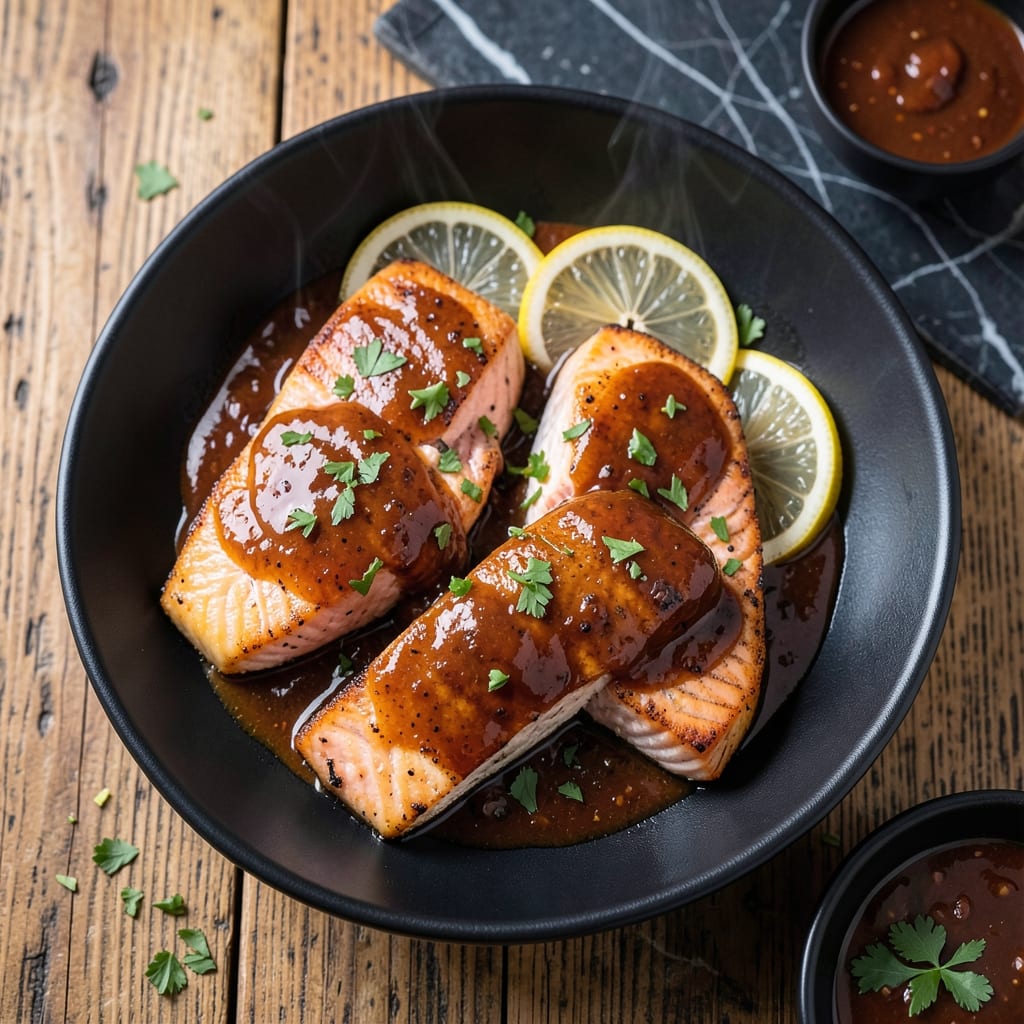
This oven-baked method delivers all the smoky, tangy flavor of grilled BBQ salmon without ever stepping outside. I developed this technique during a rainy Austin summer when outdoor cooking wasn’t an option.
The key is a high-heat oven and a homemade BBQ glaze that caramelizes beautifully. A quick sear in a hot skillet before baking ensures that perfect crispy skin, while the oven finishes the cooking evenly.
You’ll end up with flaky, tender salmon with a sticky, slightly charred glaze that clings to every bite. The aroma alone will have everyone gathering around the kitchen.
Serve with roasted vegetables or a simple green salad for a complete meal that feels special but comes together with minimal effort.
Ingredients for Bbq Salmon Recipe Oven
A handful of pantry staples and fresh salmon create this smoky, caramelized dish.
| Ingredient | Amount | Notes |
|---|---|---|
| Salmon Fillets 🐟 | 4 pieces | Skin-on, 6-8 oz each |
| Olive Oil 🫒 | 2 tbsp | Divided for searing and glaze |
| Ketchup 🍅 | ½ cup | Base for BBQ glaze |
| Apple Cider Vinegar 🍏 | 2 tbsp | For tangy balance |
| Brown Sugar 🧈 | 2 tbsp | Packed, for caramelization |
| Molasses 🍯 | 1 tbsp | Adds depth to glaze |
| Worcestershire Sauce 💧 | 1 tbsp | For umami richness |
| Smoked Paprika 🌶️ | 1 tsp | For smoky flavor |
| Garlic Powder 🧄 | 1 tsp | Enhances savory notes |
| Onion Powder 🧅 | 1 tsp | Complements the glaze |
| Salt 🧂 | ½ tsp | Kosher or sea salt |
| Black Pepper 🌶️ | ½ tsp | Freshly ground preferred |
| Dijon Mustard 🟡 | 1 tsp | Adds sharpness to glaze |
| Lemon Wedges 🍋 | 4 pieces | For serving |
The salmon is the star here. Wild-caught has richer flavor and firmer texture than farmed, but either works. Look for fillets with vibrant color and no brown spots. Whole Foods or Costco often have good selections. For the glaze, use a high-quality ketchup like Heinz or Annie’s—it makes a difference in the final flavor profile.
No molasses? Honey or maple syrup can substitute in a pinch (but note this would make it non-pescatarian if using honey). Skip the Worcestershire if you need gluten-free—coconut aminos work as a replacement. The smoked paprika is key for that BBQ flavor, but regular paprika plus a drop of liquid smoke gets you close. Fresh garlic and onion can replace the powders at double the amount.
The glaze keeps in an airtight container for up to 1 week in the fridge. Salmon is best cooked fresh, but you can prep the glaze 1-2 days ahead. Leftovers reheat gently—3-4 days max in the fridge, though the skin won’t stay crisp.
Why You’ll Love This Recipe
- One Pan Wonder: I love that I just mix the ketchup, vinegar, and brown sugar right in the baking dish—no extra bowls to wash.
- Sweet-Smoky Magic: The brown sugar caramelizes with the ketchup and vinegar to create this sticky, tangy glaze that clings to every bite.
- Weeknight Hero: Honestly, it’s my go-to for busy evenings—pop it in the oven and dinner’s ready while I set the table.
- Leftovers? Yes Please: The flavors actually deepen overnight, so I make extra for next-day lunches that taste even better.
Step-by-Step Instructions for BBQ Salmon in the Oven
This method delivers tender fish with a sticky, smoky glaze using only your oven.
Step 1: Season and Sear the Salmon Fillets
Pat the 4 pieces salmon fillets dry with paper towels to ensure crispy skin. Season both sides evenly with the 0.5 tsp salt and 0.5 tsp black pepper. This step is crucial for flavor development.
Heat 1 tbsp olive oil in an oven-safe skillet over medium-high heat. When the oil shimmers, place the fillets skin-side down and sear undisturbed for 3-4 minutes until the skin is golden and crisp. The skin should release easily from the pan when ready.
Step 2: Prepare the BBQ Glaze
In a bowl, whisk together the 0.5 cup ketchup, 2 tbsp apple cider vinegar, 2 tbsp brown sugar, 1 tbsp molasses, 1 tbsp worcestershire sauce, 1 tsp smoked paprika, 1 tsp garlic powder, 1 tsp onion powder, and 1 tsp dijon mustard until smooth.
The glaze should be thick but pourable. Taste and adjust sweetness or tang if needed, though the measurements provided create a balanced flavor. This mixture will caramelize beautifully in the oven.
Step 3: Glaze and Roast the Salmon
Preheat the oven to 400°F. Brush the seared fillets generously with half of the glaze, reserving the rest for serving. Transfer the skillet to the preheated oven and roast for 8-10 minutes until the salmon flakes easily with a fork.
The glaze will bubble and thicken during roasting. Avoid overcooking—remove the salmon when it reaches an internal temperature of 145°F and the thickest part is just opaque.
Step 4: Finish and Serve
Drizzle the remaining glaze over the cooked fillets. The residual heat will slightly warm the glaze, making it glossy and irresistible. Garnish each portion with 1 piece lemon wedge for a bright, citrusy finish.
Serve immediately while hot. The skin should remain crisp, the flesh moist, and the glaze thick enough to cling to each bite. The leftover 1 tbsp olive oil from the ingredients can be used to grease the serving platter if desired.
Pro Tips For Making Bbq Salmon Recipe Oven
- Preheat the Oven: Crank it to 400°F—any lower and the brown sugar won’t caramelize properly. I learned this the hard way after pulling out pale, sad salmon more times than I’d like to admit.
- Pat the Salmon Dry: Use a paper towel to remove all moisture from the fillets before adding the sauce. Sounds tedious, but it keeps the BBQ glaze from sliding right off.
- Skip the Over-Saucing: A thin, even coat of the ketchup-vinegar-sugar mix is plenty—drowning the salmon just makes it soggy. Resist the urge to glob it on, even if it smells amazing.
- Broil for 2 Minutes: After baking, switch to broil for the last 2 minutes to get that sticky, charred finish. Watch it like a hawk—it goes from perfect to burnt in seconds.
Pro Cooking Tips for bbq salmon recipe oven
Oven Temperature Control
Preheat your oven to 400°F and use the center rack for even heat distribution. I always place a baking sheet on the lower rack to catch any drips, which prevents smoke alarms from going off—David learned this the hard way. 🔥
Skillet Selection
Use an oven-safe skillet, preferably cast iron or stainless steel. My go-to is a Lodge 12-inch cast iron that transitions seamlessly from stovetop to oven. Avoid nonstick pans—they can’t handle the high heat needed for searing.
Searing Technique
Sear the salmon skin-side down in 1 tbsp olive oil over medium-high heat for 3-4 minutes until the skin releases easily. Press down gently with a spatula to ensure full contact and even browning.
Glaze Application
Brush half the glaze on before baking, then reserve the rest for serving. This prevents burning while still delivering maximum flavor. The glaze should bubble and thicken during the 8-10 minute roast.
Internal Temperature
Pull the salmon when it reaches 145°F internal temperature. The flesh will continue cooking slightly as it rests. I use a ThermoWorks Instant Read thermometer for accuracy—no guesswork. ✨
Rest Before Serving
Let the salmon rest for 2-3 minutes after removing from the oven. This allows the juices to redistribute, keeping the fillets moist and tender. Drizzle with the reserved glaze just before serving.
Nutrition Facts
Frequently Asked Questions
Can I use frozen salmon for this method?
Thaw frozen fillets completely in the fridge overnight before cooking. Pat them very dry to ensure crispy skin. Never cook from frozen—it leads to uneven cooking and soggy texture.
How do I prevent the glaze from burning?
Brush only half the glaze on before baking, and don’t over-bake. At 400°F for 8-10 minutes, the sugars caramelize without burning. Keep an eye after 7 minutes.
What’s the best way to store leftovers?
Store in an airtight container for up to 3 days. Reheat gently in a 300°F oven to preserve moisture. Note the skin won’t stay crisp.
Can I make the glaze ahead of time?
Yes! The glaze keeps in the fridge for up to 1 week. This makes weeknight cooking faster. Stir before using as ingredients may settle.

- BBQ Sausage Recipe Oven: Smoky Depth Without the Grill - September 28, 2026
- BBQ Chicken Bowl Recipe Rice: Smoky Sweetness Over Fluffy Grains - September 28, 2026
- Beef Cutlet Recipe Ideas: Crispy Breaded Patties With Bold Seasonings - September 28, 2026