
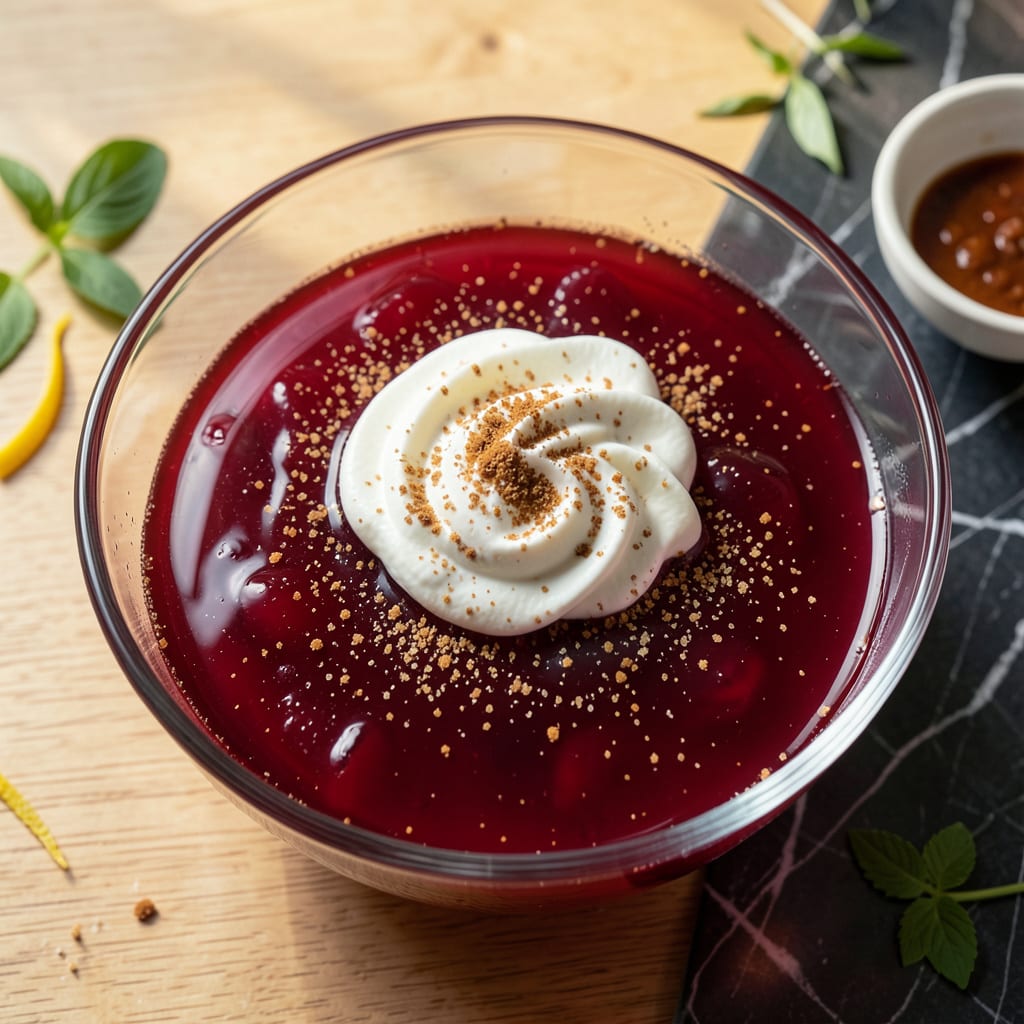
There’s a unique satisfaction in creating a dessert with unexpected depth, and this gelatin jello delivers just that. The beef gelatin creates a silky texture that’s surprisingly delicate, with a subtle richness that elevates the experience.
This recipe transforms simple ingredients into a smooth, wobbling treat that’s as fun to make as it is to eat. The process is straightforward, with precise timing ensuring the perfect consistency every time.
Ingredients for Beef Gelatin Jello
Eleven simple ingredients create this silky, wobbling dessert with unexpected depth and richness.
| Ingredient | Amount | Notes |
|---|---|---|
| Beef Gelatin Powder 🍮 | 2 tbsp | Unflavored, high bloom strength |
| Granulated Sugar 🍚 | ½ cup | Fine white sugar preferred |
| Cold Water 💧 | ½ cup | For gelatin bloom stage |
| Hot Water ☕ | 1 ½ cups | Just off boil temperature |
| Fruit Juice 🍹 | 2 cups | Any clear juice variety |
| Heavy Cream 🥛 | ½ cup | Full-fat for creaminess |
| Vanilla Extract 🌿 | 1 tsp | Pure vanilla preferred |
| Salt 🧂 | ¼ tsp | Fine sea salt variety |
| Lemon Juice 🍋 | 1 tbsp | Freshly squeezed preferred |
| Fresh Berries 🍓 | 1 cup | For garnish and texture |
| Mint Leaves 🌿 | 8 pieces | Optional garnish element |
The beef gelatin quality is paramount. Great Lakes or Vital Proteins brands offer consistent bloom strength for that essential silky texture. Look for unflavored powder—colored or flavored varieties will compromise the pure, delicate finish. Most natural food stores and Amazon carry these reliable options. Avoid sheet gelatin unless you’re experienced with conversion ratios.
No beef gelatin? Pork gelatin works identically but isn’t vegetarian. For a plant-based version, agar-agar requires different techniques. The sugar can be reduced by half without affecting texture. Any clear juice works—apple and white grape are classic, but tropical blends add interesting dimension. The cream is optional but adds that subtle richness mentioned in the intro.
Store gelatin powder in a cool, dark place for up to 1 year. Prepared jello keeps in the refrigerator for 5 days in an airtight container. Set individual portions in molds for easy serving, and add garnishes just before serving to maintain their freshness.
Why You’ll Love This Recipe
- 5-Minute Mix: I bloom the gelatin in cold water while the kettle boils—no stove, no fuss.
- Fruit Burst: The juice keeps it light and bright, with just enough sweetness to balance the beef gelatin’s richness.
- Party-Ready Plates: I set it in silicone molds for fancy shapes or slice into cubes for a no-mess potluck dish.
- Pantry Savior: A box of gelatin and shelf-stable juice means I can make this even when the fridge is bare.
Step-by-Step Instructions for Beef Gelatin Jello
Master this technique for a perfectly set dessert with professional texture and clarity.
Step 1: Bloom the Gelatin Properly
Sprinkle the 2 tbsp Beef Gelatin Powder evenly over the surface of the 0.5 cup Cold Water in a medium bowl. Do not stir—this prevents clumping. Let it sit undisturbed for 5-10 minutes until the gelatin absorbs all the water and resembles wet sand.
The mixture will look opaque and slightly thickened. This blooming stage is critical for even dissolution later. If you see any dry spots, gently tap the bowl to help the gelatin settle completely into the water.
Step 2: Dissolve Gelatin and Sweeten the Base
Pour the 1.5 cups Hot Water into a saucepan and heat until just simmering (not boiling). Remove from heat and immediately add the bloomed gelatin mixture. Whisk vigorously for 2-3 minutes until completely dissolved—there should be no visible grains or cloudiness.
Add the 0.5 cup Granulated Sugar and 0.25 tsp Salt, whisking until fully incorporated. The liquid should be smooth and slightly syrupy. This sweetened base ensures even flavor distribution throughout your final dessert.
Step 3: Incorporate Flavor and Cream Elements
Stir in the 2 cups Fruit Juice, 0.5 cup Heavy Cream, 1 tsp Vanilla Extract, and 1 tbsp Lemon Juice. The cream adds richness while the lemon juice brightens the overall flavor profile. Mix gently to avoid creating bubbles, which can affect the final clarity.
Taste the mixture at this stage and adjust sweetness if needed, though remember it will taste less sweet once set. The liquid should be room temperature or slightly warm before proceeding to the next step—never pour hot liquid directly into your serving dishes.
Step 4: Set and Chill to Perfection
Pour the mixture into your serving dishes or molds. For clearest results, use glass containers. Refrigerate uncovered for 4-6 hours, or until completely set. The jello should pull away slightly from the edges of the container and not jiggle when gently shaken.
If you’re in a hurry, you can place the dishes in the freezer for 1-2 hours, but monitor closely to prevent freezing. The proper chilling time ensures that perfect silky texture mentioned in the title—firm enough to hold its shape but still with that characteristic wiggle.
Step 5: Garnish and Serve
Once fully set, top each serving with 1 cup Fresh Berries divided evenly among dishes. The berries add freshness and a pop of color. For an elegant touch, garnish with the 8 pieces Mint Leaves, placed strategically for visual appeal.
To serve, you can either present in the dishes or dip the molds briefly in warm water to loosen before unmolding. The jello should release cleanly with a smooth, glossy surface that showcases the clarity achieved through proper technique.
Pro Tips For Making Beef Gelatin Jello
- Bloom the Gelatin: Always dissolve the beef gelatin in cold water first and let it sit for 5-10 minutes—I learned this the hard way after ending up with lumpy jello that never set properly.
- Use Hot, Not Boiling: Add the hot water at about 180°F (just under boiling) to avoid breaking down the gelatin’s setting power, which makes for a firmer, smoother texture.
- Sweeten After Dissolving: Stir in the sugar only after the gelatin is fully dissolved in the hot water to prevent graininess—my grandmother swore by this, and she was right.
- Chill Slowly: Let the mixture cool to room temperature before refrigerating to prevent uneven setting, which can leave you with a rubbery top layer and a soupy bottom.
Serving Suggestions for This Recipe
Elegant Presentation
Serve this creation in clear glass dishes to showcase its beautiful clarity and silky texture. The wobble effect is most dramatic when the jello is cut into geometric shapes using cookie cutters before setting. I love using star or heart shapes for special occasions. 💛
Layered Variations
Create stunning layered desserts by preparing different flavored batches and pouring them sequentially. Allow each layer to set for 1-2 hours before adding the next. Alternating colors like strawberry and lime makes for an impressive visual effect.
Garnish Creatively
Beyond berries and mint, try edible flowers or citrus zest for a sophisticated touch. A drizzle of honey or chocolate sauce adds complementary sweetness. The garnish should contrast the smooth jello texture.
Pairing Suggestions
Serve with a dollop of whipped cream or a scoop of vanilla ice cream for a creamy contrast. The cold cream against the chilled jello creates a refreshing experience. I sometimes add a sprinkle of crushed nuts for extra crunch.
Portion Control
For individual servings, use small mason jars or shot glasses. These create perfect single portions that are as pretty as they are delicious. The 4-6 hour setting time works the same regardless of container size.
Temperature Note
Always serve this dessert well-chilled. Room temperature causes the gelatin to soften, losing that perfect wiggle. I recommend keeping it refrigerated until the very moment of serving for optimal texture. ❄️
Nutrition Facts
Frequently Asked Questions
Can I use pork gelatin instead of beef?
Yes, pork gelatin works identically to beef gelatin in this recipe. The texture and setting properties are the same, so you can substitute 1:1. The only difference might be a slightly milder flavor with pork gelatin.
Why did my jello turn out cloudy?
Cloudiness usually comes from undissolved gelatin or bubbles. Whisk the gelatin into hot water for 2-3 minutes until fully clear, and avoid stirring vigorously after adding juice to prevent bubbles.
How do I make layered flavors?
Prepare different flavors separately and let each layer set for 1-2 hours before adding the next. Use clear juices for best visibility, and pour gently to avoid mixing.
Can I reduce the sugar without issues?
You can safely cut the sugar by half. The texture won’t be affected, but the flavor will be less sweet. Taste the mixture before chilling and adjust as needed.

- BBQ Sausage Recipe Oven: Smoky Depth Without the Grill - September 28, 2026
- BBQ Chicken Bowl Recipe Rice: Smoky Sweetness Over Fluffy Grains - September 28, 2026
- Beef Cutlet Recipe Ideas: Crispy Breaded Patties With Bold Seasonings - September 28, 2026