
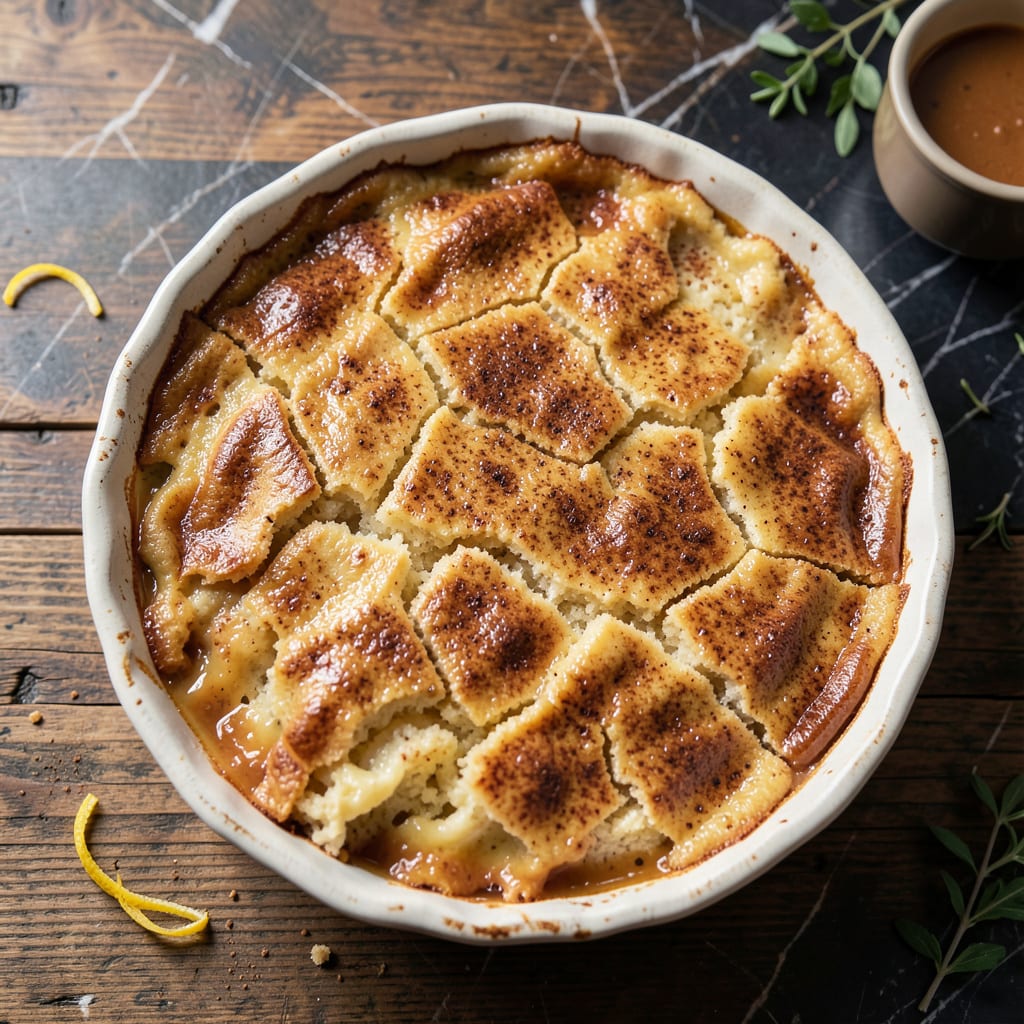
This dessert works its own magic, creating a self-forming crust while baking. The beauty lies in its simplicity—just mix, pour, and let the oven do the rest.
You’ll end up with a golden exterior, a custardy filling, and a dish so effortless it feels like a kitchen miracle. The process takes under an hour from start to finish.
Ingredients for Bisquick Impossible Pie
Short list. Big magic. The oven does all the heavy lifting here.
| Ingredient | Amount | Notes |
|---|---|---|
| Bisquick Baking Mix 🥣 | 1 cup | Original variety recommended |
| Granulated Sugar 🍚 | ¾ cup | Fine white sugar preferred |
| Vanilla Extract 🌿 | 1 tsp | Pure extract for best flavor |
| Ground Cinnamon 🌶️ | 1 tsp | Freshly ground if possible |
| Salt 🧂 | ¼ tsp | Iodized or kosher salt |
| Large Eggs 🥚 | 2 whole | Room temperature preferred |
| Whole Milk 🥛 | 1 ½ cups | Full-fat for creaminess |
| Unsalted Butter 🧈 | ¼ cup | Melted and cooled slightly |
| Coconut Flakes 🥥 | ½ cup | Sweetened or unsweetened |
| Chopped Pecans 🌰 | ¼ cup | Toasted for extra flavor |
The Bisquick is the foundation here—General Mills original is what I always grab from Walmart or Target. Any baking mix works, but the classic yellow box gives you that perfect self-forming crust. The milk makes a difference too—whole milk gives you the richest, most custardy texture (trust me on the full-fat version). If you’re using a different brand of baking mix, check the box size—some are slightly larger or smaller.
No whole milk? 2% works in a pinch (just slightly less rich). Out of Bisquick? Any biscuit baking mix should do the trick. For a little twist, swap the coconut for chopped almonds or walnuts. The cinnamon can be adjusted to taste—add more if you love that warm spice flavor. Want to go fancy? A pinch of nutmeg adds depth.
Mix comes together in minutes, so no prep ahead needed. Leftovers keep 3-4 days in the fridge—great cold or warmed up. This also freezes surprisingly well for up to 2 months (let it thaw overnight before serving).
Why You’ll Love This Recipe
- One Bowl Magic: I just dump everything in—Bisquick, sugar, vanilla—and stir. No mixer, no fuss, just a hot pan waiting.
- Warm Spiced Bliss: That cinnamon-kissed vanilla flavor with a custardy center? Honestly, it tastes like a cozy hug in dessert form.
- Breakfast or Dessert: I serve it for brunch with coffee or as a late-night treat. Between us, my kids don’t care what time it is.
- Budget Stretch: Five ingredients, one cheap box of Bisquick, and it feeds four. I’ll be real: that’s my kind of math.
Step-by-Step Instructions for Self-Forming Crust Magic
Here’s the method that makes this dish so effortless and impressive at the same time.
Step 1: Prepare the Batter Base
In a large mixing bowl, whisk together the 1 cup Bisquick Baking Mix, 0.75 cup Granulated Sugar, 1 tsp Ground Cinnamon, and 0.25 tsp Salt until fully combined. This dry mix forms the foundation of your pie’s structure.
Create a well in the center and add the 2 whole Large Eggs, 1.5 cups Whole Milk, and 1 tsp Vanilla Extract. I use a silicone spatula to fold everything together until just combined—overmixing can make the crust tough. The batter will be thin, almost like pancake batter.
The Bisquick works its magic here, creating a custard-like consistency that will transform into a crust as it bakes. Don’t worry if it looks too runny; that’s exactly how it should be.
Step 2: Incorporate the Rich Add-Ins
Melt the 0.25 cup Unsalted Butter and let it cool slightly (it should still be liquid but not hot). Slowly pour it into the batter while stirring gently. The butter adds richness and helps create that perfect self-forming crust.
Fold in the 0.5 cup Coconut Flakes and 0.25 cup Chopped Pecans until evenly distributed. These add texture and flavor, with the coconut providing a subtle sweetness and the pecans giving a satisfying crunch. If your pecans aren’t toasted, this is your chance to toast them lightly in a dry pan for extra depth.
The batter will be flecked with these ingredients, ready to create layers of flavor in every bite. This step is where the pie gets its character—don’t rush the folding process.
Step 3: Bake Until Golden and Set
Pour the batter into a greased 9-inch pie dish. I like to use a glass dish so I can see the crust forming around the edges. Place it in a preheated 350°F oven and bake for 45-50 minutes.
Watch for the edges to pull away from the pan and turn a deep golden brown. The center should be set but still have a slight jiggle when you gently shake the dish—this indicates it’s perfectly baked. If the top browns too quickly, tent it loosely with foil for the remaining time.
This is the moment where the magic happens. The Bisquick creates its own crust at the bottom and sides while the top stays custard-like. The smell of cinnamon and vanilla will fill your kitchen, signaling it’s almost ready.
Step 4: Cool and Serve
Remove the pie from the oven and let it cool on a wire rack for at least 15 minutes. This cooling period allows the crust to set fully and the custard to firm up. I know it’s tempting to dive right in, but waiting ensures clean slices.
Serve warm or at room temperature. Each slice will have that perfect self-formed crust at the bottom and sides, with a rich, custardy center studded with coconut and pecans. The contrast between the crisp crust and creamy filling is what makes this pie so special.
This dish keeps well in the refrigerator for up to 3 days, though it’s best enjoyed fresh. Reheat individual slices in the microwave for 20-30 seconds if desired.
Pro Tips For Making Bisquick Impossible Pie
- Blend the Batter Last: Mix the wet and dry ingredients just until combined—overmixing makes the pie tough. I learned this the hard way after my first three attempts came out dense.
- Use Room-Temp Eggs: Cold eggs can curdle the batter when mixed with the sugar and vanilla. After a few lumpy batches, I started setting them out 30 minutes ahead—sounds small, but it actually changes the outcome.
- Skip the Overfilled Pan: Resist the urge to fill the pie dish more than ¾ full. The batter rises like a soufflé, and I’ve had to clean overflowed messes from my oven floor too many times.
- Add a Pinch More Cinnamon: The recipe calls for a teaspoon, but a heaping teaspoon—or even 1¼—gives that warm spice flavor that makes this pie taste like home. My grandmother swore by this, and she was right.
Flavor Customization for These Flavors
Sweet Spice Variations
Swap the cinnamon for 1 tsp apple pie spice or pumpkin pie spice for a warm, complex flavor. This blend adds nutmeg and cloves that pair beautifully with the custard. I love this during fall when those spices feel extra cozy.
Chocolate Lover’s Twist
Add ¼ cup cocoa powder to the dry mix for a chocolate version. Reduce sugar to ½ cup to balance the sweetness. I also stir in ½ cup chocolate chips—the melty pockets in the custard are divine. 💛
The cocoa gives a deep, rich base that turns this into a dessert that feels decadent yet remains effortless.
Fruit Infusions
Fold in 1 cup diced apple or peach pieces before baking. The fruit softens beautifully while adding natural sweetness. I toss the fruit with 1 tbsp flour first to prevent sinking to the bottom.
Nutty Upgrades
Replace pecans with walnuts or almonds for different crunch. Toast them first in a dry pan for 3-4 minutes to deepen their flavor. I prefer walnuts for their bitterness that cuts through the sweetness.
Coconut Boost
Use toasted coconut flakes instead of untoasted for extra depth. Spread them on a baking sheet at 350°F for 5 minutes until golden. The toasted coconut adds a nutty aroma that elevates the whole pie.
Nutrition Facts
Frequently Asked Questions
Why does the crust form on its own?
The Bisquick contains flour and leavening agents that separate during baking. The flour sinks to create the crust while the custard rises to the top.
Can I use a different baking mix?
Yes, any biscuit-style baking mix works. Stick to 1 cup and check for similar ingredients to ensure proper texture.
How do I know when it’s done?
The edges will pull away and turn golden brown. The center should jiggle slightly but not be liquid when gently shaken.
Can I make this ahead of time?
It keeps 3-4 days refrigerated or 2 months frozen. Reheat slices for 20-30 seconds to restore freshness.

- BBQ Sausage Recipe Oven: Smoky Depth Without the Grill - September 28, 2026
- BBQ Chicken Bowl Recipe Rice: Smoky Sweetness Over Fluffy Grains - September 28, 2026
- Beef Cutlet Recipe Ideas: Crispy Breaded Patties With Bold Seasonings - September 28, 2026