
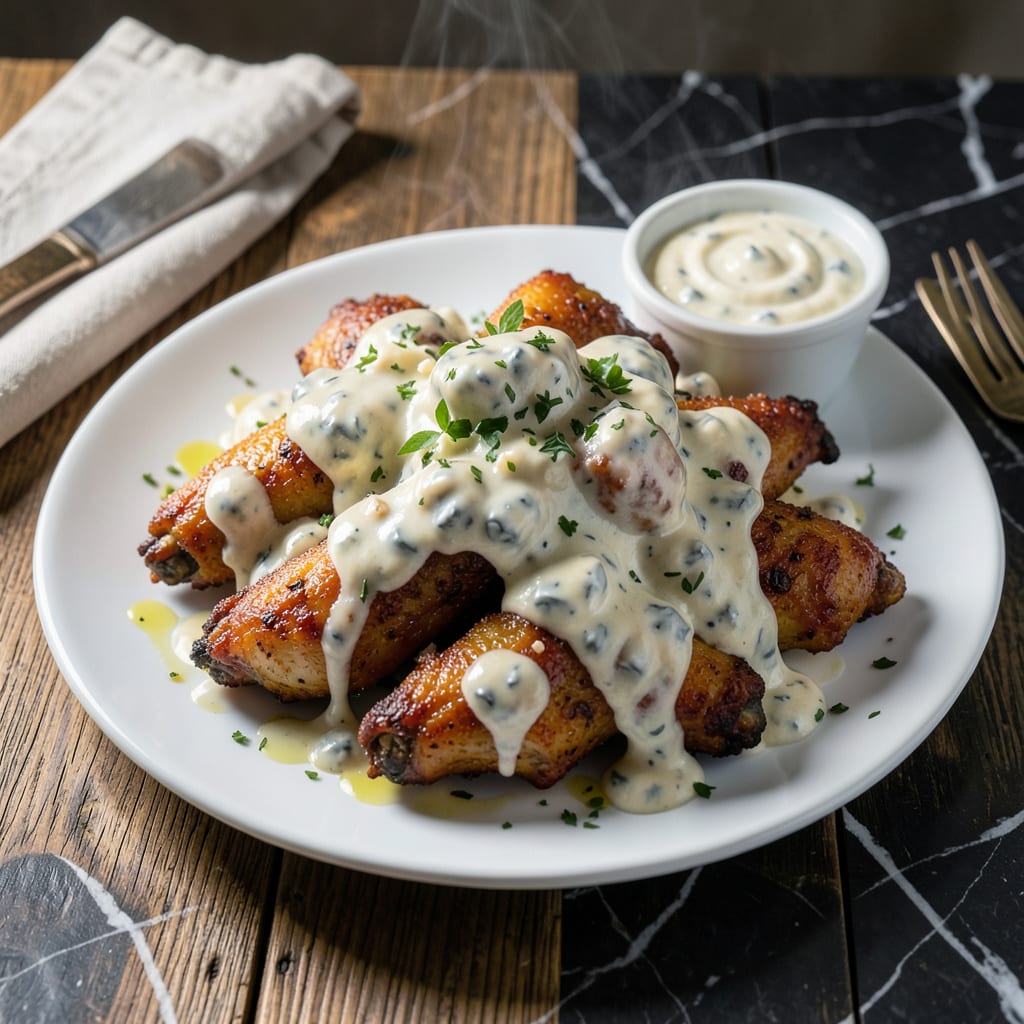
This blue cheese sauce transforms classic wings into a bold, tangy masterpiece with minimal effort. The secret lies in balancing sharp blue cheese with creamy elements for a dip that clings perfectly to crispy wings.
The result is restaurant-quality wings with a velvety coating that enhances every bite. This method guarantees crispy wings that stay firm under the rich, tangy sauce.
Ingredients for Blue Cheese Recipe for Wings
Crispy wings meet bold blue cheese in this tangy, creamy masterpiece.
| Ingredient | Amount | Notes |
|---|---|---|
| Chicken Wings 🍗 | 2 lb | Split into drumettes and flats |
| Blue Cheese Crumbles 🧀 | 1 cup | High-quality, sharp variety |
| Mayonnaise 🥚 | ¾ cup | Full-fat for creaminess |
| Sour Cream 🥛 | ½ cup | Full-fat preferred |
| Buttermilk 🥛 | ¼ cup | Or substitute with milk and vinegar |
| Worcestershire Sauce 💧 | 1 tbsp | For depth of flavor |
| Garlic Cloves 🧄 | 2 cloves | Minced finely |
| Lemon Juice 🍋 | 1 tbsp | Freshly squeezed |
| Dijon Mustard 🟡 | 1 tbsp | Smooth variety |
| Salt 🧂 | ½ tsp | Kosher or sea salt |
| Black Pepper 🌶️ | ½ tsp | Freshly ground preferred |
| Hot Sauce 🔥 | 1 tsp | Optional for extra tang |
| Vegetable Oil 🫒 | 1 cup | For frying wings |
[recipeingredientscaler]
The blue cheese is non-negotiable here. Maytag or Roquefort deliver that sharp, tangy punch we want. Whole Foods or Trader Joe’s usually have good options—avoid the pre-crumbled stuff if it looks dry or mealy. For the wings, fresh is best, but frozen works in a pinch (just thaw completely first). The buttermilk ties everything together, so don’t skip it.
No buttermilk? Mix 1 tbsp of vinegar or lemon juice into 1 cup of milk and let it sit for 5 minutes. Sour cream can be swapped for Greek yogurt if you prefer a lighter texture. The Worcestershire adds umami depth—Annie’s makes a solid vegetarian version if that matters to you. For extra kick, Frank’s RedHot or Tabasco are my go-tos.
The sauce keeps for about 5 days in the fridge, but it’s best fresh. Wings are ideal hot out of the fryer—toss them immediately in the sauce so it clings properly. Leftovers? Reheat in the oven to keep them crispy (microwave makes them soggy).
Why You’ll Love This Recipe
- One Bowl Wonder: I mix the blue cheese, mayo, and buttermilk right in the same bowl I’ll serve from—no extra dishes to wash.
- That Blue Cheese Tang: The crumbles melt just enough into the creamy sauce, giving every wing a sharp, cool bite that cuts through the heat.
- Game Day Ready: I’ve set these out for Sunday football and had zero leftovers, but they work just as well for a weeknight dinner with friends.
- Budget Stretcher: A bag of wings and a small wedge of blue cheese feed a hungry crowd without breaking the bank.
Step-by-Step Instructions for Blue Cheese Dip and Wings
This method ensures a bold, tangy dip with perfectly crispy wings every time.
Step 1: Fry the Chicken Wings to Golden Perfection
Heat the 1 cup vegetable oil in a large, deep skillet over medium-high heat until it reaches 375°F. While the oil heats, pat the 2 lb chicken wings dry with paper towels—this is essential for achieving maximum crispiness.
Working in batches to avoid overcrowding, carefully lower the wings into the hot oil. Fry for 10-12 minutes, turning occasionally, until they’re deep golden brown and crispy on all sides. The oil should bubble steadily around the wings; if it smokes excessively, reduce the heat slightly.
Drain the fried wings on a wire rack set over a paper towel-lined baking sheet. This keeps them crispy by allowing air to circulate, preventing steam from making the skin soggy.
Step 2: Prepare the Garlic and Aromatics
While the wings fry, mince the 2 cloves garlic cloves finely. This ensures the garlic distributes evenly in the dip and doesn’t overpower any single bite. Garlic burns easily, so having it ready to go prevents any frantic chopping later.
In a mixing bowl, combine the 0.75 cup mayonnaise, 0.5 cup sour cream, and 0.25 cup buttermilk. Whisk until the mixture is smooth and fully blended. The buttermilk adds a subtle tang that complements the boldness of the blue cheese beautifully.
Step 3: Build the Blue Cheese Dip Base
To the mayonnaise mixture, add the 1 cup blue cheese crumbles, 1 tbsp Worcestershire sauce, 1 tbsp lemon juice, 1 tbsp Dijon mustard, 0.5 tsp salt, 0.5 tsp black pepper, and 1 tsp hot sauce. Stir until the blue cheese is mostly incorporated but still slightly chunky—this gives the dip texture and bursts of flavor.
The Worcestershire sauce adds depth, while the lemon juice brightens the richness of the cheese and mayonnaise. Taste the dip and adjust the seasoning if needed, though the blue cheese is already salty, so go easy on additional salt.
Step 4: Finish and Serve the Dip with Wings
Cover the dip and refrigerate for at least 30 minutes to allow the flavors to meld together. This resting time is crucial—it lets the blue cheese soften slightly and the aromatics infuse the mixture thoroughly.
Serve the crispy wings alongside the chilled dip. The contrast of the hot, crunchy wings with the cool, creamy dip is what makes this combination irresistible. For presentation, garnish the dip with a sprinkle of reserved blue cheese crumbles and a drizzle of hot sauce if desired.
Pro Tips For Making Blue Cheese Recipe For Wings
- Double Fry Wings: Fry the wings once at 325°F for 10 minutes, then again at 375°F for 5-6 minutes for extra crispiness. I learned this the hard way—single frying leaves them soggy under the sauce.
- Chill the Blue Cheese: Pop the blue cheese crumbles in the freezer for 15 minutes before mixing into the dressing. Sounds weird, but it keeps the chunks intact instead of turning the whole thing into a gray paste.
- Skip Boiling Dressing: Resist the urge to heat the blue cheese dressing—it’ll separate and get greasy. Just whisk the mayo, sour cream, buttermilk, and crumbles together cold.
- Use Buttermilk Wisely: Start with 2 tablespoons of buttermilk in the dressing, then add more by the teaspoon if it’s too thick. My grandmother swore by this, and she was right: too much thins it into a sad, runny mess.
Essential Equipment for This Dish
Deep Fryer Essentials
For restaurant-quality results, I use a Cuisinart Deep Fryer with precise temperature control. It maintains 375°F perfectly for crispy wings. A good fryer should have a 1.5-2 gallon capacity to handle 2 lb of wings without overcrowding.
Thermometer Precision
A candy thermometer clips to your pot and ensures oil stays at 375°F. I recommend Taylor Precision’s model for accuracy. Without one, you risk burning or undercooking. 🌡️
Mixing Bowls
A stainless steel mixing bowl set is perfect for combining ingredients. I use 1.5 quart for the dip—big enough to whisk without spills. Look for bowls with non-slip bottoms for stability while mixing.
Whisk for Smoothness
A balloon whisk incorporates air into the dip for that perfect creamy texture. I prefer OXO’s 11-inch model. The curved handle makes it comfortable to use, even with thick mixtures.
Wire Rack for Draining
Place fried wings on a wire rack over a baking sheet. This setup lets air circulate, keeping wings crispy. A 12×17 inch rack handles 2 lb easily. I use Wilton’s cooling racks for durability.
Quality Knife
A sharp 8-inch chef’s knife makes quick work of garlic and herbs. I trust Wüsthof for precision. A good knife minimizes prep time and reduces risk of injury from struggling with dull blades.
Nutrition Facts
Frequently Asked Questions
Can I bake the wings instead of frying?
Yes! Toss wings with 1 tbsp oil and bake at 425°F for 45-50 minutes, flipping halfway. They won’t be as crispy as fried but still delicious.
What if I don’t like chunky dip?
Blend the sauce with an immersion blender for a smooth texture. Add a splash of buttermilk if it’s too thick. The flavor will be just as bold!
Can I make the dip ahead of time?
Prepare it up to 2 days in advance and store in an airtight container in the fridge. Stir before serving.

- BBQ Sausage Recipe Oven: Smoky Depth Without the Grill - September 28, 2026
- BBQ Chicken Bowl Recipe Rice: Smoky Sweetness Over Fluffy Grains - September 28, 2026
- Beef Cutlet Recipe Ideas: Crispy Breaded Patties With Bold Seasonings - September 28, 2026