
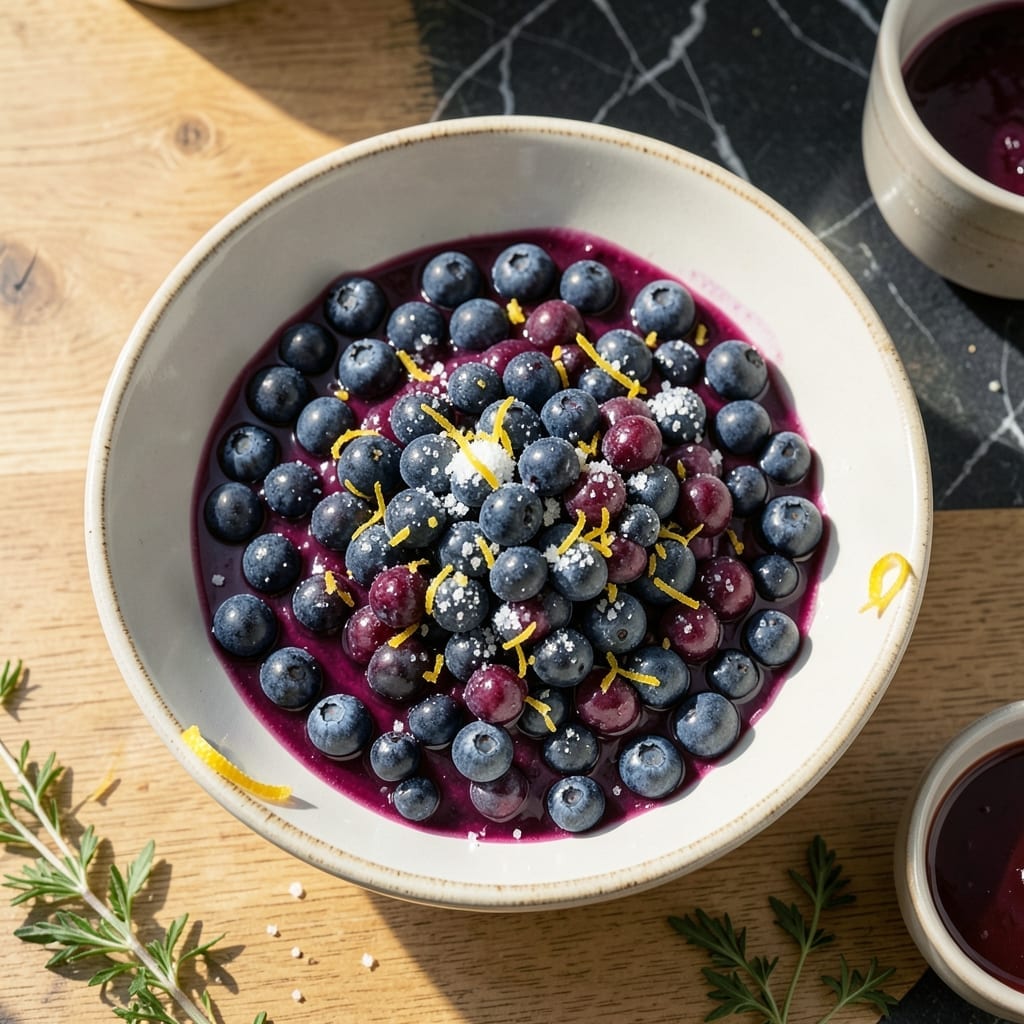
I developed this foolproof blueberry pie filling to solve the age-old problem of runny desserts. The secret lies in a precise ratio of fruit to thickener, creating a luscious, spreadable consistency every time.
This method requires just 5 ingredients and 15 minutes of active cooking. The blueberries break down naturally while the thickener works its magic, eliminating the need for constant stirring or special equipment.
What you get is a vibrant, glossy filling that holds its shape when sliced yet remains silky smooth. It works beautifully in pies, as a topping for ice cream, or even straight from the jar.
Make a double batch and store for up to two weeks in the refrigerator. The flavor only improves with time.
Ingredients for Blueberry Pie Filling Recipe Easy
Five simple ingredients transform into vibrant, glossy pie filling with perfect consistency every time.
| Ingredient | Amount | Notes |
|---|---|---|
| Fresh Blueberries 🫐 | 6 cups | Rinsed and drained thoroughly |
| Granulated Sugar 🍚 | ¾ cup | Adjust to taste preference |
| Cornstarch 🌾 | ¼ cup | For thickening consistency |
| Lemon Juice 🍋 | 2 tbsp | Freshly squeezed preferred |
| Lemon Zest 🍋 | 1 tsp | Finely grated for brightness |
Blueberries are the foundation, so use the freshest you can find. Farmer’s markets or Costco often have peak-season berries at better prices. Look for plump, deep blue fruit with no signs of mold or excessive moisture. The sugar enhances natural sweetness—organic cane sugar works beautifully if you prefer a less refined option.
No cornstarch? Arrowroot powder at the same ratio gives similar results. For a lower-sugar version, half the amount of sugar with a splash of maple syrup works well. Lemon juice is non-negotiable—it brightens the filling and balances sweetness. Out of fresh lemons? Bottled lemon juice in a pinch, but fresh is always better.
This keeps in the fridge for up to 2 weeks in an airtight container. For longer storage, freeze in 1-cup portions for up to 6 months. Thaw overnight before using—flavor deepens with time.
Why You’ll Love This Recipe
- One-Pot Wonder: I just dump everything in a saucepan and stir—no fancy techniques, just blueberries, sugar, and cornstarch doing their thing.
- Bright and Tangy: The lemon zest and juice cut through the sweetness, making every bite of that thick, jammy filling pop.
- Endless Uses: I’ve spooned this over ice cream, swirled it into yogurt, and even stuffed it in pastries. Honestly, it’s my secret weapon.
Step-by-Step Instructions for Blueberry Pie Filling
This method delivers consistently thick, glossy filling with minimal effort and maximum flavor.
Step 1: Prepare the Fresh Blueberries
Begin by thoroughly rinsing the 6 cups Fresh Blueberries under cold water to remove any debris. Gently pat them dry with clean kitchen towels or paper towels. This step is crucial as excess moisture can dilute the filling and affect thickening.
I recommend using a salad spinner for efficient drying. Once dried, pick through the berries to remove any stems or underripe pieces. Your goal is to have uniform, plump berries that will break down evenly during cooking.
Step 2: Create the Thickening Mixture
In a large bowl, whisk together the 0.75 cup Granulated Sugar and 0.25 cup Cornstarch until completely combined. This ensures even distribution of the thickening agent throughout the filling.
The cornstarch will create that signature jammy consistency we’re after. If you notice any lumps in your mixture, press them through a fine-mesh sieve to achieve a smooth texture before proceeding.
Step 3: Combine and Cook the Filling
Transfer the prepared Fresh Blueberries to a large saucepan. Add the sugar-cornstarch mixture, 2 tbsp Lemon Juice, and 1 tsp Lemon Zest. Stir gently to coat the berries evenly, being careful not to crush them at this stage.
Place the saucepan over medium-high heat and bring to a gentle boil, stirring frequently. Once boiling, reduce heat to medium and continue cooking for 8-10 minutes, stirring constantly. You’ll notice the mixture begin to thicken and the berries start to burst.
The filling is ready when it reaches a consistency that coats the back of a spoon and leaves a clear path when you draw your finger through it on the spoon. This visual test is more reliable than time alone.
Step 4: Cool and Thicken Completely
Remove the saucepan from heat and let the filling cool at room temperature for 30 minutes. During this time, it will continue to thicken as it cools. Resist the urge to stir it during this period, as this can break down the thickening structure.
After the initial cooling, transfer the filling to the refrigerator to chill completely, about 2 hours. The filling will become even thicker and develop that characteristic glossy appearance we associate with perfect pie filling.
Once fully cooled, your filling will hold its shape when spooned but still have a slightly fluid quality that makes it perfect for pies, pastries, or even as a topping for ice cream.
Pro Tips For Making Blueberry Pie Filling Recipe Easy
- Pre-cook the Berries: Toss the blueberries with a bit of sugar and lemon juice, then let them sit for 10 minutes before cooking. This draws out juices early so the cornstarch can thicken the filling properly.
- Use a Heavy Pot: A thick-bottomed saucepan prevents scorching—blueberry sugars burn fast over direct heat. I learned this the hard way after ruining two batches.
- Don’t Over-Stir: Stir just enough to mix once the cornstarch is added, then leave it be until it starts to bubble. Over-stirring breaks down the berries and thins the filling.
- Zest First, Juice Later: Grate the lemon zest before cutting and juicing—it’s easier and you’ll get more flavor. Sounds weird, but it works.
Make-Ahead Tips for This Dish
Prep Ahead Strategy
You can prep all ingredients 1 day in advance—rinse, dry, and store blueberries in the fridge, measure sugar and cornstarch into separate containers. This cuts active cooking time to just 15 minutes when you’re ready.
Double Batch Magic
I always make 2 batches at once since it freezes beautifully. Use a large stockpot to accommodate the volume, and divide into 2-cup portions for easy storage. This saves time for future pies or last-minute desserts. 💡
Label containers with the date—frozen filling stays fresh for up to 6 months.
Refrigerator Storage
Store cooled filling in airtight glass jars for up to 2 weeks. The flavors actually deepen over time, making it taste even better after a few days.
Thawing Method
For frozen filling, transfer to the fridge 24 hours before use. To speed up the process, place the sealed container in a bowl of cold water for 2-3 hours, changing the water every 30 minutes.
Last-Minute Adjustments
If your filling seems too thick after thawing, stir in 1-2 tbsp water and heat gently. If too thin, simmer for 3-5 minutes with an extra 1 tsp cornstarch mixed with water. ✨
Nutrition Facts
Frequently Asked Questions
Can I use frozen blueberries instead of fresh?
Yes, frozen works perfectly! Thaw and drain them first to remove excess liquid, then proceed as directed. The texture may be slightly softer, but the flavor remains excellent.
How do I fix filling that’s too runny?
Simmer it for 2-3 minutes longer with an extra 1 tsp cornstarch mixed with water. Stir constantly until it thickens to your desired consistency.
What can I substitute for cornstarch?
Use the same amount of arrowroot powder or instant tapioca. For a lower-carb option, try 1 tbsp chia seeds soaked in water for 10 minutes.
How long does homemade filling last?
It stays fresh in the fridge for up to 2 weeks in an airtight container. For longer storage, freeze for up to 6 months.

- BBQ Sausage Recipe Oven: Smoky Depth Without the Grill - September 28, 2026
- BBQ Chicken Bowl Recipe Rice: Smoky Sweetness Over Fluffy Grains - September 28, 2026
- Beef Cutlet Recipe Ideas: Crispy Breaded Patties With Bold Seasonings - September 28, 2026