
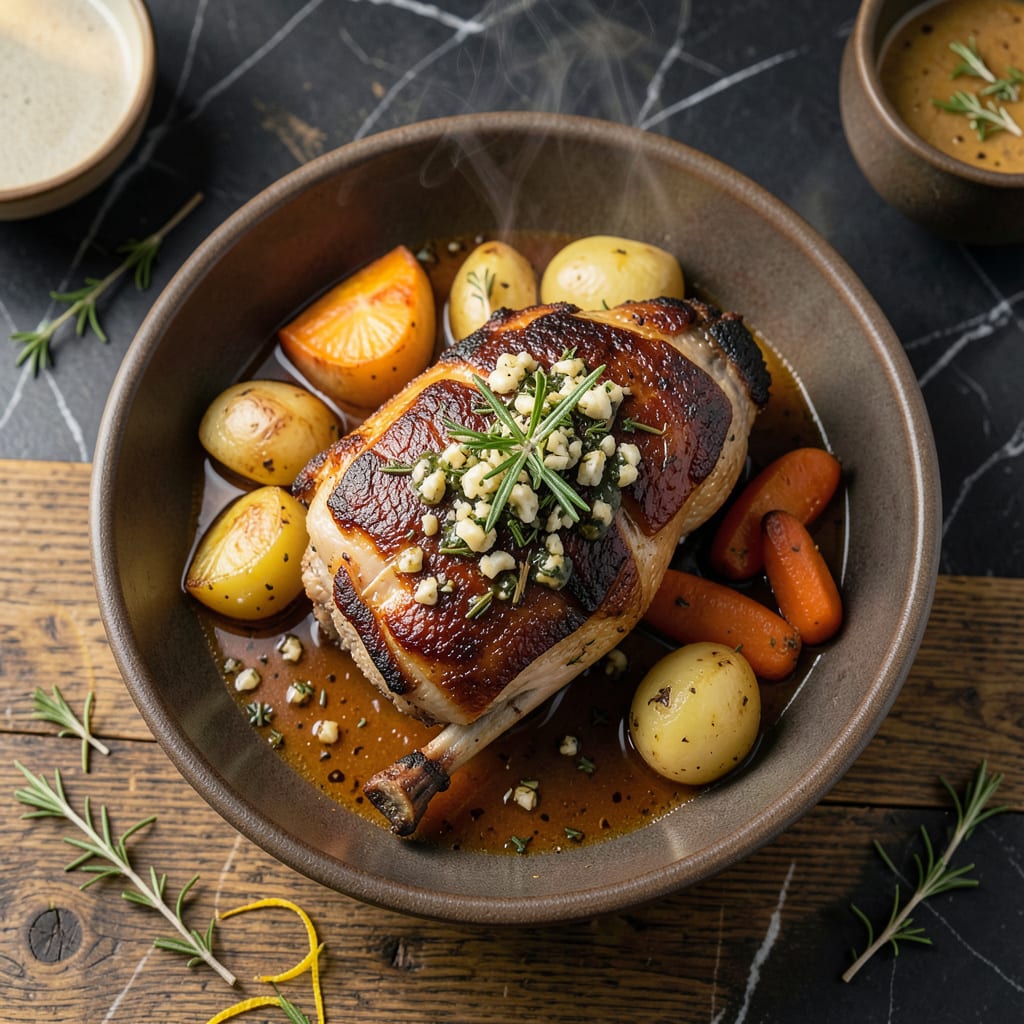
Slow-roasting bone-in pork transforms tough cuts into meltingly tender meat with rich, concentrated flavor. This method ensures juicy results every time.
An herbed crust adds aromatic depth while the bone enhances moisture and taste. The process is straightforward yet delivers restaurant-quality succulence at home.
Ingredients for Bone in Pork
Quality pork shoulder and aromatic herbs create restaurant-level succulence at home with minimal effort.
| Ingredient | Amount | Notes |
|---|---|---|
| Bone-In Pork Shoulder Roast 🥩 | 3 lb | Skin-on for crispy finish |
| Kosher Salt 🧂 | 2 tbsp | Diamond Crystal preferred |
| Freshly Ground Black Pepper 🌶️ | 1 tbsp | Coarse grind recommended |
| Garlic Cloves 🧄 | 6 cloves | Smashed, peeled |
| Fresh Rosemary Sprigs 🌿 | 4 whole | Leaves stripped, stems discarded |
| Fresh Thyme Sprigs 🍃 | 4 whole | Leaves stripped, stems discarded |
| Olive Oil 🫒 | ¼ cup | Extra-virgin for herb crust |
| Dijon Mustard 🟡 | 2 tbsp | Smooth, not grainy |
| Honey 🍯 | 1 tbsp | For glaze balance |
| Dry White Wine 🍷 | ½ cup | Sauvignon Blanc recommended |
| Chicken Stock 🥣 | ½ cup | Low-sodium preferred |
| Yellow Onion 🧅 | 1 whole | Medium size, quartered |
| Carrots 🥕 | 2 whole | Peeled, cut into chunks |
| Celery Stalks 🌿 | 2 whole | Cut into large pieces |
The pork shoulder cut is critical for this preparation. Bone-in, skin-on roasts yield the most flavorful results, with the fat cap rendering down during the long cook. Professional kitchens source from Snake River Farms or Heritage Foods for premium quality. Look for cuts with good marbling—at least 20% fat content ensures moisture retention. Most well-stocked supermarkets carry suitable roasts in the 3-4 lb range.
For the herb crust, fresh rosemary and thyme are non-negotiable for optimal aroma. In a pinch, dried herbs at one-third the quantity may be substituted, though fresh provides superior depth. The white wine adds acidity to balance the richness—any dry white works. If avoiding alcohol, use additional chicken stock with 1 tbsp apple cider vinegar per cup. The honey can be replaced with maple syrup for a different glaze profile.
Store raw pork in the coldest part of your refrigerator, ideally on a tray to catch drips. Consume within 2 days of purchase or freeze for up to 6 months. Leftovers keep well for 4-5 days and actually improve in flavor as the herbs continue to infuse the meat.
Why You’ll Love This Recipe
- Minimal Effort: I rub the pork with salt, pepper, garlic, and rosemary, then let the oven do the rest.
- Fallback Flavor: That bone-in cut with rosemary and garlic? Ridiculously good every single time.
- Feeds Everyone: One roast, one pan, and suddenly I’ve got a crowd-pleaser for Sunday supper or meal prep.
- Leftovers Win: Honestly, the next-day sandwiches with the juicy pork might be even better than the first meal.
Step-by-Step Instructions for Bone In Pork
This method ensures tender meat with a crisp, herbaceous crust every time.
Step 1: Prepare the Herb Crust and Score the Pork
In a small bowl, combine the 2 tbsp Kosher Salt, 1 tbsp Freshly Ground Black Pepper, stripped leaves from the 4 whole Fresh Rosemary Sprigs and 4 whole Fresh Thyme Sprigs, 0.25 cup Olive Oil, 2 tbsp Dijon Mustard, and 1 tbsp Honey. Stir until it forms a thick paste.
Pat the 3 lb Bone-In Pork Shoulder Roast dry with paper towels, then score the skin in a crosshatch pattern. This allows the herb mixture to penetrate deeply and creates more surface area for crisping. Rub the paste all over the pork, working it into every crevice and scored line.
Step 2: Sear and Build the Aromatic Base
Preheat your oven to 325°F. In a large Dutch oven or roasting pan, heat a small amount of oil over medium-high heat. Sear the pork on all sides until the skin is deep golden brown—this should take 3-4 minutes per side.
Remove the pork and set it aside. In the same pan, add the 1 whole Yellow Onion (quartered), 2 whole Carrots (cut into chunks), and 2 whole Celery Stalks (cut into large pieces). Sauté for 4-5 minutes until the vegetables begin to soften and develop color.
Step 3: Deglaze and Begin the Slow Roast
Pour the 0.5 cup Dry White Wine into the pan, scraping up any browned bits from the bottom. Let it simmer for 2 minutes to reduce slightly. Add the 0.5 cup Chicken Stock and the 6 cloves Garlic Cloves (smashed and peeled).
Return the pork to the pan, skin-side up. The liquid should come about halfway up the pork. If needed, add a bit more chicken stock to reach this level. Cover the pan tightly with a lid or foil.
Step 4: Slow-Roast to Perfection
Transfer the pan to the preheated oven and roast for 2.5 to 3 hours. Baste the pork with the pan juices every 45 minutes to ensure the skin stays moist and develops an even crust. The pork is done when the internal temperature reaches 195°F and the meat pulls apart easily with a fork.
During the last 30 minutes of cooking, remove the lid to allow the skin to crisp. Watch closely to prevent over-browning—if the skin darkens too quickly, loosely tent the pan with foil.
Step 5: Rest and Serve
Remove the pork from the oven and transfer it to a cutting board. Tent it loosely with foil and let it rest for 20 minutes. This allows the juices to redistribute, ensuring moist, flavorful meat.
Skimming excess fat from the pan juices, serve the pork with the vegetables and reduced liquid spooned over the top. The skin should be crackling and deep amber, while the meat inside remains succulent and tender.
Pro Tips For Making Bone In Pork
- Score the Fat: Cut 1/4-inch deep slits in the fat cap before seasoning—this lets the salt, garlic, and rosemary penetrate deeper into the meat.
- Start High, Finish Low: Sear the pork shoulder at 450°F for 20 minutes to crisp the skin, then drop to 325°F for the remaining cook time.
- Don’t Trim the Fat: I learned this the hard way—leaving that fat cap intact keeps the meat moist during long roasting, and it renders down beautifully.
- Rest Under Foil: After pulling it from the oven, tent it loosely with foil and let it rest for at least 15 minutes—this guarantees the juices redistribute instead of pooling on the cutting board.
Make-Ahead Tips for bone in pork
Overnight Prep
I always prepare the herb crust the night before cooking. Mix 2 tbsp Kosher Salt, 1 tbsp black pepper, ¼ cup olive oil, 2 tbsp Dijon mustard, and 1 tbsp honey in a bowl. The flavors meld beautifully overnight in the fridge. 💡
Score and Season
Score the pork skin the evening before and rub in half the herb mixture. Store uncovered in the fridge to dry the skin slightly—this creates the perfect base for a crispy crust the next day. Cover loosely with plastic wrap.
Vegetable Prep
Chop the yellow onion, carrots, and celery the night before and store in a sealed container. This saves 15 minutes on cooking day. Keep the 6 garlic cloves whole until ready to smash.
Wine and Stock
Measure out the ½ cup dry white wine and ½ cup chicken stock in advance. I use Sauvignon Blanc for its bright acidity. Store in a pitcher in the fridge so they’re ready to deglaze immediately.
Morning Of Tips
Remove the pork from the fridge 1 hour before cooking to bring it to room temperature. This ensures even cooking. I also take this time to preheat my Dutch oven on the stovetop.
Make-Ahead Advantage
The flavors deepen significantly when the herb crust sits on the pork overnight. I notice the meat absorbs the aromatic notes more thoroughly, resulting in a more complex taste profile. 🌟
Nutrition Facts
Frequently Asked Questions
What cooking method works best?
Slow-roasting at 325°F for 2.5-3 hours yields the most tender, flavorful results. This low-and-slow approach ensures the connective tissue breaks down completely while keeping the meat juicy.
Can I use a different cut?
Pork shoulder is ideal, but bone-in rib roast works too. Avoid lean cuts like tenderloin—they dry out during long cooking. The bone adds richness and moisture.
How do I know when it’s done?
Use a meat thermometer: 195°F internal temp means it’s ready. The meat should pull apart easily with a fork. Don’t rely on color alone.
Should I cover it while cooking?
Cover for the first 2 hours, then uncover to crisp the skin. This prevents drying while allowing the crust to develop. Baste every 45 minutes.

- BBQ Sausage Recipe Oven: Smoky Depth Without the Grill - September 28, 2026
- BBQ Chicken Bowl Recipe Rice: Smoky Sweetness Over Fluffy Grains - September 28, 2026
- Beef Cutlet Recipe Ideas: Crispy Breaded Patties With Bold Seasonings - September 28, 2026