
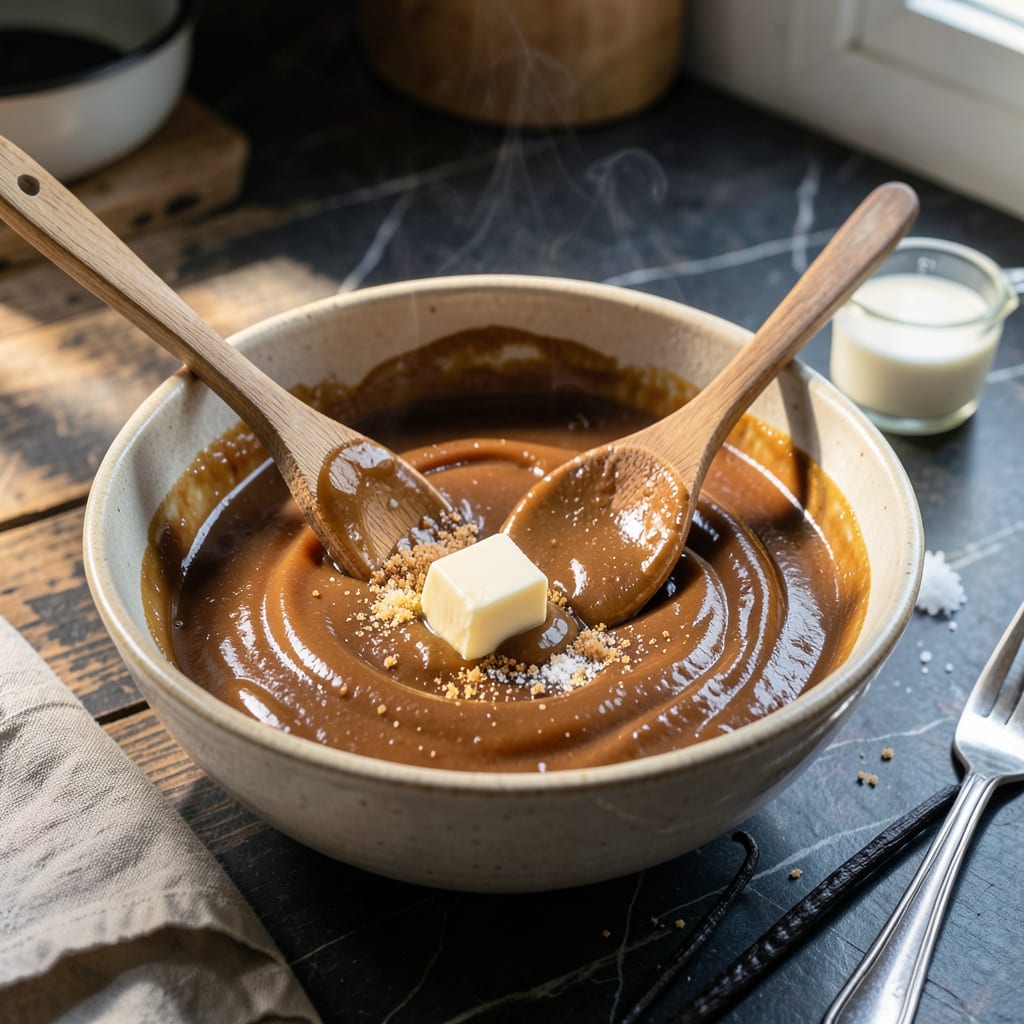
This homemade caramel icing brings professional-quality results to your kitchen with just a few pantry staples. The evaporated milk creates an exceptionally smooth texture that’s impossible to achieve with regular milk.
You’ll love how this glaze transforms cakes and cupcakes with its rich, buttery flavor and perfect consistency. It spreads effortlessly and sets beautifully, making it ideal for layer cakes or simple sheet cakes.
Ingredients for Caramel Icing Recipe Evaporated Milk
Seven simple ingredients create this luscious homemade caramel glaze with professional results.
| Ingredient | Amount | Notes |
|---|---|---|
| Granulated Sugar 🍚 | 2 cups | Fine white sugar preferred |
| Evaporated Milk 🥛 | 1 can | 12 oz can, undiluted |
| Unsalted Butter 🧈 | 1 cup | Cut into small cubes |
| Light Brown Sugar 🟤 | 1 cup | Packed firmly for richness |
| Vanilla Extract 🌿 | 2 tsp | Pure extract for best flavor |
| Salt 🧂 | ½ tsp | Balances sweetness perfectly |
| Heavy Cream 🥛 | ¼ cup | Optional for thinner consistency |
The evaporated milk is non-negotiable here—Carnation brand is widely available at any grocery store and gives that ultra-smooth texture. Use full-fat Pet or Borden evaporated milk if you can find it (the good stuff, not the low-fat version). The butter should be high-quality like Land O’Lakes or Plugrá, and make sure it’s unsalted so you control the seasoning yourself.
No evaporated milk? Sweetened condensed milk in a pinch, but reduce sugar by half. Brown sugar can be swapped with coconut sugar, though the flavor shifts slightly. For a dairy-free version, coconut milk at full-fat replaces the evaporated milk, but the texture won’t be quite the same. The vanilla must be pure—imitation vanilla tastes harsh in caramel.
This icing sets up fast at room temperature. Store in an airtight container for up to 1 week at room temp, or 1 month refrigerated. If it thickens too much, warm slightly and stir in a splash of cream to loosen.
Why You’ll Love This Recipe
- Five Ingredient Magic: I love that this comes together with just sugar, evaporated milk, butter, brown sugar, and vanilla—nothing complicated.
- Rich Caramel Flavor: The combination of brown and granulated sugar with evaporated milk gives it that deep, buttery caramel taste I crave.
- Crowd Pleaser: Honestly, it’s my go-to for birthdays, potlucks, or even just a weeknight dessert to make ordinary cake extraordinary.
- Budget Friendly: Evaporated milk is a pantry staple, and this recipe stretches ingredients I already have on hand without skimp on flavor.
Step-by-Step Instructions for Caramel Icing with Evaporated Milk
This proven method delivers a silky, spreadable glaze with the perfect caramel depth.
Step 1: Melt and Combine the Sugars with Butter
In a heavy-bottomed saucepan, melt the 1 cup Unsalted Butter over medium heat. I always use a light-colored pan so I can monitor the color change as the caramel develops. Once melted, stir in the 2 cups Granulated Sugar and 1 cup Light Brown Sugar.
Cook while stirring constantly with a wooden spoon or silicone spatula. The mixture will start to bubble—this is normal. Continue cooking for 4-5 minutes until the sugars fully dissolve and the mixture turns a deep amber color. Watch for small bubbles forming at the edges before moving to the next step.
Step 2: Temper the Caramel with Evaporated Milk
Carefully pour in the 1 can Evaporated Milk in a slow, steady stream while stirring continuously. Real talk: this will bubble vigorously and may splatter, so keep your face and hands clear of the pan. The mixture will seize up initially—this is the sugar hardening from the temperature drop.
Keep stirring over medium-low heat until the caramel smooths out, about 3-4 minutes. You’ll notice the mixture transition from a thick, grainy paste to a glossy, liquid caramel. This tempering step prevents the sugars from recrystallizing, ensuring a smooth final texture.
Step 3: Simmer to the Perfect Consistency
Once smooth, stop stirring and let the caramel simmer undisturbed for 5-7 minutes. This allows it to thicken to the right consistency for icing. Use a candy thermometer if you have one—you’re aiming for 235-240°F (soft-ball stage).
If you don’t have a thermometer, test the consistency by dropping a small amount into a bowl of ice water. It should form a soft, pliable ball that flattens slightly when removed. I’ve found that 7 minutes is usually the sweet spot for this recipe.
Step 4: Finish with Vanilla, Salt, and Cream
Remove the pan from heat and immediately stir in the 2 tsp Vanilla Extract and 0.5 tsp Salt. The vanilla deepens the caramel flavor, while the salt enhances the sweetness. Let it sit for 1 minute to mellow slightly.
For a thinner, more pourable glaze, stir in the 0.25 cup Heavy Cream at this stage. This is optional but highly recommended for drizzling over cakes or pastries. The icing will lighten in color slightly and become smoother. Let it cool for 10-15 minutes until it reaches your desired spreading consistency.
Step 5: Cool and Use
Transfer the caramel icing to a heatproof bowl and let it cool to room temperature, stirring occasionally to release heat evenly. As it cools, it will thicken further—this is normal. For the best texture, use it while still slightly warm but spreadable.
If it thickens too much, gently reheat it in the microwave in 10-second increments, stirring between each, until it loosens. This icing keeps well in an airtight container at room temperature for up to 3 days, but I promise it won’t last that long.
Pro Tips For Making Caramel Icing Recipe Evaporated Milk
- Stir Constantly: I learned this the hard way—caramel burns fast, so keep that spoon moving once the sugar and evaporated milk hit the heat. Even 30 seconds of neglect can turn golden perfection into bitter regret.
- Use Room-Temp Butter: After burning three batches, I finally figured out cold butter seizes up in the hot caramel. Let it sit out for 20 minutes first so it melts in smooth, not as stubborn clumps.
- Skip Low-Fat Milk: Sounds weird, but it works: full-fat evaporated milk is non-negotiable here. The lower-fat versions thin out the icing and mute that rich, sticky depth you’re after.
- Add Vanilla Off Heat: My grandmother swore by this, and she was right: stir in the vanilla extract only after removing the pan from the burner. High heat dulls its flavor, and nobody wants flat-tasting caramel.
Best Sauces and Condiments for caramel icing recipe evaporated milk
Drizzling Sauces
For a decadent touch, warm this caramel icing slightly and drizzle over vanilla ice cream or bread pudding. The contrast of warm caramel and cold dessert is irresistible. I often add a pinch of flaky sea salt on top for that sweet-salty balance. 💛
Cake Pairings
This icing pairs perfectly with spice cake or carrot cake, where its rich sweetness complements the warm spices. Spread a thin layer between cake layers for a professional bakery-style finish. For cupcakes, pipe it on while still warm for a glossy, smooth top.
Fruit Complements
Try serving this glaze with sliced apples or pears for dipping—the natural acidity cuts through the sweetness beautifully. I love arranging apple slices on a platter with a small bowl of warmed caramel icing in the center for easy dipping.
Beverage Matches
A cold glass of milk or a strong cup of black coffee balances the richness of this caramel icing. The bitterness of coffee enhances the caramel’s depth, while milk provides a creamy contrast. For a special treat, drizzle it over affogato (vanilla gelato with espresso).
Creative Uses
Use this as a filling for sandwich cookies or as a glaze for cinnamon rolls. It also makes an incredible topping for cheesecake—just warm it slightly before pouring. I’ve even used it as a dip for pretzel bites at parties.
Storage Tip
If storing leftover icing, transfer to an airtight container once completely cooled. Reheat gently in the microwave in 10-second bursts, stirring between each, until it reaches your desired consistency. Adding a splash of heavy cream can restore its smooth texture if needed. 🔥
Nutrition Facts
Frequently Asked Questions
Why use evaporated milk instead of regular milk?
Evaporated milk has less water content, creating a richer, creamier texture. It also caramelizes better, giving your icing a deeper flavor and smoother consistency.
Can I make this icing ahead of time?
Store it in an airtight container at room temperature for up to 3 days. Reheat gently in 10-second microwave bursts, stirring between each, until spreadable.
What if my caramel seizes up when adding milk?
This is normal—the sugar hardens from the temperature drop. Keep stirring over medium-low heat for 3-4 minutes until it smooths out into a glossy liquid.
How do I adjust the thickness?
For a thinner glaze, stir in 0.25 cup heavy cream at the end. For thicker icing, let it cool longer or simmer for an extra 1-2 minutes.

- BBQ Sausage Recipe Oven: Smoky Depth Without the Grill - September 28, 2026
- BBQ Chicken Bowl Recipe Rice: Smoky Sweetness Over Fluffy Grains - September 28, 2026
- Beef Cutlet Recipe Ideas: Crispy Breaded Patties With Bold Seasonings - September 28, 2026