
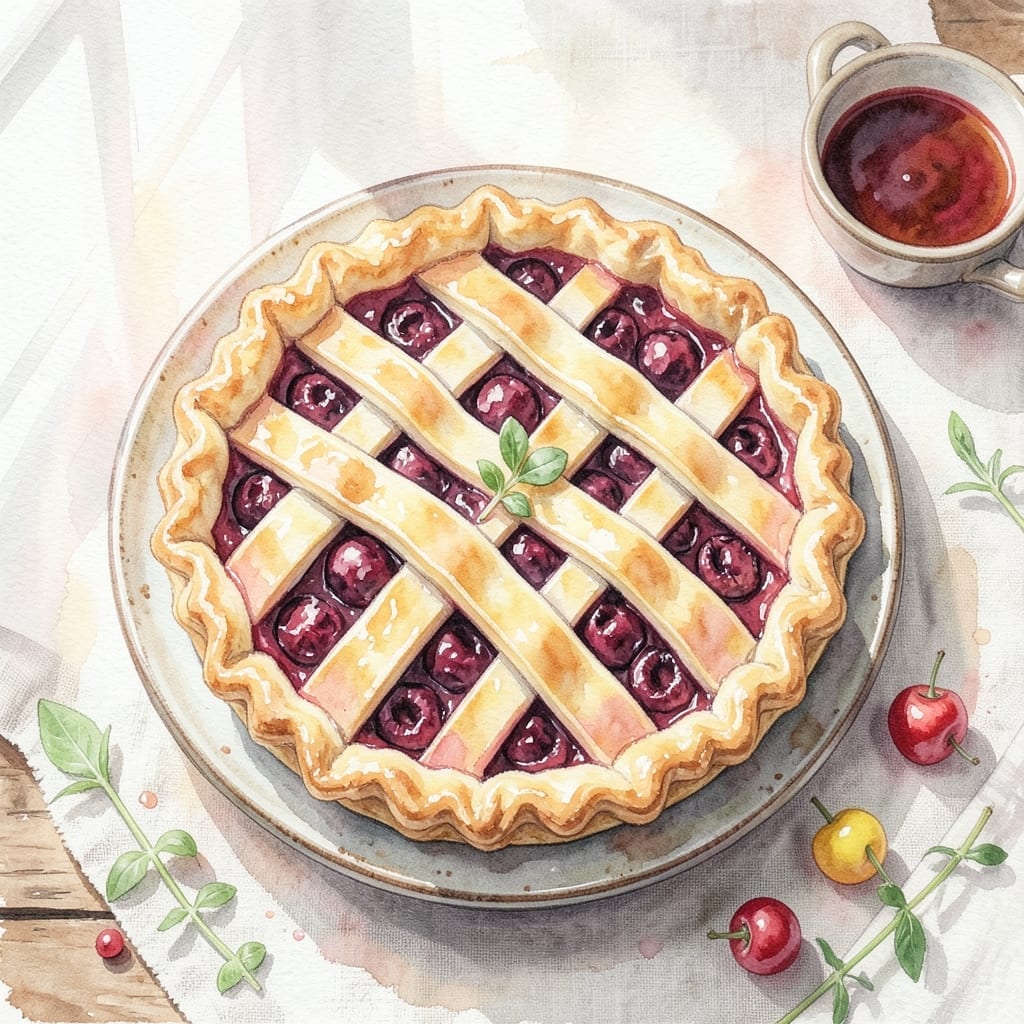
There’s nothing quite like a warm slice of cherry pie with a flaky, golden crust, and you can achieve homemade quality with ease using canned filling. This recipe simplifies the process without sacrificing taste or texture.
The key lies in the crust—handling the dough minimally and chilling it properly ensures those coveted flaky layers. A simple egg wash before baking adds a professional sheen that makes it look as good as it tastes.
By the time it comes out of the oven, you’ll have a pie with a crisp, buttery crust and a rich, fruity filling that’s both comforting and impressive. The aroma alone will have everyone gathering around the kitchen.
Perfect for holidays, potlucks, or a cozy weekend treat. Here’s how to make it right.
Ingredients for Cherry Pie Recipe Using Cherry Pie Filling
Nine essential ingredients create this impressive dessert with store-bought filling shortcut.
| Ingredient | Amount | Notes |
|---|---|---|
| All-Purpose Flour 🌾 | 2 ½ cups | Plus extra for dusting surface |
| Granulated Sugar 🍚 | 1 tbsp | For crust sweetness balance |
| Salt 🧂 | 1 tsp | Fine grain for even distribution |
| Unsalted Butter 🧈 | 1 cup | Cold, cubed for flakiness |
| Ice Water 💧 | ⅓ cup | Plus 1-2 additional tbsp as needed |
| Cherry Pie Filling 🍒 | 2 cans | 21 oz size each, well-drained |
| Large Egg 🥚 | 1 whole | For egg wash finish |
| Granulated Sugar 🍚 | 1 tbsp | For sprinkling on crust |
| Vanilla Extract 🌿 | 1 tsp | Pure extract for best flavor |
| Lemon Juice 🍋 | 1 tsp | Freshly squeezed for brightness |
The butter is non-negotiable for that flaky texture. Use a high-fat European-style butter like Plugrá or Kerrygold if you can find it—it makes a noticeable difference. The flour should be all-purpose, nothing fancy. I always keep a bag of King Arthur on hand for baking. The pie filling? Any brand works, but Lucky Leaf or Comstock are reliable for consistent thickness and fruit quality.
No all-purpose flour? Pastry flour at a 1:1 ratio works, but don’t use bread flour—it’s too high-protein. Out of cherry filling? Blueberry or apple pie filling swaps in perfectly. For a richer flavor, add 1/2 tsp almond extract to the filling. The egg wash can be made with just the yolk for extra shine, or use 2 tbsp milk if you’re out of eggs.
The dough can be made 2 days ahead and refrigerated, or freeze it wrapped tightly for 3 months. Baked pie keeps at room temperature for 2 days or refrigerated for 5 days. Always let it cool completely before slicing for clean pieces.
Why You’ll Love This Recipe
- I’ll be real: this pie disappears at potlucks, picnics, and Sunday suppers alike.
- No-Fuss Crust: Honestly, the flaky butter crust comes together in minutes with just flour, sugar, and ice water—no fancy techniques.
- Sweet-Tart Magic: That first bite of warm cherry filling wrapped in crisp pastry? Ridiculously good.
- Crowd-Pleaser Guaranteed: I’ll be real: this pie disappears at potlucks, picnics, and Sunday suppers alike.
Step-by-Step Instructions for Cherry Pie with Flaky Crust
Achieve bakery-quality results with this methodical approach to a perfect pie.
Step 1: Prepare the Dough
In a large bowl, whisk together the 2.5 cups All-Purpose Flour, 1 tbsp Granulated Sugar, and 1 tsp Salt until evenly combined. The sugar adds subtle sweetness to balance the tart cherries, while the salt enhances all the flavors.
Cut in the 1 cup Unsalted Butter (cold and cubed) using a pastry cutter or your fingers until the mixture resembles coarse crumbs with pea-sized butter pieces visible. I prefer the finger method—it gives me better control over the texture. The key is working quickly to keep the butter cold for maximum flakiness.
Gradually add the 0.33 cup Ice Water, mixing with a fork until the dough just comes together. If it seems too dry, add 1-2 additional tbsp of ice water. The dough should hold when pressed but not be sticky. Overworking develops gluten, which makes the crust tough rather than tender.
Step 2: Chill and Roll the Crust
Divide the dough into two equal portions, flatten into discs, and wrap in plastic. Refrigerate for at least 1 hour (or up to 24 hours). This chilling step is non-negotiable—it relaxes the gluten and solidifies the butter, ensuring a flaky texture.
On a lightly floured surface, roll one disc into a 12-inch circle about ⅛-inch thick. Transfer to a 9-inch pie dish, pressing gently into the bottom and up the sides. Trim the edges, leaving a ½-inch overhang. Repeat with the second disc for the top crust.
Step 3: Prepare the Filling
In a bowl, combine the 2 cans Cherry Pie Filling (well-drained), 1 tsp Vanilla Extract, and 1 tsp Lemon Juice. The vanilla adds depth, while the lemon juice brightens the cherries’ natural sweetness.
Mix gently to avoid breaking up the cherries too much. You want intact fruit pieces in every bite. Let the filling sit for 10 minutes while you finish preparing the crust—this allows the flavors to meld slightly before baking.
Step 4: Assemble and Vent the Pie
Pour the cherry filling into the bottom crust, mounding slightly in the center. Brush the overhang with water, then place the top crust over the filling. Trim and crimp the edges to seal, using a fork or your fingers for a decorative finish.
Cut 4-5 slits in the top crust to allow steam to escape. This prevents the filling from bubbling over and creates an attractive pattern. For extra shine, brush the top with a beaten large egg and sprinkle with the remaining 1 tbsp Granulated Sugar.
Step 5: Bake to Golden Perfection
Preheat the oven to 375°F. Place the pie on a baking sheet to catch any drips and bake for 45-50 minutes. The crust should be deep golden brown and the filling should bubble visibly through the vents.
If the edges brown too quickly, cover them with foil or a pie shield. Let the pie cool for at least 2 hours before slicing—this gives the filling time to set properly. The result will be a flaky, golden crust encasing a thick, glossy cherry filling in every slice.
Pro Tips For Making Cherry Pie Recipe Using Cherry Pie Filling
- Chill the Dough: Pop your pie crust in the fridge for at least 30 minutes before rolling—keeps the butter from melting too fast and guarantees a flakier texture. I learned this the hard way after my first few pies came out tough.
- Drain the Filling: Strain the cherry pie filling in a colander for 10 minutes to remove excess syrup, or you’ll end up with a soggy bottom crust. Sounds tedious, but it actually changes the outcome.
- Vent the Top: Cut 4-5 slits in the top crust or use a lattice design—steam needs to escape, or your pie might burst open in the oven. My grandmother swore by this, and she was right.
- Use Cold Butter: Cut your unsalted butter into small cubes and keep it ice-cold until you mix it with the flour. This is the thing that matters most for a crust that’s crisp, not greasy.
Dietary Considerations for These Flavors
Gluten-Free Option
Swap the all-purpose flour for a 1:1 gluten-free baking blend like King Arthur Measure for Measure. Add ½ tsp xanthan gum if your blend doesn’t include it. The texture will be slightly denser but still flaky and delicious.
Reduced Sugar
Use sugar-free cherry pie filling and reduce the crust sugar to ½ tbsp. The natural sweetness of the cherries will shine through. I find Splenda or monk fruit blends work well for the crust.
Vegan Adaptation
Replace the butter with 1 cup cold vegan butter like Miyoko’s, and use a flax egg (1 tbsp ground flaxseed + 3 tbsp water) for the wash. The crust will be just as tender and golden. 🌱
Nut-Free Note
This recipe is naturally nut-free, but always check your pie filling brand for processing warnings. Lucky Leaf and Comstock are typically safe choices for those with nut allergies.
Lower-Calorie Tweaks
Use light butter or a butter-flavored shortening to cut calories by about 25%. The crust may be slightly less flaky but still crisp. Serve with fresh berries to balance the richness.
Dairy-Free Alternative
Substitute coconut oil (solid, not melted) for the butter in the crust. Chill thoroughly before rolling. The flavor will have a slight coconut note, which pairs nicely with cherries. 💛
Nutrition Facts
Frequently Asked Questions
Can I use a store-bought crust instead?
Yes, a pre-made crust works fine for convenience. Just ensure it’s thawed if frozen and roll it to fit your dish.
How do I prevent a soggy bottom crust?
Sprinkle 1-2 tbsp of breadcrumbs or crushed cookies on the bottom crust before adding the filling. This creates a barrier to absorb excess moisture.
What if my filling is too runny?
Let the pie cool completely for at least 2 hours. If it’s still loose, mix 1 tsp cornstarch with 1 tbsp cold water and stir into the filling before baking.
Can I make this pie ahead of time?
Bake it 1 day ahead and store at room temperature. Reheat in a 300°F oven for 10-15 minutes before serving.

- BBQ Sausage Recipe Oven: Smoky Depth Without the Grill - September 28, 2026
- BBQ Chicken Bowl Recipe Rice: Smoky Sweetness Over Fluffy Grains - September 28, 2026
- Beef Cutlet Recipe Ideas: Crispy Breaded Patties With Bold Seasonings - September 28, 2026