
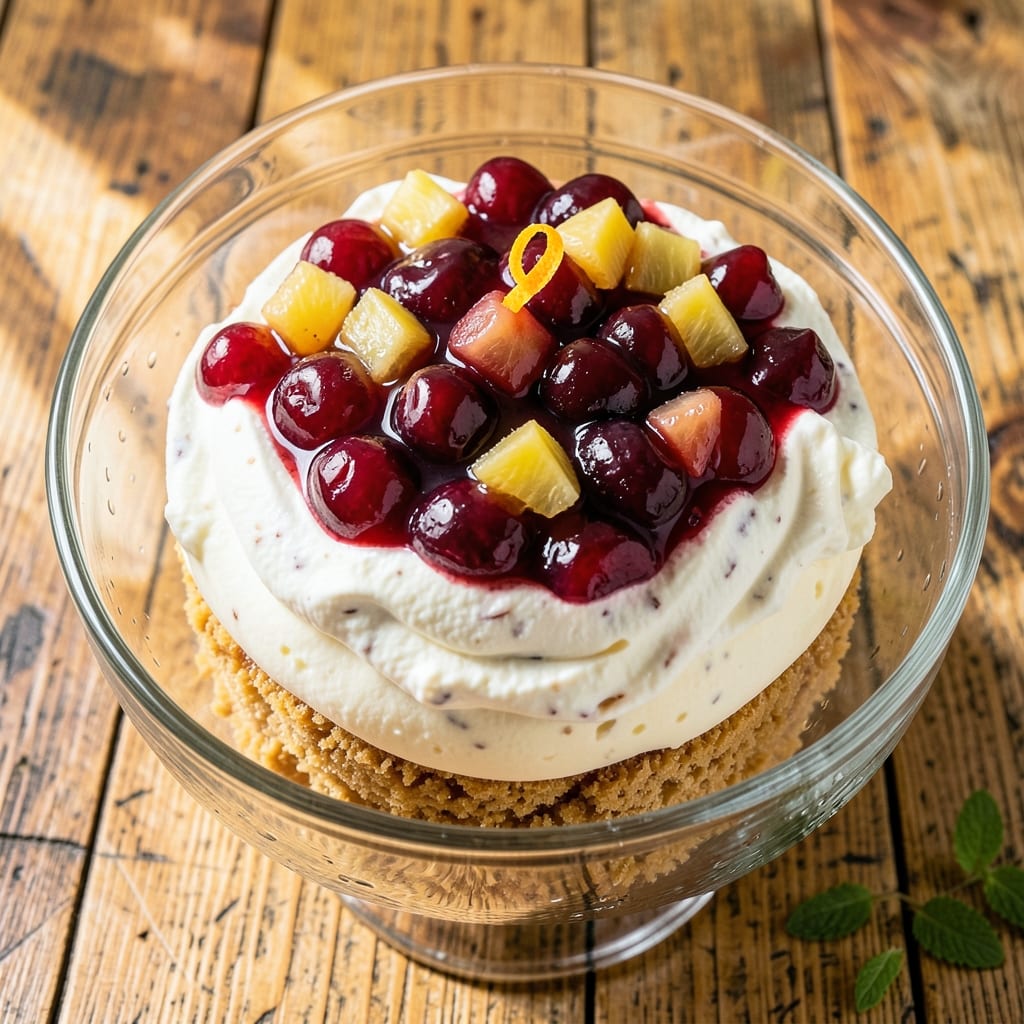
Cherry Yum Yum Recipe With Dream Whip: Retro Dessert with Fluffy Topping

Cherry Yum Yum Recipe With Dream Whip: Retro Dessert with Fluffy Topping

This retro dessert brings back nostalgic flavors with a modern twist. The combination of sweet cherries and light, airy topping creates a perfect balance that’s hard to resist.

The Dream Whip adds a fluffy texture that’s both smooth and satisfying. It’s a simple yet impressive dish that comes together with minimal effort, making it ideal for gatherings or a special treat.

What sets this creation apart is the contrast between the rich cherry layer and the cloud-like Dream Whip topping. Every bite delivers a burst of sweetness followed by a creamy finish.

Serve chilled for the best experience, letting the flavors meld together beautifully.

👨‍🍳
Difficulty
Medium
🌿
Diet
Vegetarian
⏱️
Total Time
30 min
🔥
Calories
Med Cal

Ingredients for Cherry Yum Yum Recipe with Dream Whip

Modern twist on nostalgic flavors with fluffy layers and sweet cherries throughout.

Ingredient Amount Notes
Cherry Pie Filling 🍒 2 cans 21 oz cans, undrained
Crushed Pineapple 🍍 1 can 20 oz can, undrained
Dream Whip 🥛 1 package 3.4 oz, prepared per instructions
Cream Cheese 🧀 8 oz Full-fat, softened to room temperature
Granulated Sugar 🍚 ½ cup For sweetening cream cheese layer
Vanilla Extract 🌿 1 tsp Pure extract for best flavor
Graham Cracker Crumbs 🍪 1 ½ cups For crust base layer
Unsalted Butter 🧈 ½ cup Melted for crust binding
Maraschino Cherries 🍒 ½ cup Chopped, for garnish
Chopped Walnuts 🌰 ½ cup Optional, for topping
Sweetened Condensed Milk 🥛 1 can 14 oz can, for Dream Whip stabilization

The Dream Whip is non-negotiable here—Jell-O brand is the gold standard for that signature retro fluff. Grab it from the baking aisle at Walmart or Kroger. For the pie filling, Comstock or Lucky Leaf work best (avoid the sugar-free versions). The cream cheese needs to be full-fat—Philadelphia is reliable—and make sure it’s truly room temp before mixing (cold cream cheese = lumpy topping).

No Dream Whip? Cool Whip at full volume works in a pinch, but the texture won’t be as light. Swap the graham cracker crust for digestive biscuits if you’re feeling fancy. The pineapple can be drained if you prefer a firmer filling, but keep the juice for maximum nostalgia. For a nut-free version, skip the walnuts or replace with toasted coconut.

Assemble at least 4 hours ahead so the layers set properly. Keeps covered in the fridge for 3-4 days—though the Dream Whip topping is best fresh. Leftovers? Unlikely. But if you’ve got any, they freeze well for up to 1 month (thaw in the fridge overnight).

❤️

Why You’ll Love This Recipe

  • Ready in Minutes: No baking, no fuss—just mix the Dream Whip, cream cheese, and sugar, then fold in the cherry pie filling and pineapple.
  • Sweet-Tart Magic: The tangy pineapple cuts through the rich cream cheese, while the cherry filling adds juicy bursts of flavor.
  • Potluck MVP: I bring this to every gathering, and the pan always comes back empty. It’s a hit with kids and adults alike.
  • Budget-Friendly Feast: A can of pie filling and a box of Dream Whip stretch into a dessert that feeds a crowd without breaking the bank.

Step-by-Step Instructions for Cherry Yum Yum with Dream Whip

This layered dessert comes together in stages, each building on the last for perfect texture.

Step 1: Create the Graham Cracker Crust Base

Combine the 1.5 cups graham cracker crumbs with the 0.5 cup melted unsalted butter in a bowl until evenly moistened. The mixture should resemble wet sand.

Press firmly into the bottom of a 9×13-inch baking dish using a measuring cup or glass to compact it tightly. This creates a stable foundation that won’t crumble when sliced. Chill in the refrigerator while you prepare the next layer.

Step 2: Prepare the Cream Cheese Layer

Beat the 8 oz cream cheese with the 0.5 cup granulated sugar and 1 tsp vanilla extract until smooth and creamy. I find that room temperature cream cheese whips up fluffier without lumps.

Spread this mixture evenly over the chilled crust. The layer should be about ¼-inch thick when properly distributed. This creates a rich, tangy contrast to the sweet fruit layers above.

Step 3: Add the Fruit Layers

Carefully spread both cans of cherry pie filling over the cream cheese layer, ensuring complete coverage. The pie filling should be thick enough that it doesn’t seep into the cream cheese layer.

Next, gently spread the 1 can crushed pineapple (with its juice) over the cherry layer. The pineapple’s natural sweetness and acidity balance the richness of the other components.

Step 4: Prepare and Spread the Dream Whip Topping

Prepare the 1 package Dream Whip according to package instructions, using the 1 can sweetened condensed milk as directed. This creates a stable, fluffy topping that holds its shape when sliced.

Spread the prepared Dream Whip evenly over the pineapple layer. The topping should be at least 1-inch thick to create that signature cloud-like texture. Work quickly but carefully to maintain the air in the whipped topping.

Step 5: Garnish and Chill

Sprinkle the 0.5 cup chopped maraschino cherries and 0.5 cup chopped walnuts evenly over the Dream Whip layer. The cherries add a pop of color and extra cherry flavor, while the walnuts provide a satisfying crunch.

Refrigerate for at least 4 hours or overnight to allow all layers to set completely. This resting time is crucial for clean slices and the development of flavors throughout the dessert.

👨‍🍳

Pro Tips For Making Cherry Yum Yum Recipe With Dream Whip

  • Chill the Dream Whip: Let the prepared Dream Whip sit in the fridge for at least 15 minutes before folding it into the cream cheese mixture—it holds its peaks better and prevents a runny mess.
  • Drain the Pineapple: Press the crushed pineapple in a fine-mesh strainer for 30 seconds to remove excess juice, or your dessert will be watery instead of light and fluffy.
  • Soften the Cream Cheese: Leave the cream cheese out for 1-2 hours until it’s truly room temperature; mixing it cold leaves lumps that no amount of stirring will smooth out.
  • Layer with Juice: Spoon just the cherry pie filling fruit into the dish first, then drizzle the syrup from the can over the top—this keeps the layers distinct and prevents soggy Dream Whip.

Pro Cooking Tips for Perfect Results

Dream Whip Mastery

Always prepare Dream Whip with ice-cold milk and beat for exactly 4 minutes at high speed. I use my KitchenAid stand mixer with the whisk attachment for maximum volume. The sweetened condensed milk stabilizes it beautifully. 💡

Layering Technique

Spread each layer evenly right to the edges—this prevents sagging. Use an offset spatula for the cream cheese layer to get that perfect ¼-inch thickness. Press the graham crust down hard with a measuring cup for a solid base.

Chilling Secrets

Don’t skimp on chilling time—4 hours minimum, overnight is ideal. The layers need this time to set properly. I often make it the night before serving, which actually improves the flavor melding.

Clean Slices

Run your knife under hot water and wipe it clean between each slice. This gives you those perfect, Instagram-worthy squares. The 9×13-inch dish makes 15 servings when cut into 2-inch squares.

Room Temperature Tip

Let the cream cheese sit out for 1-2 hours before mixing. Cold cream cheese creates lumps that are impossible to smooth out. I learned this the hard way my first time making this dessert. 🔥

Pineapple Prep

Use the entire can of crushed pineapple with juice—it adds essential moisture. If you prefer a firmer texture, drain it and reserve ¼ cup juice to mix back in. This keeps the dessert from being too dry.

Nutrition Facts

Servings 4
Amount Per Serving
Calories 480kcal
% Daily Value
Total Fat 28g36%
Saturated Fat 16g80%
Cholesterol 85mg28%
Sodium 320mg14%
Total Carbohydrate 58g21%
Dietary Fiber 2g7%
Sugars 45g
Protein 8g16%
Percent Daily Values are based on a 2,000 calorie diet. Your daily values may be higher or lower depending on your calorie needs.

Frequently Asked Questions

1

Can I make this ahead of time?

Yes! In fact, it’s best made at least 4 hours ahead. The flavors meld beautifully overnight in the fridge. Just cover tightly with plastic wrap to prevent drying.

2

What can I substitute for Dream Whip?

Cool Whip works in a pinch, but the texture won’t be as light. For homemade, whip 2 cups heavy cream with ¼ cup powdered sugar until stiff peaks form.

3

How do I prevent the graham crust from getting soggy?

Press the crust firmly into the pan and chill for 15 minutes before adding layers. This creates a barrier against moisture from the fruit.

4

Can I use fresh cherries instead of pie filling?

Yes, but you’ll need to cook them down first. Simmer 4 cups pitted cherries with ½ cup sugar and 2 tbsp cornstarch until thickened.

★★★★★5.0(1 review)
Allison Carter

Cherry Yum Yum Recipe With Dream Whip: Retro Dessert with Fluffy Topping

Cherry Yum Yum Recipe With Dream Whip: Retro Dessert with Fluffy Topping

This retro dessert brings back nostalgic flavors with a modern twist. The combination of sweet cherries and light, airy topping creates a perfect balance that’s hard to resist.

The Dream Whip adds a fluffy texture that’s both smooth and satisfying. It’s a simple yet impressive dish that comes together with minimal effort, making it ideal for gatherings or a special treat.

What sets this creation apart is the contrast between the rich cherry layer and the cloud-like Dream Whip topping. Every bite delivers a burst of sweetness followed by a creamy finish.

Serve chilled for the best experience, letting the flavors meld together beautifully.

👨‍🍳
Difficulty
Medium
🌿
Diet
Vegetarian
⏱️
Total Time
30 min
🔥
Calories
Med Cal

Ingredients for Cherry Yum Yum Recipe with Dream Whip

Modern twist on nostalgic flavors with fluffy layers and sweet cherries throughout.

Ingredient Amount Notes
Cherry Pie Filling 🍒 2 cans 21 oz cans, undrained
Crushed Pineapple 🍍 1 can 20 oz can, undrained
Dream Whip 🥛 1 package 3.4 oz, prepared per instructions
Cream Cheese 🧀 8 oz Full-fat, softened to room temperature
Granulated Sugar 🍚 ½ cup For sweetening cream cheese layer
Vanilla Extract 🌿 1 tsp Pure extract for best flavor
Graham Cracker Crumbs 🍪 1 ½ cups For crust base layer
Unsalted Butter 🧈 ½ cup Melted for crust binding
Maraschino Cherries 🍒 ½ cup Chopped, for garnish
Chopped Walnuts 🌰 ½ cup Optional, for topping
Sweetened Condensed Milk 🥛 1 can 14 oz can, for Dream Whip stabilization

The Dream Whip is non-negotiable here—Jell-O brand is the gold standard for that signature retro fluff. Grab it from the baking aisle at Walmart or Kroger. For the pie filling, Comstock or Lucky Leaf work best (avoid the sugar-free versions). The cream cheese needs to be full-fat—Philadelphia is reliable—and make sure it’s truly room temp before mixing (cold cream cheese = lumpy topping).

No Dream Whip? Cool Whip at full volume works in a pinch, but the texture won’t be as light. Swap the graham cracker crust for digestive biscuits if you’re feeling fancy. The pineapple can be drained if you prefer a firmer filling, but keep the juice for maximum nostalgia. For a nut-free version, skip the walnuts or replace with toasted coconut.

Assemble at least 4 hours ahead so the layers set properly. Keeps covered in the fridge for 3-4 days—though the Dream Whip topping is best fresh. Leftovers? Unlikely. But if you’ve got any, they freeze well for up to 1 month (thaw in the fridge overnight).

❤️

Why You’ll Love This Recipe

  • Ready in Minutes: No baking, no fuss—just mix the Dream Whip, cream cheese, and sugar, then fold in the cherry pie filling and pineapple.
  • Sweet-Tart Magic: The tangy pineapple cuts through the rich cream cheese, while the cherry filling adds juicy bursts of flavor.
  • Potluck MVP: I bring this to every gathering, and the pan always comes back empty. It’s a hit with kids and adults alike.
  • Budget-Friendly Feast: A can of pie filling and a box of Dream Whip stretch into a dessert that feeds a crowd without breaking the bank.

Step-by-Step Instructions for Cherry Yum Yum with Dream Whip

This layered dessert comes together in stages, each building on the last for perfect texture.

Step 1: Create the Graham Cracker Crust Base

Combine the 1.5 cups graham cracker crumbs with the 0.5 cup melted unsalted butter in a bowl until evenly moistened. The mixture should resemble wet sand.

Press firmly into the bottom of a 9×13-inch baking dish using a measuring cup or glass to compact it tightly. This creates a stable foundation that won’t crumble when sliced. Chill in the refrigerator while you prepare the next layer.

Step 2: Prepare the Cream Cheese Layer

Beat the 8 oz cream cheese with the 0.5 cup granulated sugar and 1 tsp vanilla extract until smooth and creamy. I find that room temperature cream cheese whips up fluffier without lumps.

Spread this mixture evenly over the chilled crust. The layer should be about ¼-inch thick when properly distributed. This creates a rich, tangy contrast to the sweet fruit layers above.

Step 3: Add the Fruit Layers

Carefully spread both cans of cherry pie filling over the cream cheese layer, ensuring complete coverage. The pie filling should be thick enough that it doesn’t seep into the cream cheese layer.

Next, gently spread the 1 can crushed pineapple (with its juice) over the cherry layer. The pineapple’s natural sweetness and acidity balance the richness of the other components.

Step 4: Prepare and Spread the Dream Whip Topping

Prepare the 1 package Dream Whip according to package instructions, using the 1 can sweetened condensed milk as directed. This creates a stable, fluffy topping that holds its shape when sliced.

Spread the prepared Dream Whip evenly over the pineapple layer. The topping should be at least 1-inch thick to create that signature cloud-like texture. Work quickly but carefully to maintain the air in the whipped topping.

Step 5: Garnish and Chill

Sprinkle the 0.5 cup chopped maraschino cherries and 0.5 cup chopped walnuts evenly over the Dream Whip layer. The cherries add a pop of color and extra cherry flavor, while the walnuts provide a satisfying crunch.

Refrigerate for at least 4 hours or overnight to allow all layers to set completely. This resting time is crucial for clean slices and the development of flavors throughout the dessert.

👨‍🍳

Pro Tips For Making Cherry Yum Yum Recipe With Dream Whip

  • Chill the Dream Whip: Let the prepared Dream Whip sit in the fridge for at least 15 minutes before folding it into the cream cheese mixture—it holds its peaks better and prevents a runny mess.
  • Drain the Pineapple: Press the crushed pineapple in a fine-mesh strainer for 30 seconds to remove excess juice, or your dessert will be watery instead of light and fluffy.
  • Soften the Cream Cheese: Leave the cream cheese out for 1-2 hours until it’s truly room temperature; mixing it cold leaves lumps that no amount of stirring will smooth out.
  • Layer with Juice: Spoon just the cherry pie filling fruit into the dish first, then drizzle the syrup from the can over the top—this keeps the layers distinct and prevents soggy Dream Whip.

Pro Cooking Tips for Perfect Results

Dream Whip Mastery

Always prepare Dream Whip with ice-cold milk and beat for exactly 4 minutes at high speed. I use my KitchenAid stand mixer with the whisk attachment for maximum volume. The sweetened condensed milk stabilizes it beautifully. 💡

Layering Technique

Spread each layer evenly right to the edges—this prevents sagging. Use an offset spatula for the cream cheese layer to get that perfect ¼-inch thickness. Press the graham crust down hard with a measuring cup for a solid base.

Chilling Secrets

Don’t skimp on chilling time—4 hours minimum, overnight is ideal. The layers need this time to set properly. I often make it the night before serving, which actually improves the flavor melding.

Clean Slices

Run your knife under hot water and wipe it clean between each slice. This gives you those perfect, Instagram-worthy squares. The 9×13-inch dish makes 15 servings when cut into 2-inch squares.

Room Temperature Tip

Let the cream cheese sit out for 1-2 hours before mixing. Cold cream cheese creates lumps that are impossible to smooth out. I learned this the hard way my first time making this dessert. 🔥

Pineapple Prep

Use the entire can of crushed pineapple with juice—it adds essential moisture. If you prefer a firmer texture, drain it and reserve ¼ cup juice to mix back in. This keeps the dessert from being too dry.

Nutrition Facts

Servings 4
Amount Per Serving
Calories 480kcal
% Daily Value
Total Fat 28g36%
Saturated Fat 16g80%
Cholesterol 85mg28%
Sodium 320mg14%
Total Carbohydrate 58g21%
Dietary Fiber 2g7%
Sugars 45g
Protein 8g16%
Percent Daily Values are based on a 2,000 calorie diet. Your daily values may be higher or lower depending on your calorie needs.

Frequently Asked Questions

1

Can I make this ahead of time?

Yes! In fact, it’s best made at least 4 hours ahead. The flavors meld beautifully overnight in the fridge. Just cover tightly with plastic wrap to prevent drying.

2

What can I substitute for Dream Whip?

Cool Whip works in a pinch, but the texture won’t be as light. For homemade, whip 2 cups heavy cream with ¼ cup powdered sugar until stiff peaks form.

3

How do I prevent the graham crust from getting soggy?

Press the crust firmly into the pan and chill for 15 minutes before adding layers. This creates a barrier against moisture from the fruit.

4

Can I use fresh cherries instead of pie filling?

Yes, but you’ll need to cook them down first. Simmer 4 cups pitted cherries with ½ cup sugar and 2 tbsp cornstarch until thickened.

★★★★★5.0(1 review)
Allison Carter