
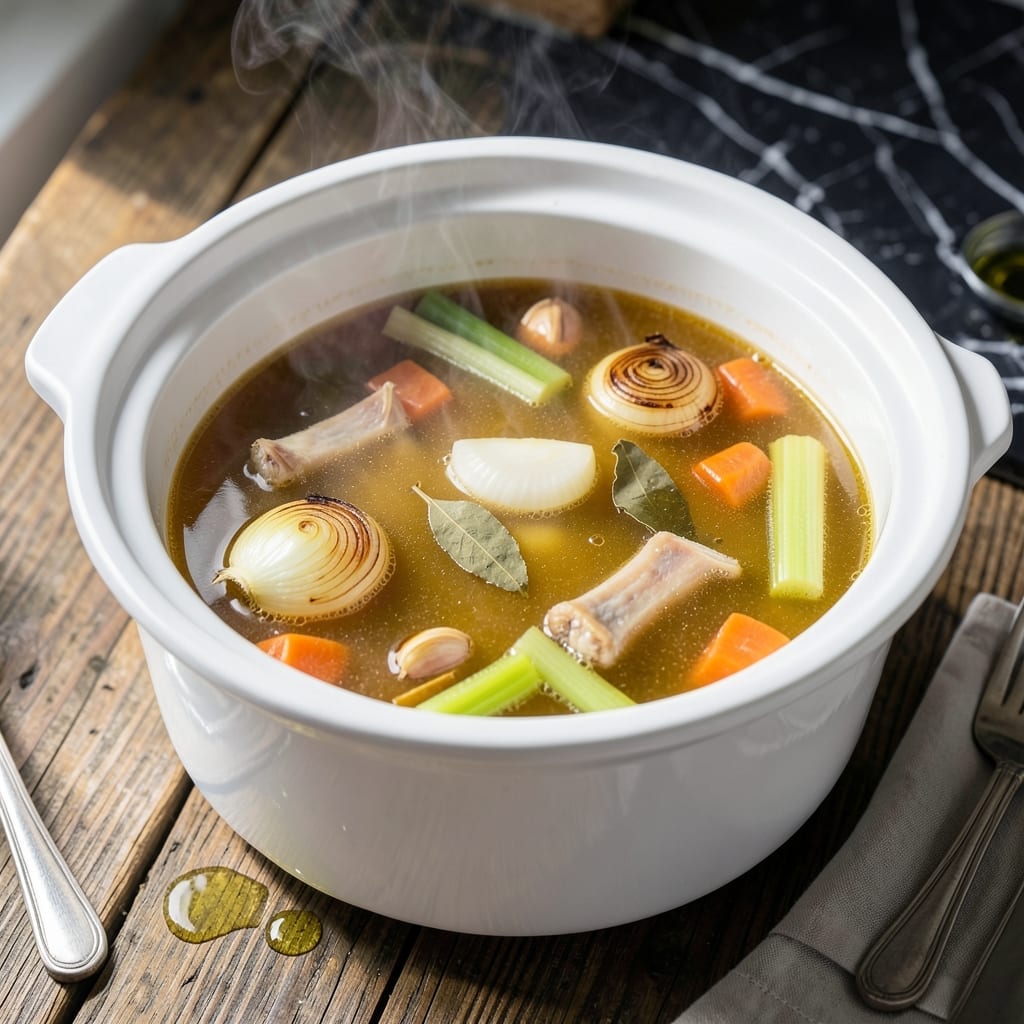
This slow cooker method transforms humble ingredients into rich, aromatic broth with almost no effort.
Simply combine bones and vegetables, then let the slow cooker work its magic for 8-12 hours. The result is a golden, flavorful liquid that forms the perfect base for soups, sauces, or sipping.
Ingredients for Chicken Broth Recipe Slow Cooker
Humble ingredients transform into golden, aromatic broth with minimal effort in your slow cooker.
| Ingredient | Amount | Notes |
|---|---|---|
| Chicken Bones 🍗 | 2 lb | Carcass, neck, or wings |
| Yellow Onions 🧅 | 2 whole | Quartered, skin on |
| Carrots 🥕 | 3 whole | Cut into large chunks |
| Celery Stalks 🌿 | 3 whole | Including leafy tops |
| Garlic Cloves 🧄 | 6 cloves | Smashed, skin on |
| Bay Leaves 🍃 | 2 whole | Dried, for depth |
| Black Peppercorns 🌶️ | 1 tbsp | Whole for infusion |
| Apple Cider Vinegar 🍏 | 2 tbsp | Brightens flavor profile |
| Fresh Parsley 🌿 | 1 whole | Stems included for flavor |
| Cold Water 💧 | 12 cups | Covers all ingredients |
| Kosher Salt 🧂 | 1 tsp | Adjust to taste later |
The chicken bones are the foundation. Save carcasses from roasted chickens or ask your butcher for backs and necks—they’re packed with gelatin. Pasture-raised bones yield the richest flavor (look for Whole Foods or local farms). Don’t skip the onion skins and celery tops—they add color and depth. Freshness matters less here than in other dishes, making this perfect for using up veggie scraps.
No chicken bones? Turkey or duck bones work in a pinch. Swap apple cider vinegar for white wine vinegar or lemon juice—any acid helps extract minerals from the bones. Missing fresh parsley? Dried parsley or thyme at half the amount works. The vinegar is subtle but important—don’t omit it. If you’re short on time, a pressure cooker cuts this to 2 hours.
Strain and cool broth before storing. Refrigerate for up to 5 days or freeze for 6 months. Freeze in ice cube trays for easy portioning. Skim fat once chilled for cleaner flavor. This base elevates soups, grains, and sauces effortlessly.
Why You’ll Love This Recipe
- Set and Forget: I toss everything in before work and come home to golden, fragrant broth—no babysitting required.
- Deep, Rich Flavor: The slow cooker coaxes every bit of goodness from the chicken bones and garlic, making it taste like it simmered all day (because it did).
- Meal Prep Magic: I use this broth for soups, risottos, and even cooking grains—one batch covers a week of meals.
- Penny-Wise Comfort: Honestly, it costs almost nothing to make and turns scraps into liquid gold.
Step-by-Step Instructions for Chicken Broth Slow Cooker
This method delivers rich, aromatic broth with minimal effort and maximum flavor extraction.
Step 1: Prepare Aromatics and Bones
Place the 2 lb Chicken Bones in the bottom of your slow cooker. Distribute the 2 whole Yellow Onions, quartered with skins on, evenly over the bones. The skins will impart a beautiful golden color to your finished broth.
Add the 3 whole Carrots cut into large chunks, 3 whole Celery Stalks with leafy tops, and 6 cloves Garlic Cloves (smashed with skins on). These vegetables form the classic mirepoix base that builds deep, savory layers of flavor.
Step 2: Add Spices and Liquid
Toss in the 2 whole Bay Leaves, 1 tbsp Black Peppercorns, and 2 tbsp Apple Cider Vinegar. The vinegar helps extract minerals from the bones while the whole spices infuse the liquid with subtle complexity.
Add the 1 whole Fresh Parsley with stems included, then pour in all 12 cups Cold Water to cover everything completely. Stir in the 1 tsp Kosher Salt at this stage, knowing you can adjust seasoning later.
Step 3: Slow Cook for Maximum Extraction
Cover and cook on low heat for 12-18 hours. This extended time allows collagen from the chicken bones to break down completely, creating a rich, gelatinous texture in your broth. Avoid using high heat – the gentle simmer preserves clarity and prevents cloudiness.
You’ll know it’s ready when the liquid has developed a deep golden hue and the bones have released all their richness. The surface should glisten with a light layer of fat that you can skim off later if desired.
Step 4: Strain and Finish
Line a large colander with cheesecloth or a clean kitchen towel and place it over a large bowl or pot. Carefully ladle the contents of the slow cooker into the colander, allowing all the liquid to drain through naturally.
Discard the solids and transfer the strained broth to storage containers. Let it cool to room temperature before refrigerating or freezing. The fat will solidify at the top, making it easy to remove if you prefer a leaner broth. Your yield should be approximately 8-10 cups of rich, aromatic liquid ready for any recipe.
Pro Tips For Making Chicken Broth Recipe Slow Cooker
- Roast the Bones: Toss the chicken bones with a little oil and roast at 400°F for 20-25 minutes first—I learned this the hard way, and the depth of flavor it adds is non-negotiable.
- Skip the Peeling: Don’t bother peeling the onions, carrots, or garlic. Just scrub them well and chop roughly; the skins add color and richness to the broth.
- Resist the Urge to Boil: Keep the slow cooker on low for 8-12 hours. A rolling boil makes the broth cloudy and can turn the fat greasy instead of skimming cleanly.
- Add Vinegar Last: Stir in a tablespoon of apple cider vinegar at the end—sounds weird, but it works to brighten the flavor and pull out any lingering minerals from the bones.
Common Mistakes When Making Great chicken broth recipe slow cooker
Overfilling the Slow Cooker
Never exceed the ⅔ full mark—liquid expands as it heats and bones take up space. I learned this the hard way with a messy kitchen counter. Leave 2-3 inches at the top for safety and even cooking.
Skipping the Vinegar
The 2 tbsp Apple Cider Vinegar isn’t just for flavor—it helps extract calcium and collagen from the bones. Without it, your broth may lack that rich, gelatinous body. This small addition makes a huge difference.
Using High Heat
Always cook on low heat for 12-18 hours. High heat can make the broth cloudy and break down the ingredients too quickly, resulting in bitter flavors. Patience truly pays off with this recipe. 💡
Peeling the Vegetables
Those onion skins and celery tops add color and depth—don’t peel them! The skins contain compounds that give your broth that beautiful golden hue. Just give them a good rinse first.
Adding Salt Too Early
Start with just 1 tsp Kosher Salt—the liquid reduces significantly, and you can always adjust seasoning after tasting. I’ve ruined batches by being heavy-handed with salt upfront.
Not Skimming the Fat
After cooking, let the broth cool and skim off the solidified fat from the top. This gives you a cleaner, more versatile base for recipes. A fine-mesh skimmer works perfectly for this task.
Frequently Asked Questions
How long does it keep in the fridge?
Properly stored in airtight containers, it stays fresh for up to 5 days. For longer storage, freeze in portions for up to 6 months.
What if I don’t have chicken bones?
Use chicken wings or thighs instead—they’ll still yield rich flavor. For a vegetarian version, swap in mushroom stems and seaweed.
Why is my broth cloudy?
Cloudiness usually comes from boiling too vigorously. Stick to low heat and avoid stirring. If it happens, strain through a coffee filter for clarity.
Can I use a pressure cooker instead?
Yes! A pressure cooker cuts the time to about 2 hours. Use the same ingredients and ratio, but follow your appliance’s liquid guidelines.
Nutrition Facts

- BBQ Sausage Recipe Oven: Smoky Depth Without the Grill - September 28, 2026
- BBQ Chicken Bowl Recipe Rice: Smoky Sweetness Over Fluffy Grains - September 28, 2026
- Beef Cutlet Recipe Ideas: Crispy Breaded Patties With Bold Seasonings - September 28, 2026