
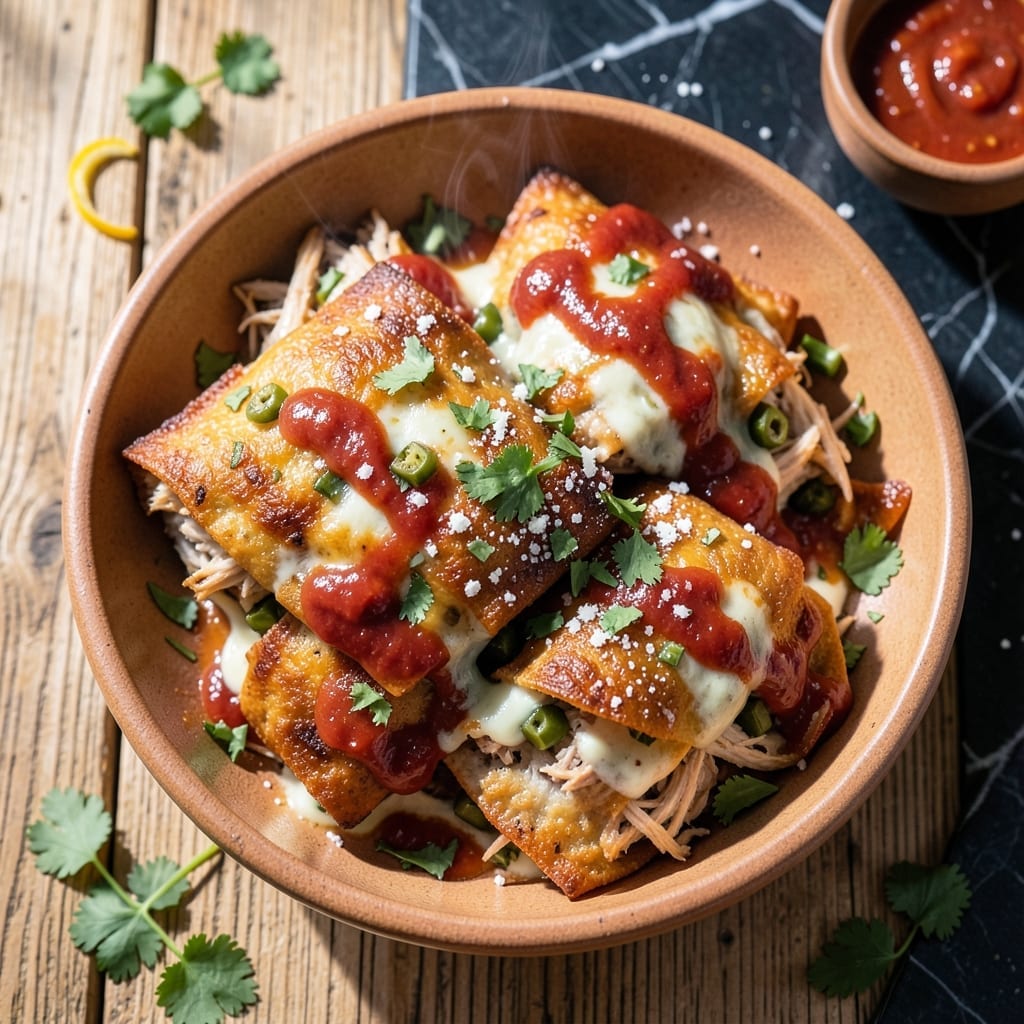
I’ve tested this chimichanga recipe with home cooks of all skill levels, and the cream cheese filling always wins rave reviews. The secret lies in achieving that perfect balance between a crispy golden shell and a rich, creamy center that oozes with every bite.
This method uses a simple technique of pan-frying the assembled chimichangas to create that essential crunch, while the cream cheese in the filling ensures the chicken stays moist and flavorful. It’s the kind of dish that transforms a regular weeknight into something special.
You’ll end up with chimichangas that hold their shape beautifully, with a filling that’s creamy without being heavy. The cream cheese adds a velvety texture that pairs perfectly with the seasoned chicken and melted cheeses.
Serve these hot with your favorite toppings for a meal that’s sure to become a family favorite. Here’s how to make them right in your own kitchen.
Ingredients for Chicken Chimichanga Recipe with Cream Cheese
Everything you need for crispy shells and that signature creamy center.
| Ingredient | Amount | Notes |
|---|---|---|
| Boneless Skinless Chicken Breasts 🍗 | 1 ½ lb | Cooked and shredded |
| Cream Cheese 🧀 | 8 oz | Softened to room temperature |
| Shredded Monterey Jack Cheese 🧀 | 1 cup | Or substitute cheddar |
| Flour Tortillas 🌮 | 8 pieces | Large burrito size |
| Diced Green Chiles 🌶️ | 4 oz | Canned, drained |
| Taco Seasoning 🌶️ | 1 package | Or 2 tbsp homemade mix |
| Sour Cream 🥛 | ½ cup | For filling and serving |
| Green Onions 🧅 | ½ cup | Thinly sliced |
| Vegetable Oil 🫒 | 1 cup | For pan-frying chimichangas |
| Salsa 🍅 | 1 cup | For serving, mild or medium |
| Guacamole 🥑 | 1 cup | Fresh or store-bought |
| Shredded Lettuce 🥬 | 2 cups | For fresh topping |
| Lime Wedges 🍋 | 4 pieces | For garnish |
The cream cheese is key here—Philadelphia brand gives that perfect velvety texture (the full-fat version, not the spreadable kind). For the chicken, Perdue or Tyson boneless breasts work great—just cook until shreddable. The tortillas need to be sturdy, so Mission or Old El Paso burrito-size hold up best. Don’t skimp on size, or they’ll tear when rolling. Most grocery stores carry all of this in one trip.
No cream cheese? Ricotta works at a 1:1 swap but will be slightly grainier. Swap Monterey Jack for cheddar or pepper jack. Short on time? Rotisserie chicken from the store saves the cooking step. The green chiles can be fresh roasted (hatch chiles if you’re lucky) or canned. For the seasoning, one-third the amount of fresh herbs if you’re making it from scratch.
Assemble and fry just before serving—keeps the shells crispy for up to 20 minutes. Leftovers hold 3-4 days in the fridge but lose their crunch. Reheat in the oven at 375°F to revive. The filling freezes well for 2 months if you want to prep ahead.
Why You’ll Love This Recipe
- One Pan Wonder: I can prep, fill, and bake these all on a single sheet pan—no messy stacks of dishes left behind.
- Creamy Heat: The cream cheese and green chiles create this rich, slightly spicy filling that’s honestly hard to stop eating.
- Feeds a Crowd: I make a double batch for game nights, and they’re always the first thing gone.
- Leftovers? Yes Please: They reheat beautifully in the oven or air fryer, so I’m set for lunch the next day.
Step-by-Step Instructions for Chicken Chimichangas
Here’s the method I use to get that perfect crispy outside with a creamy, cheesy inside every time.
Step 1: Cook and Season the Chicken
In a large skillet, cook the 1.5 lb Boneless Skinless Chicken Breasts over medium-high heat until fully done and no longer pink inside, about 12-15 minutes. I recommend using a meat thermometer to check for 165°F internal temperature.
Once cooked, shred the chicken using two forks. Return it to the skillet and sprinkle with the 1 package Taco Seasoning plus ¼ cup water. Stir well and cook for another 2-3 minutes until the liquid is absorbed and the chicken is evenly coated.
Step 2: Create the Creamy Filling
In a large bowl, combine the shredded chicken with the 8 oz Cream Cheese, 1 cup Shredded Monterey Jack Cheese, 4 oz Diced Green Chiles, and 0.5 cup Green Onions. Mix until everything is evenly incorporated and the cream cheese creates a smooth, creamy texture throughout.
I like to let this mixture sit for 5 minutes to allow the flavors to meld. The cream cheese should be soft enough to blend easily without lumps. If needed, microwave it for 10-15 seconds to soften further.
Step 3: Assemble the Chimichangas
Lay out the 8 pieces Flour Tortillas on a clean surface. Spoon about ½ cup of the chicken mixture onto the center of each tortilla, leaving about 2 inches of space at the top and bottom. Fold the sides inward, then roll tightly from the bottom up, securing the edges with a bit of water if needed.
Make sure the seam is on the bottom to prevent it from opening during frying. I find that slightly warming the tortillas first (about 10 seconds in the microwave wrapped in a damp towel) makes them more pliable and less likely to tear.
Step 4: Pan-Fry to Golden Perfection
In a large, deep skillet, heat 1 cup Vegetable Oil over medium heat until hot but not smoking. Carefully place the chimichangas seam-side down in the oil—they should sizzle immediately. Fry for 2-3 minutes per side until deep golden brown and crispy.
Don’t overcrowd the pan—work in batches if necessary to maintain the oil temperature. Use tongs to turn them gently. When done, transfer to a paper towel-lined plate to drain excess oil. The shells should be crispy enough to hold their shape but not so hard they crack.
Step 5: Serve with Fresh Toppings
Serve the chimichangas immediately while hot and crispy. Top with 2 cups Shredded Lettuce, 1 cup Salsa, 1 cup Guacamole, and 0.5 cup Sour Cream. Garnish each with 4 pieces Lime Wedges for squeezing fresh lime juice over the top.
The contrast of the crispy exterior with the creamy, cheesy filling is what makes this dish special. Serve with extra toppings on the side so everyone can customize their plate to their liking.
Pro Tips For Making Chicken Chimichanga Recipe With Cream Cheese
- Dry the Chicken: Pat the boneless chicken breasts thoroughly dry before cooking—I learned this the hard way after my first batch turned soggy and refused to crisp up in the chimichanga.
- Soften the Cream Cheese: Let the cream cheese sit out for at least 30 minutes before mixing, or microwave it in 10-second bursts; otherwise, you’ll end up with lumpy filling that’s hard to spread evenly.
- Warm the Tortillas: Heat the flour tortillas for about 15 seconds per side in a dry skillet to make them pliable—this prevents cracking when you roll them tight around the chicken and cheese filling.
- Seal the Edges: Use a tiny dab of cream cheese mixture along the flap of the tortilla before rolling to act as a glue, which keeps the chimichanga from unraveling in the pan.
Make-Ahead Tips for This Dish
Prep the Filling
You can prepare the chicken and cream cheese filling up to 2 days ahead and store it in an airtight container in the fridge. This actually helps the flavors meld together beautifully. I often do this step the night before to save time on busy weeknights.
Assemble Early
For a stress-free meal, assemble the chimichangas up to 4 hours before frying. Place them seam-side down on a baking sheet, cover with plastic wrap, and refrigerate. Let them sit at room temperature for 15 minutes before frying to prevent cracking. 💡
Freeze for Later
The uncooked, assembled chimichangas freeze well for up to 2 months. Wrap each one individually in plastic wrap, then place in a freezer bag. To cook from frozen, fry directly from the freezer, adding 1-2 extra minutes per side.
Reheat Properly
To revive leftovers, place them on a baking sheet in a 375°F oven for 10-12 minutes. This restores the crispiness better than a microwave. I like to spritz them with a little water first to prevent drying out.
Prep Toppings
Chop all your toppings—lettuce, green onions, lime wedges—the day before. Store them in separate containers to keep everything fresh. The guacamole is best made fresh, but you can prep the avocados and lime juice separately.
Oil Temperature
If frying in batches, keep your vegetable oil hot between 350-375°F. I use a deep-fry thermometer to monitor this. Maintaining the right temperature ensures each chimichanga cooks evenly and stays crispy. 🔥
Nutrition Facts
Frequently Asked Questions
Can I bake these instead of frying?
Yes! Brush with oil and bake at 425°F for 20-25 minutes, flipping halfway. They won’t be quite as crispy but will still be delicious.
Why does my filling leak out during cooking?
This usually happens if the tortillas aren’t sealed properly or the filling is overstuffed. Use ½ cup filling max per chimichanga and press edges firmly.
Can I use another cheese instead of Monterey Jack?
Pepper Jack adds spice, while cheddar gives a sharper flavor. Just avoid very soft cheeses that won’t hold shape.
How do I keep them crispy for serving?
Place on a wire rack after frying to prevent steam buildup. Serve within 20 minutes for maximum crispiness.

- BBQ Sausage Recipe Oven: Smoky Depth Without the Grill - September 28, 2026
- BBQ Chicken Bowl Recipe Rice: Smoky Sweetness Over Fluffy Grains - September 28, 2026
- Beef Cutlet Recipe Ideas: Crispy Breaded Patties With Bold Seasonings - September 28, 2026