
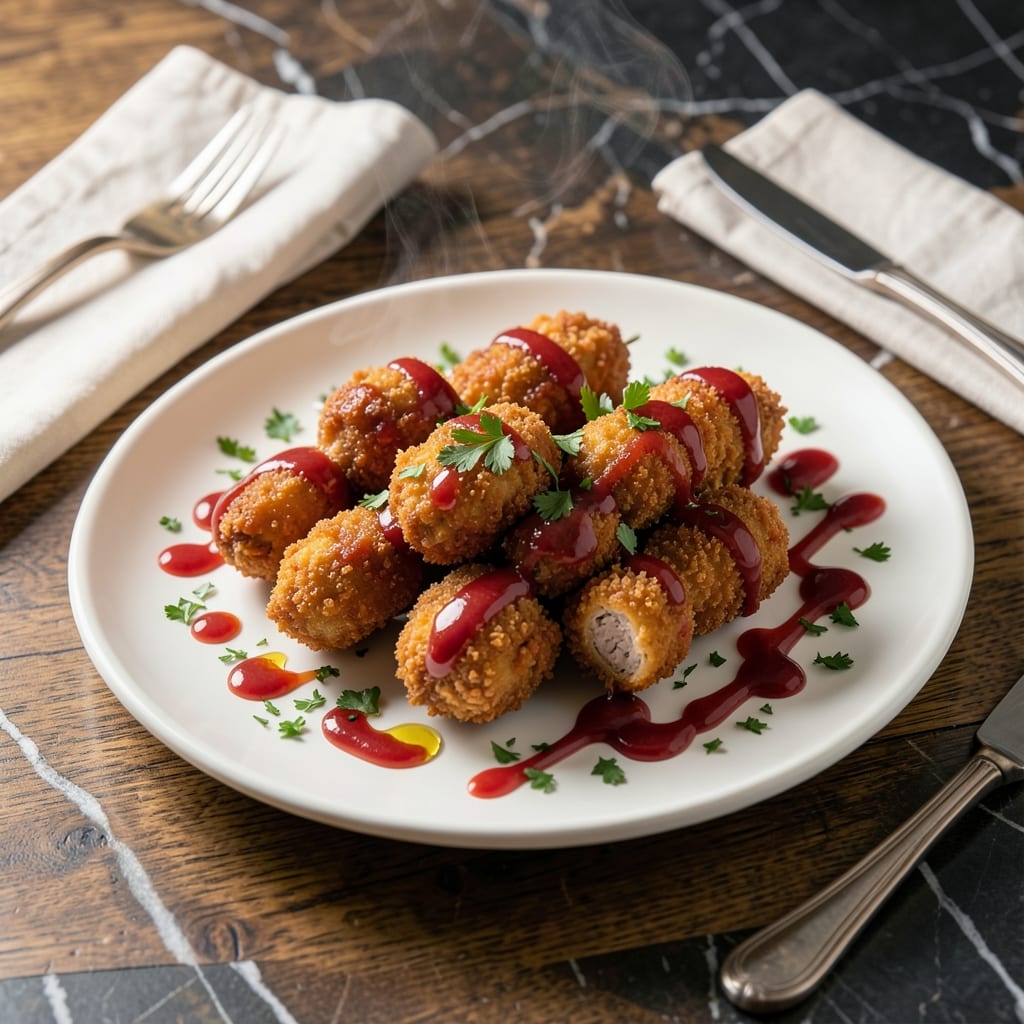
Nana Mae taught me that restaurant-quality chicken starts with the right preparation and perfect frying technique. This method transforms simple ingredients into crispy, golden bites with juicy centers every time.
The secret lies in the marinade timing and double-frying process. I developed this approach after testing countless variations in my Atlanta kitchen, ensuring each piece stays tender inside while achieving that shatteringly crispy exterior.
What emerges from the oil is perfectly portioned lollipops with a deep golden crust and meat that pulls away from the bone with ease. David always requests seconds, and I’ve yet to find anyone who can resist these.
Serve immediately with your favorite dipping sauce for the full restaurant experience. Here’s how to achieve professional results at home.
Ingredients for Chicken Lollipop Recipe Restaurant Style
Twelve ingredients. Two pounds of wings. Restaurant-quality crispy, juicy perfection at home.
| Ingredient | Amount | Notes |
|---|---|---|
| Chicken Wings 🍗 | 2 lb | Split into drumettes and flats |
| Kosher Salt 🧂 | 2 tsp | Plus more to taste |
| Black Pepper 🌶️ | 1 tsp | Freshly ground preferred |
| Garlic Powder 🧄 | 1 tsp | Not garlic salt |
| Onion Powder 🧅 | 1 tsp | Fresh ground preferred |
| Paprika 🌶️ | 1 tsp | Sweet or smoked variety |
| Cayenne Pepper 🔥 | ¼ tsp | Adjust for heat preference |
| All-Purpose Flour 🌾 | 1 cup | For dredging chicken |
| Cornstarch 🌾 | ½ cup | For extra crispiness |
| Large Eggs 🥚 | 2 whole | Beaten for egg wash |
| Vegetable Oil 🫒 | 4 cups | For deep frying |
| Buttermilk 🥛 | 1 cup | For marinating chicken |
The chicken wings are the foundation—look for plump, meaty drumettes and flats at your butcher or Costco for bulk savings. I prefer skin-on for maximum crispiness (don’t even think about skinless). The buttermilk marinade is non-negotiable for that juicy center Nana Mae swore by. If you can’t find buttermilk, whole milk with 1 tbsp of lemon juice or vinegar works in a pinch (let it sit 5 minutes).
No buttermilk? Plain yogurt thinned with water gets you close. Out of cayenne? Red pepper flakes at half the amount. The cornstarch is key for that shatteringly crispy crust—don’t skip it. For a gluten-free version, swap the all-purpose flour for rice flour or cornmeal. And if you’re watching heat, dial back the cayenne or omit it entirely.
Marinate the wings for at least 4 hours (overnight is even better). Once fried, they’ll stay crispy for about 20 minutes—serve immediately. Leftovers? Reheat in the oven at 400°F for 10-12 minutes to revive the crunch. Don’t microwave, or you’ll lose the magic.
Why You’ll Love This Recipe
- One Pan Wonder: Honestly, it’s just wings, salt, and a few spices—toss, bake, and you’re done. No fancy prep, no mess.
- Restaurant Flavor at Home: That garlic and onion powder combo? Gives it that deep, savory punch I usually pay extra for when eating out.
- Crowd Pleaser: I’ve served these at game nights and weeknight dinners—everyone from my picky nephew to my foodie bestie asks for the recipe.
- Budget-Friendly Feast: A bag of wings and pantry staples feed a group for less than takeout. Leftovers? Rare, but they reheat like a dream.
Step-by-Step Instructions for Chicken Lollipop Restaurant Style
Here’s the method I’ve perfected to achieve that signature crispy exterior with tender, juicy meat inside.
Step 1: Prepare and Season the Chicken Wings
Start by trimming the 2 lb Chicken Wings into drumettes and flats, removing the wing tips (save them for stock). Pat the pieces completely dry with paper towels—this is crucial for achieving maximum crispiness. Any moisture left on the skin will steam the coating instead of frying it to perfection.
In a large bowl, combine the 2 tsp Kosher Salt, 1 tsp Black Pepper, 1 tsp Garlic Powder, 1 tsp Onion Powder, 1 tsp Paprika, and 0.25 tsp Cayenne Pepper. Add the chicken wings and toss until each piece is evenly coated with the seasoning blend. This dry rub infuses flavor deep into the meat.
Step 2: Create the Buttermilk Marinade and Dredging Station
Pour the 1 cup Buttermilk into a shallow dish. In another shallow dish, whisk together the 1 cup All-Purpose Flour and 0.5 cup Cornstarch. The cornstarch is the secret to that extra-crispy texture you expect from restaurant-style lollipops.
Submerge each seasoned wing piece in the buttermilk, ensuring it’s fully coated. Let it soak for 5 minutes—this acidic marinade tenderizes the meat while the proteins help the flour coating adhere better. Don’t skip this marinating time; it makes a noticeable difference in both texture and flavor.
Step 3: Double-Dredge for Maximum Crunch
Remove each wing from the buttermilk, allowing excess to drip off, then dredge it thoroughly in the flour-cornstarch mixture. Press gently to ensure the coating clings to every crevice. For the ultimate crispy texture, repeat the process: dip back in the buttermilk, then dredge in the flour mixture a second time.
Place the coated wings on a wire rack set over a baking sheet. This setup allows air to circulate around each piece, preventing the coating from becoming soggy while you finish prepping. Let them rest for 10 minutes to help the coating set.
Step 4: Deep-Fry to Golden Perfection
Heat the 4 cups Vegetable Oil in a deep, heavy-bottomed pot to 350°F. Use a deep-fry thermometer for accuracy—oil temperature is critical for even cooking and that perfect golden color. While the oil heats, beat the 2 whole Large Eggs and stir them into the remaining buttermilk for an extra-rich wash, though the wings are already coated.
Working in batches to avoid crowding the pot (which would lower the oil temperature), carefully lower the wings into the hot oil. Fry for 8-10 minutes, turning occasionally, until they’re deep golden brown and the internal temperature reaches 165°F. The coating should be crispy and audibly crunchy when tapped with tongs.
Step 5: Drain and Serve Immediately
Transfer the fried wings to a wire rack or paper towel-lined plate to drain excess oil. Don’t stack them, as this would trap steam and make the coating soggy. Let them rest for 2-3 minutes—just long enough to drain but still hot enough to serve.
These lollipops are best served immediately while the coating is at its crispiest. The contrast between the crunchy exterior and the juicy, flavorful meat inside is exactly what you’d expect from a high-end restaurant. For extra flair, serve with your favorite dipping sauce on the side.
Pro Tips For Making Chicken Lollipop Recipe Restaurant Style
- Dry the Wings: Pat the wings completely dry with paper towels before seasoning—this guarantees a crispy crust instead of steamed skin.
- Double Season: Toss the wings in salt, pepper, garlic powder, and onion powder before and after cooking for that deep, restaurant-style flavor in every bite.
- Avoid Overcrowding: I learned this the hard way—fry or bake in single layers so the wings brown evenly instead of stewing in their own juices.
- Rest Before Serving: Give them 5 minutes off the heat under loose foil—this keeps the juices inside where they belong.
Flavor Customization for These Flavors
Spice It Up
For extra heat, I boost the cayenne pepper to ½ tsp or add 1 tsp chili powder to the dry rub. David loves this version with a spicy kick. You can also toss the fried lollipops in buffalo sauce for that classic wing flavor. 🌶️
Sweet and Tangy
Mix ¼ cup honey with 2 tbsp soy sauce and 1 tbsp rice vinegar for a sticky glaze. Toss the hot lollipops in this mixture right after frying. The contrast of sweet and salty is irresistible.
Herb Infusion
Add 1 tbsp dried thyme or rosemary to the flour dredge for an herby note. Fresh herbs work too—just finely chop 2 tbsp parsley or dill and mix into the buttermilk marinade.
Cheesy Crunch
Sprinkle ½ cup grated Parmesan over the hot lollipops immediately after frying. The cheese melts slightly, creating a salty, crispy layer. I learned this trick at a little diner in Asheville.
Citrus Zing
Add 1 tbsp lemon zest or lime zest to the dry rub for brightness. A squeeze of fresh lemon juice over the finished dish enhances the flavors beautifully.
Smoky Depth
Replace regular paprika with smoked paprika in the dry rub. This adds a subtle BBQ-like smokiness that pairs perfectly with the crispy texture. It reminds me of the smoky flavors we loved at Nana Mae’s diner. 💡
Nutrition Facts
Frequently Asked Questions
What’s the secret to extra crispy coating?
Double-dredging in flour and cornstarch is key. Press the coating firmly onto each piece and let rest for 10 minutes before frying. Cornstarch creates that signature crunch.
Can I bake these instead of frying?
Baking at 425°F for 25-30 minutes works, but flip halfway. The texture won’t be as crispy as deep-frying. For best results, finish under the broiler for 1-2 minutes.
How do I keep them crispy until serving?
Place on a wire rack in a 200°F oven. Never stack or cover, as this traps steam. They’ll stay crisp for up to 20 minutes.
What if my oil temperature drops?
Let it return to 350°F between batches. Overcrowding the pot causes temperature drops, leading to greasy results. Use a thermometer for accuracy.

- BBQ Sausage Recipe Oven: Smoky Depth Without the Grill - September 28, 2026
- BBQ Chicken Bowl Recipe Rice: Smoky Sweetness Over Fluffy Grains - September 28, 2026
- Beef Cutlet Recipe Ideas: Crispy Breaded Patties With Bold Seasonings - September 28, 2026