
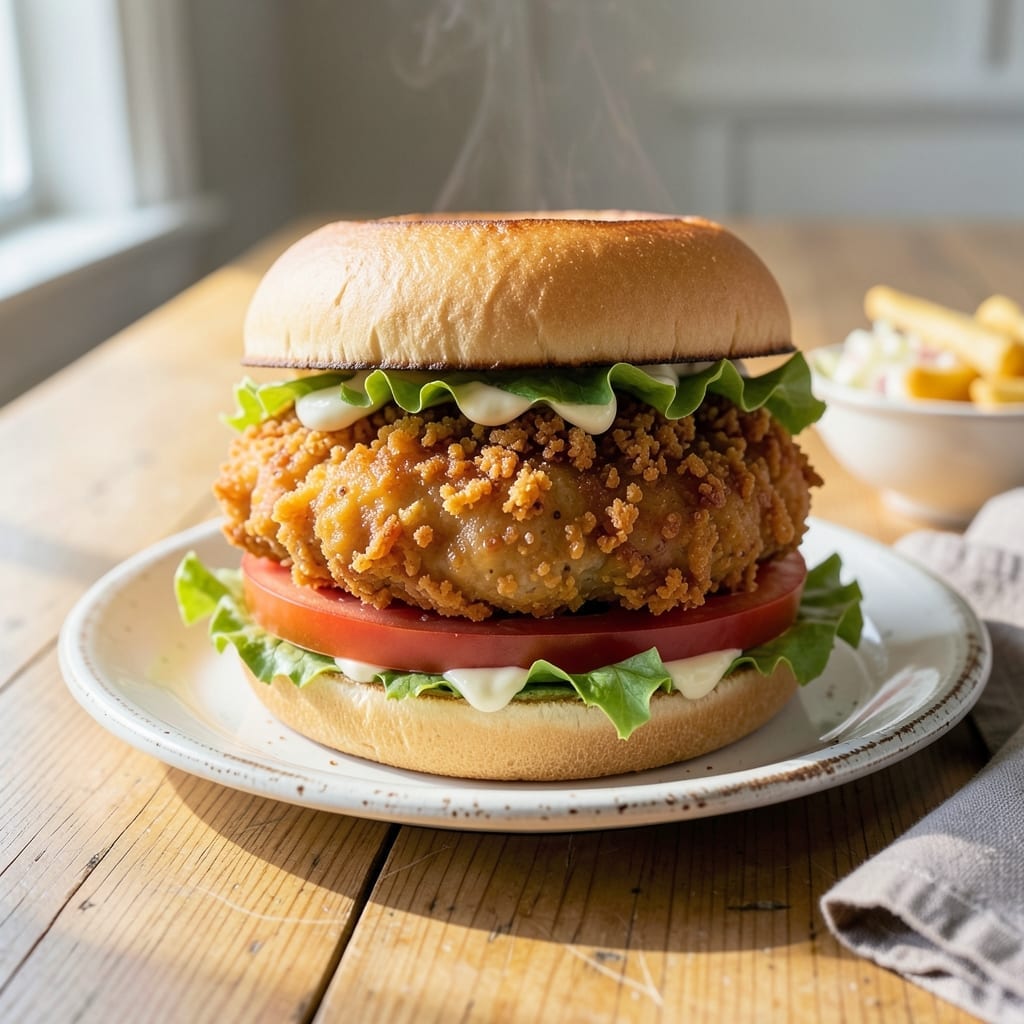
There’s a science to achieving crispy chicken that stays crunchy even after assembly. I’ve tested countless methods, and this one delivers golden, shatteringly crispy results every time.
The secret lies in a double-dredging technique using flour and buttermilk, followed by a hot oil bath at the precise temperature. This creates a thick, craggy crust that locks in juices while maintaining its crunch.
What you get is tender chicken encased in a perfectly seasoned, crispy shell that holds up to sauces and toppings. It’s the kind of sandwich that makes you pause mid-bite to appreciate the texture.
Serve on a soft bun with your favorite fixings for a meal that’s worth every minute of effort.
Ingredients for Chicken Sandwich Recipe Crispy
Golden, shatteringly crispy results start with these carefully chosen ingredients for the perfect sandwich.
| Ingredient | Amount | Notes |
|---|---|---|
| Boneless Skinless Chicken Breasts 🍗 | 1 ½ lb | Pounded to even thickness |
| Buttermilk 🥛 | 2 cups | Full-fat for richness |
| All-Purpose Flour 🌾 | 2 cups | For double dredging |
| Cornstarch 🌾 | ¼ cup | Adds extra crispiness |
| Large Eggs 🥚 | 2 whole | For binding dredge |
| Baking Powder 🧂 | 1 tsp | Helps crust puff slightly |
| Salt 🧂 | 1 ½ tsp | Diamond Crystal kosher preferred |
| Black Pepper 🌶️ | 1 tsp | Freshly ground for best flavor |
| Garlic Powder 🧄 | 1 tsp | For seasoning flour |
| Paprika 🌶️ | 1 tsp | Sweet or smoked variety |
| Cayenne Pepper 🔥 | ¼ tsp | Adjust for heat preference |
| Vegetable Oil 🫒 | 4 cups | For frying, high smoke point |
| Soft Hamburger Buns 🍞 | 4 whole | Toasted before serving |
| Mayonnaise 🥫 | ½ cup | For sandwich assembly |
| Pickles 🥒 | ½ cup | Sliced, for topping |
The chicken is everything here. Boneless, skinless breasts pounded to even thickness ensure even cooking and maximum crunch. I source mine from Whole Foods or Costco—look for pieces that are uniform in size. The buttermilk is non-negotiable (the acidity tenderizes and the fat adds richness). Full-fat only—low-fat versions won’t give you that same luxurious crust.
No buttermilk? Whole milk plus 1 tbsp vinegar per cup works in a pinch. Swap cornstarch for arrowroot powder at the same ratio if that’s what you’ve got. The baking powder might seem odd, but it’s the secret to that craggy texture. For the oil, peanut or canola work too—just avoid olive oil (too low smoke point). The buns? Potato rolls from Martin’s are my go-to.
Fry in batches and keep finished pieces warm on a rack (not a plate—steam kills crunch). Leftovers? Re-crisp in a 375°F oven for 10-12 minutes. Best eaten fresh, but holds up for 2 days in the fridge if you absolutely must. Freezing? Not recommended—the texture suffers.
Why You’ll Love This Recipe
- One Bowl Wonder: I love that I can mix the flour, cornstarch, and eggs right in the same bowl I marinated the chicken in—minimal cleanup, maximum satisfaction.
- Crispy Perfection: The buttermilk soak keeps the chicken juicy while the cornstarch in the coating gives it that insane crunch every time.
- Meal Prep Hero: I make a double batch on Sunday, and these sandwiches hold up beautifully in the fridge for quick lunches all week.
- Budget Friendly: Chicken breasts are affordable, and with pantry staples like flour and eggs, I’m serving up restaurant-quality sandwiches for a fraction of the price.
Step-by-Step Instructions for Crispy Chicken Sandwich
Here’s the method I use to achieve that perfect golden crunch every single time.
Step 1: Marinate and Tenderize the Chicken
Begin by pounding the 1.5 lb Boneless Skinless Chicken Breasts to an even ½-inch thickness using a meat mallet. This ensures even cooking and prevents dry spots. Place the pounded chicken in a large bowl and pour over the 2 cups Buttermilk.
Cover and refrigerate for at least 4 hours, but overnight is even better. The buttermilk not only tenderizes the chicken but also helps the coating adhere better. You’ll notice the chicken becomes slightly opaque as it absorbs the liquid—that’s how you know it’s working.
Step 2: Create the Secret Crispy Coating
In a large shallow dish, whisk together the 2 cups All-Purpose Flour, 0.25 cup Cornstarch, 1 tsp Baking Powder, 1.5 tsp Salt, 1 tsp Black Pepper, 1 tsp Garlic Powder, 1 tsp Paprika, and 0.25 tsp Cayenne Pepper. The cornstarch is the secret to extra crispiness, while the baking powder helps create tiny air pockets in the crust.
In a separate shallow dish, beat the 2 whole Large Eggs until well combined. This two-step dredging process—flour mixture, then egg wash, then flour mixture again—creates that thick, craggy coating that stays crispy long after frying.
Step 3: Double-Dredge and Fry to Golden Perfection
Remove the chicken from the buttermilk and let excess drip off. Dredge each piece in the flour mixture, pressing firmly to adhere. Dip in the beaten eggs, then dredge in the flour mixture again. This double coating is what gives you that restaurant-quality crunch.
Heat the 4 cups Vegetable Oil in a deep skillet or Dutch oven to 350°F. Carefully lower the chicken into the hot oil and fry for 6-8 minutes per side until deep golden brown and the internal temperature reaches 165°F. Don’t crowd the pan—fry in batches if needed to maintain oil temperature.
Step 4: Assemble the Ultimate Crispy Chicken Sandwich
Transfer the fried chicken to a wire rack set over a baking sheet to drain. Toast the 4 whole Soft Hamburger Buns until lightly golden. Spread 0.5 cup Mayonnaise on both halves of each bun—this adds creaminess that balances the crispiness perfectly.
Place a piece of hot chicken on the bottom bun and top with 0.5 cup Pickles. Add the top bun and press down slightly. The contrast of the cool, tangy pickles with the hot, crispy chicken is what makes this sandwich unforgettable. Serve immediately while the chicken is still at its crispest.
Pro Tips For Making Chicken Sandwich Recipe Crispy
- Double-Dredge the Chicken: Dip the buttermilk-soaked chicken in the flour-cornstarch mix, then back into the buttermilk, then flour again—I learned this the hard way after my first batch had sad, patchy crusts.
- Heat the Oil Right: Use a thermometer to hit 350°F before frying. After burning three batches, I finally figured out that guessing the temperature just doesn’t cut it.
- Rest the Chicken: Let it sit on a wire rack for 5 minutes after frying to keep the crust crispy. Skip the paper towels—they trap steam and make it soggy.
- Add Cornstarch: Mix 2 tablespoons of cornstarch into your flour for extra crunch—sounds weird, but it works. My grandmother swore by this, and she was right.
Essential Equipment for This Dish
Deep Fryer
A quality deep fryer with precise temperature control is my top recommendation—I use the Cuisinart CDF-200 for home cooking. It maintains 350°F consistently and has a 5-quart capacity, perfect for frying multiple pieces without crowding. The built-in thermostat takes the guesswork out of oil temperature. 🔥
Heavy Dutch Oven
If you don’t own a fryer, a heavy Dutch oven works beautifully. I swear by my Lodge 7-quart—it distributes heat evenly and holds temperature well. Use a candy thermometer clipped to the side to monitor oil temp accurately.
Meat Mallet
Even thickness is crucial for consistent cooking and crispiness. A meat mallet with both flat and tenderizing sides lets you pound chicken to an exact ½-inch thickness. I keep my OXO Good Grips mallet in a drawer for weekly use.
Wire Rack Setup
Never drain fried foods on paper towels—they create steam that softens your crispy coating. Instead, use a wire rack set over a baking sheet. The OXO Good Grips cooling rack fits perfectly in a half-sheet pan and keeps chicken elevated.
Instant-Read Thermometer
An instant-read thermometer is non-negotiable for checking internal temperature. I use the ThermoWorks ThermoPop—it gives accurate readings in 3-4 seconds and alerts you when chicken hits 165°F. No more overcooked or undercooked pieces.
Shallow Dishes
For dredging, you need wide, shallow dishes. I use 9×13-inch glass baking dishes—they’re the perfect size for coating chicken evenly. The wide surface area makes it easy to press the flour mixture onto every part of each piece.
Nutrition Facts
Frequently Asked Questions
What’s the best oil for frying?
Use a neutral oil with a high smoke point like vegetable, peanut, or canola. Maintain 350°F for perfect crispiness. Avoid olive oil as it burns easily.
Can I bake instead of fry?
Yes, bake at 400°F for 20-25 minutes on a wire rack. Spray with oil for extra crunch. Results won’t be identical but still delicious.
Why did my coating fall off?
Common causes: chicken wasn’t dry before dredging or oil wasn’t hot enough. Ensure oil is at 350°F and pat chicken dry first.
How do I keep it crispy longer?
Drain on a wire rack, not paper towels. Hold in a 200°F oven for up to 30 minutes before serving.

- BBQ Sausage Recipe Oven: Smoky Depth Without the Grill - September 28, 2026
- BBQ Chicken Bowl Recipe Rice: Smoky Sweetness Over Fluffy Grains - September 28, 2026
- Beef Cutlet Recipe Ideas: Crispy Breaded Patties With Bold Seasonings - September 28, 2026