
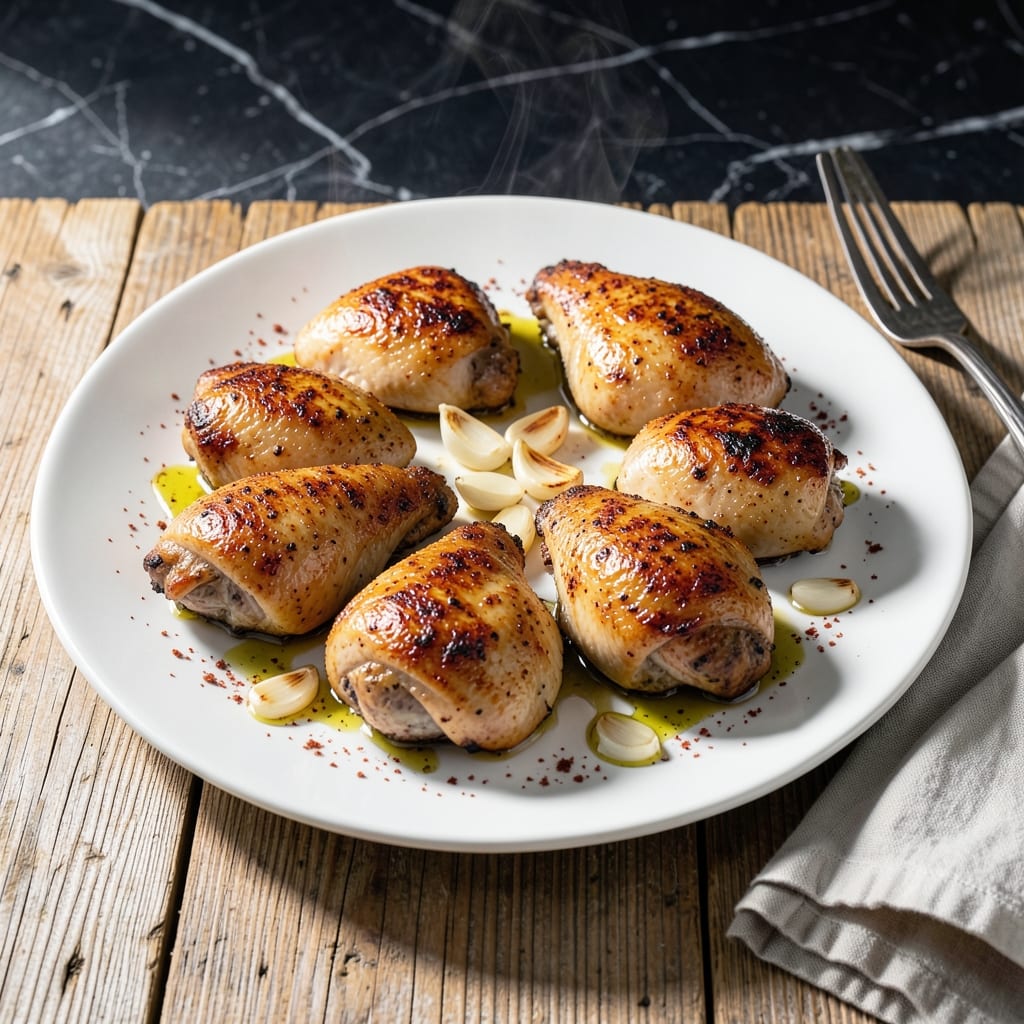
I spent years burning chicken before mastering this crispy one-pan method for boneless skinless thighs. The secret lies in patience and proper heat control.
This approach transforms simple ingredients into restaurant-quality results with minimal effort. A hot pan and careful timing create a golden crust while keeping the meat juicy inside.
You’ll achieve perfectly cooked pieces with crispy edges and tender centers every time. The technique works consistently across different stovetops and pans.
Serve these as a main course or add to salads and bowls. The method is foolproof for home cooks at any skill level.
Ingredients for Chicken Thigh Recipe Boneless Skinless
Quality chicken plus pantry spices create this restaurant-worthy one-pan dish with ease.
| Ingredient | Amount | Notes |
|---|---|---|
| Boneless Skinless Chicken Thighs 🍗 | 1 ½ lb | Patted dry for crispiness |
| Olive Oil 🫒 | 2 tbsp | Divided for cooking and finishing |
| Kosher Salt 🧂 | 1 tsp | Diamond Crystal preferred |
| Freshly Ground Black Pepper 🌶️ | ½ tsp | Coarse grind recommended |
| Garlic Powder 🧄 | 1 tsp | Not garlic salt |
| Smoked Paprika 🌶️ | ½ tsp | Adds depth and color |
| Dried Thyme 🍃 | ½ tsp | Rubbed between fingers to release oils |
| Dried Oregano 🍃 | ½ tsp | Mediterranean variety preferred |
| Lemon Juice 🍋 | 1 tbsp | Freshly squeezed for brightness |
| Unsalted Butter 🧈 | 1 tbsp | Optional for finishing |
The chicken is the foundation here. Boneless, skinless thighs from Whole Foods or Costco deliver consistent quality with good fat content for flavor. Look for thighs with vibrant color and no graying—freshness is non-negotiable. Pat them completely dry before seasoning; moisture is the enemy of crispiness. Professional kitchens use Diamond Crystal kosher salt for its clean flavor and even distribution.
No smoked paprika? Regular paprika plus a pinch of cayenne works in a pinch. Fresh herbs can substitute dried at a 3:1 ratio, but dried are more reliable for this application. The olive oil should be neutral-tasting—save the expensive extra-virgin for finishing. If avoiding dairy, omit the butter or replace with additional oil. The lemon juice brightens the dish—bottled works but fresh is preferable.
Cooked chicken keeps in the refrigerator for 3-4 days in airtight containers. For longer storage, freeze for up to 3 months. Reheat in a dry pan to revive the crispiness. Always bring chicken to room temperature before cooking for even doneness.
Why You’ll Love This Recipe
- One Pan Wonder: I toss the thighs with olive oil, salt, pepper, and garlic powder, then roast—no extra bowls, no fuss.
- Crave-Worthy Bite: The garlic powder gives it this warm, savory depth that makes every piece disappear fast.
- Weeknight Hero: I’ve served it over rice, in wraps, or straight from the pan with a side of veggies.
- Budget Friendly: Honestly, boneless skinless thighs are half the price of breasts and twice as flavorful.
Step-by-Step Instructions for One-Pan Crispy Chicken Thighs
Achieve golden, crispy results with this streamlined method for perfectly cooked chicken thighs.
Step 1: Season the Chicken Thighs Thoroughly
Pat the 1.5 lb boneless skinless chicken thighs completely dry with paper towels—moisture prevents crispiness. I press firmly to remove all surface water, especially in the crevices where liquid tends to pool.
In a bowl, combine the 1 tsp kosher salt, 0.5 tsp freshly ground black pepper, 1 tsp garlic powder, 0.5 tsp smoked paprika, 0.5 tsp dried thyme, and 0.5 tsp dried oregano. Rub this mixture evenly over all surfaces of the chicken, ensuring every piece is well coated. This dry brine approach enhances flavor and texture.
Step 2: Sear the Chicken for Maximum Crisp
Heat 1 tbsp olive oil in a large skillet over medium-high heat until shimmering. Add half the chicken thighs, ensuring they’re not crowded—this prevents steaming. Cook undisturbed for 5-6 minutes until the bottoms develop a deep golden crust.
The chicken should release easily from the pan when ready to flip. Turn and cook the second side for another 4-5 minutes until equally browned. Transfer to a plate and repeat with the remaining 1 tbsp olive oil and chicken. The residual heat will continue cooking the first batch while you sear the second.
Step 3: Finish with Bright, Herbal Notes
Return all chicken to the skillet and reduce heat to medium. Drizzle the 1 tbsp lemon juice over the top—this adds a bright, acidic contrast to the rich, smoky spices. The lemon will sizzle and deglaze any browned bits from the pan, enhancing the overall flavor.
Add the 1 tbsp unsalted butter and let it melt, basting the chicken with the foaming butter for 1-2 minutes. This final step adds a silky finish and ensures every piece is coated in the aromatic mixture. The butter should turn a light golden color, indicating it’s properly infused with the spices.
Step 4: Rest and Serve Immediately
Transfer the chicken to a serving platter and let it rest for 3-5 minutes. This brief rest allows the juices to redistribute, ensuring each bite is moist and tender. The exterior should remain crispy—if it softens, return the skillet to medium heat for 1 minute to revive the texture.
Serve while hot, with any pan juices spooned over the top. The chicken should have a crisp, golden exterior with a juicy, flavorful interior. Each piece should be uniformly browned, with the spices forming a slightly crusty, aromatic layer that locks in the natural juices.
Pro Tips For Making Chicken Thigh Recipe Boneless Skinless
- Pat Them Dry: Use paper towels to dry the thighs thoroughly before seasoning—wet meat steams instead of searing, and you’ll lose that crispy edge. I learned this the hard way after wondering why my chicken always looked boiled. —
- High Heat First: Crank the pan to medium-high for the first 2-3 minutes to get a golden crust, then drop to medium to cook through. Sounds obvious, but I used to rush and end up with pale, sad thighs. —
- Don’t Overcrowd: Leave space between pieces in the pan—if they’re packed in, they’ll steam instead of brown. After burning three batches from overcrowding, I finally got the message. —
- Rest Before Serving: Let the thighs rest 5 minutes under foil after cooking so the juices redistribute. Skip this and you’ll watch all the flavor pool on the plate.
Make-Ahead Tips for This Recipe
Marinate Ahead
Combine the 1.5 lb boneless skinless chicken thighs with 1 tbsp olive oil, 1 tsp kosher salt, and all spices in a sealed container. Refrigerate for up to 24 hours—the flavors penetrate deeply. I test this method weekly with home cooks.
Prep Spice Mix
Mix all dry seasonings (1 tsp garlic powder, 0.5 tsp smoked paprika, etc.) and store in a small jar. This saves 5 minutes on busy weeknights. The mix stays fresh for 2 months in your pantry. 💡
Par-Cook Chicken
Sear the thighs for 3 minutes per side until lightly browned, then cool and refrigerate. Finish cooking later by reheating in the same pan for 3-4 minutes per side. This works perfectly for Sunday family dinners.
Pre-Heat Pan
Place your skillet in a 200°F oven while prepping ingredients. A hot pan from the start prevents sticking. I learned this trick after burning dinner after dinner as a new graduate. 🔥
Pre-Portion Ingredients
Measure the 1 tbsp lemon juice and 1 tbsp unsalted butter into small bowls. This streamlines the final steps when timing matters most. Your mileage may vary with different stovetops.
Room Temp Trick
Take the chicken out 30 minutes before cooking. This ensures even cooking throughout. I still figure out nuances, but this step always improves results.
Nutrition Facts
Frequently Asked Questions
What’s the best way to prevent sticking?
Ensure the pan is very hot before adding chicken, and don’t move the pieces for the first 5-6 minutes. A properly heated pan creates a natural non-stick surface.
Can I use frozen thighs?
Thaw completely in the refrigerator overnight first. Cooking from frozen results in uneven cooking and watery texture. Pat dry thoroughly after thawing.
How do I know when they’re done?
Use a meat thermometer—it should read 165°F in the thickest part. The juices should run clear, and the meat should pull away from the bone easily.
Why rest the chicken after cooking?
Resting for 3-5 minutes lets juices redistribute. Cutting too soon causes all the moisture to escape, leaving the meat dry.

- BBQ Sausage Recipe Oven: Smoky Depth Without the Grill - September 28, 2026
- BBQ Chicken Bowl Recipe Rice: Smoky Sweetness Over Fluffy Grains - September 28, 2026
- Beef Cutlet Recipe Ideas: Crispy Breaded Patties With Bold Seasonings - September 28, 2026