
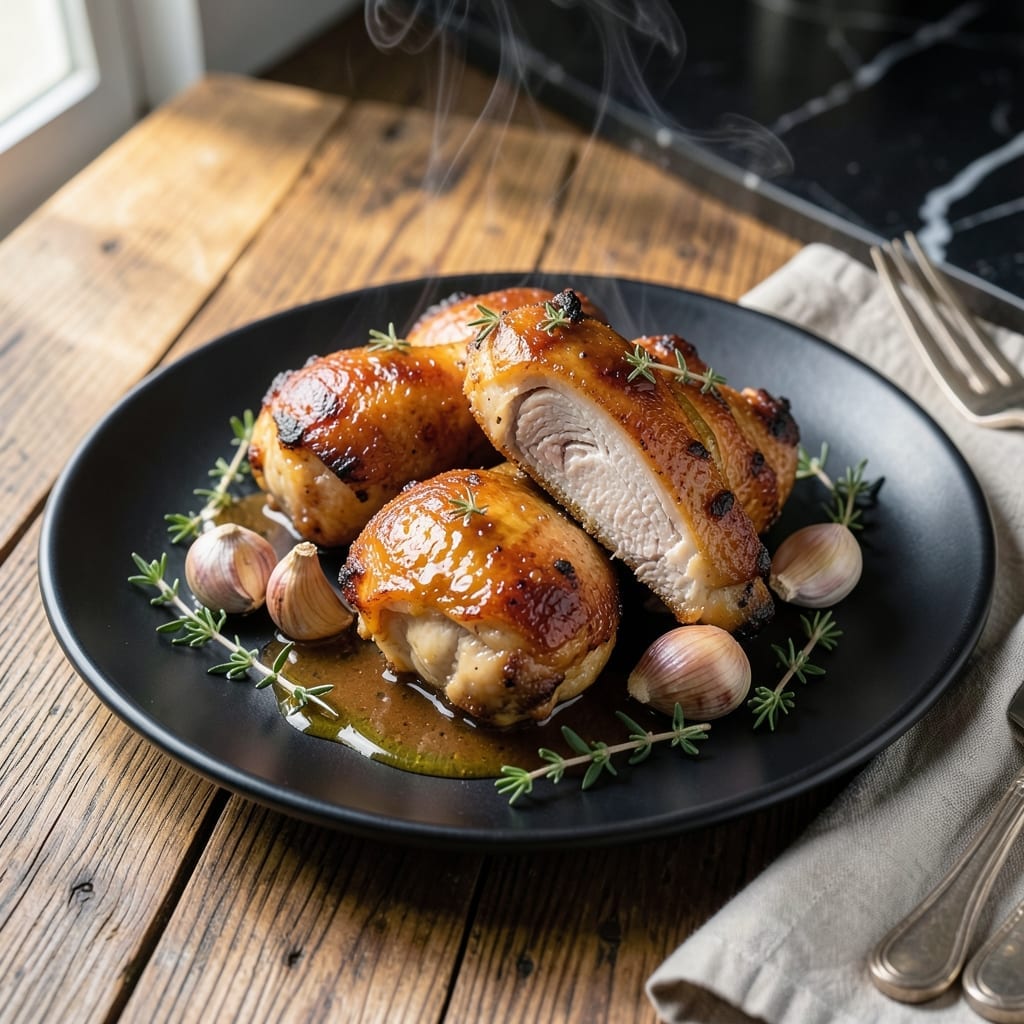
This recipe transformed my weeknight cooking with its perfect balance of sweet and savory. I developed it after countless attempts to nail that sticky, caramelized honey garlic glaze that clings to every bite.
The secret lies in searing the chicken first to lock in juices, then simmering in a simple sauce that reduces to a glossy coat. It’s a 30-minute process that delivers restaurant-quality results with minimal effort.
What emerges is tender chicken with a golden crust, coated in a thick, finger-licking sauce. The aroma alone will have everyone gathering around the kitchen.
Serve over rice or with steamed vegetables to soak up every drop of that incredible glaze. This dish proves that quick meals can be extraordinary.
Ingredients for Chicken Thigh Recipe Honey Garlic
Nothing exotic here—just good stuff for that perfect sweet-savory glaze.
| Ingredient | Amount | Notes |
|---|---|---|
| Chicken Thighs 🍗 | 2 lb | Boneless, skinless preferred |
| Honey 🍯 | ½ cup | Pure, unprocessed preferred |
| Garlic Cloves 🧄 | 6 cloves | Minced for maximum flavor |
| Soy Sauce 🫒 | ⅓ cup | Low-sodium for balance |
| Olive Oil 🫒 | 2 tbsp | For searing chicken |
| Apple Cider Vinegar 🍏 | 2 tbsp | Balances sweetness |
| Ketchup 🍅 | ¼ cup | Adds tang and thickness |
| Brown Sugar 🍚 | 2 tbsp | Light or dark works |
| Fresh Ginger 🌿 | 1 tbsp | Grated for zing |
| Salt 🧂 | ½ tsp | Kosher or sea salt |
| Black Pepper 🌶️ | ½ tsp | Freshly ground preferred |
| Dried Thyme 🍃 | ½ tsp | Optional for depth |
| Red Pepper Flakes 🔥 | ¼ tsp | Adjust for heat preference |
The chicken is the star here. Thighs stay juicier than breasts—look for skin-on if you want extra crispiness (I usually skip the skin for weeknights). Costco has great deals on family packs, or grab organic at Whole Foods. The honey should be thick and golden—avoid the ultra-processed stuff. Fresh garlic is non-negotiable though (jarred just doesn’t have the same punch).
No honey? Maple syrup at a 1:1 ratio works. Out of soy sauce? Tamari or coconut aminos are solid swaps. If you don’t have apple cider vinegar, white wine vinegar or lemon juice gets you close. The ketchup might seem odd, but it’s the secret to that sticky consistency (trust me). Want more heat? Double the red pepper flakes.
This reheats like a dream—3-4 days in the fridge, 3 months frozen. The sauce thickens as it cools, so thin with water when reheating. I always make extra for leftovers (that glaze is too good to waste).
Why You’ll Love This Recipe
- One Pan Wonder: I toss everything in, let it bake, and dinner’s ready with almost no cleanup.
- Sweet-Savory Magic: The honey caramelizes with the garlic and soy sauce—sticky, rich, and irresistibly good.
- Meal Prep Hero: I make a double batch on Sunday and it reheats beautifully for lunches all week.
- Budget Winner: Chicken thighs are cheap, and this recipe stretches them into something restaurant-worthy.
Step-by-Step Instructions for Honey Garlic Chicken Thighs
Here’s how to make this dish with minimal effort and maximum flavor.
Step 1: Season and Sear the Chicken Thighs
Pat the 2 lb Chicken Thighs dry with paper towels. This step is crucial—moisture prevents proper browning. Season both sides with 0.5 tsp Salt, 0.5 tsp Black Pepper, and 0.5 tsp Dried Thyme. The thyme adds a subtle earthy note that balances the sweetness.
Heat 2 tbsp Olive Oil in a large skillet over medium-high heat. When the oil shimmers, add the chicken in a single layer. Don’t crowd the pan or the chicken will steam instead of sear. Cook for 5-6 minutes per side until golden brown and crispy. Transfer to a plate and set aside.
Step 2: Build the Honey Garlic Sauce Base
In the same skillet, reduce heat to medium. Add the minced 6 cloves Garlic Cloves and 1 tbsp Fresh Ginger. Sauté for 1-2 minutes until fragrant—don’t let the garlic burn or it’ll turn bitter. You’ll smell when it’s ready.
Pour in 0.33 cup Soy Sauce, 2 tbsp Apple Cider Vinegar, and 0.25 cup Ketchup. Stir to combine, scraping up any browned bits from the chicken. These bits are packed with flavor and will deepen the sauce. Let it simmer for 2 minutes.
Step 3: Sweeten and Thicken the Sauce
Add 0.5 cup Honey and 2 tbsp Brown Sugar to the skillet. Stir well to dissolve the sugar. The honey will make the sauce glossy and sticky, while the brown sugar adds a molasses-like depth. Sprinkle in 0.25 tsp Red Pepper Flakes for a subtle kick.
Let the sauce simmer for 3-4 minutes until it thickens slightly and coats the back of a spoon. Taste and adjust seasoning if needed, though the soy sauce and ketchup should provide enough saltiness. The sauce should be rich, sweet, and tangy with a hint of heat.
Step 4: Finish and Glaze the Chicken
Return the chicken to the skillet, spooning the sauce over each piece to coat evenly. Reduce heat to low and let it simmer for 5-7 minutes, turning the chicken occasionally. This step allows the flavors to meld and the chicken to absorb the sauce.
You’ll know it’s done when the sauce has reduced to a thick, glossy glaze and the chicken is fully cooked through (internal temperature of 165°F). The chicken should be sticky, shiny, and irresistibly aromatic.
Pro Tips For Making Chicken Thigh Recipe Honey Garlic
- Brown the Skin First: Sear the chicken thighs skin-side down in hot olive oil for 5-6 minutes until deep golden—this renders the fat and builds flavor before adding the honey garlic sauce.
- Mince Garlic Fine: I learned this the hard way—chopping garlic too coarsely leaves harsh bites in the sauce, while a fine mince blends smoothly into the honey and soy.
- Skip the Overcrowding: Cook the thighs in a single layer with space between them, or they’ll steam instead of crisp. I was skeptical until I tried it, but the texture difference is huge.
- Simmer the Sauce: After adding honey and soy, let the sauce reduce for 3-4 minutes on medium-low heat until it thickens slightly and clings to the chicken.
Essential Equipment for This Recipe
Essential Skillet
Invest in a heavy-bottomed stainless steel skillet—I use a 12-inch Cuisinart. It distributes heat evenly, preventing hot spots that can burn your sauce. The wide surface gives chicken room to sear properly without crowding. 🔥
Wooden Spoon
A wooden spoon is perfect for stirring the sauce and scraping up those flavorful browned bits. Unlike metal, it won’t scratch your pan. I keep one dedicated just for cooking with sticky sauces like this.
Meat Thermometer
Don’t guess—use a digital instant-read thermometer. I’ve burned too many meals learning this lesson. For chicken, you want 165°F internal temperature. The ThermoWorks ThermaPen is my go-to for accuracy and speed.
Garlic Press
Fresh garlic is non-negotiable here. A sturdy garlic press (I like OXO’s) makes quick work of mincing 6 cloves. No more chopping by hand—this tool saves time and ensures even distribution in your sauce.
Tongs
Use locking tongs to flip the chicken—12-inch length keeps your hands safe from splatters. They give you better control than a fork, and you won’t pierce the meat, keeping all those juices inside where they belong.
Glass Measuring Cups
For precise measurements of your honey, soy sauce, and other liquids, a set of Pyrex glass measuring cups is essential. They’re heatproof, durable, and the measurements are easy to read.
Nutrition Facts
Frequently Asked Questions
Can I use bone-in, skin-on thighs instead?
Use bone-in, skin-on for extra flavor. Sear skin-side down first for 7-8 minutes to render the fat and get it crispy. The cooking time may increase by 5 minutes to reach 165°F.
What if my sauce is too thin?
Simmer uncovered for 2-3 extra minutes to reduce. If still thin, mix 1 tsp cornstarch with 1 tbsp water and stir into the sauce. It will thicken as it cools.
How do I make this spicier?
Double the red pepper flakes or add 1 chopped jalapeño with the garlic. For serious heat, stir in 1 tsp sriracha at the end. Taste as you go!
Can I make this ahead of time?
The flavors deepen overnight! Store in an airtight container for up to 4 days. Reheat gently on the stove with a splash of water to loosen the sauce.

- BBQ Sausage Recipe Oven: Smoky Depth Without the Grill - September 28, 2026
- BBQ Chicken Bowl Recipe Rice: Smoky Sweetness Over Fluffy Grains - September 28, 2026
- Beef Cutlet Recipe Ideas: Crispy Breaded Patties With Bold Seasonings - September 28, 2026