
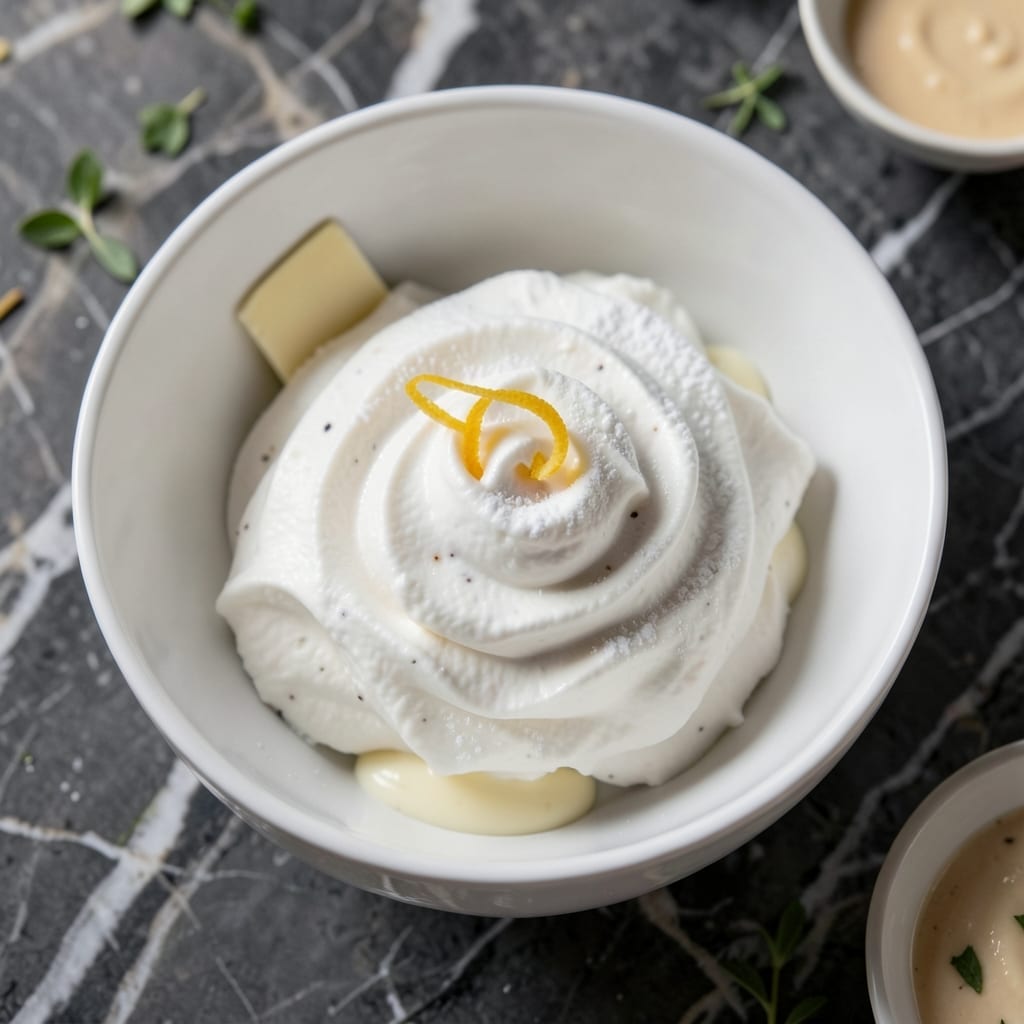
This pudding-free frosting delivers that classic light and fluffy texture without the extra step of mixing in instant pudding. I developed this version after realizing many bakers want simplicity without sacrificing quality.
The secret lies in properly whipped Cool Whip combined with powdered sugar and a touch of vanilla. This creates a stable, spreadable frosting that holds its shape on cakes and cupcakes. No cooking required—just mix and use.
What you get is a smooth, creamy topping with the perfect balance of sweetness and airiness. It pipes beautifully and maintains its texture even after refrigeration. The result is professional-quality frosting with minimal effort.
Use it on sheet cakes, layer cakes, or as a dip for fresh fruit. This recipe proves you don’t need pudding for exceptional results.
Ingredients for Cool Whip Frosting Recipe Without Pudding
Eight ingredients make this fluffy, no-cook frosting that pipes like a dream.
| Ingredient | Amount | Notes |
|---|---|---|
| Cool Whip 🥣 | 8 oz | Thawed, do not overmix |
| Powdered Sugar 🍚 | 3 cups | Sifted for smooth texture |
| Vanilla Extract 🌿 | 1 tsp | Pure vanilla preferred |
| Heavy Cream 🥛 | 2 tbsp | Optional for stability |
| Unsalted Butter 🧈 | 2 tbsp | Softened, for richness |
| Salt 🧂 | 0.125 tsp | Balances sweetness |
| Almond Extract 🌰 | ¼ tsp | Optional, enhances flavor |
| Lemon Juice 🍋 | 1 tsp | Fresh, brightens flavor |
The Cool Whip is non-negotiable here—only the original full-fat version works for that ultra-light texture. I grab mine from Walmart or Target (the store-brand tubs don’t whip up the same). Powdered sugar quality matters too: C&H or Domino dissolve better than generic brands. If you’re making a double batch, sift the sugar first to avoid grainy frosting.
Out of Cool Whip? Whipped Dream (the vegetarian version) works identically. Want it richer? Swap the heavy cream for full-fat coconut milk. No vanilla extract? Vanilla bean paste at half the amount adds speckles and depth. Skip the almond extract if you’re not a fan—a dash of cinnamon or cardamom can add warmth instead.
This frosting holds up in the fridge for 5 days in an airtight container. Freeze for 3 months (thaw in the fridge overnight). If it weeps a little after freezing, just rewhip for 30 seconds. Pipes best when chilled but not rock-hard.
Why You’ll Love This Recipe
- 5-Minute Mix: No mixer? No problem. Just fold everything together and it’s ready to spread.
- Cloud-Like Sweetness: The Cool Whip and heavy cream blend into something light yet rich—vanilla shines through every bite.
- Party or Pancakes: I’ve slathered this on cake, cupcakes, even waffles for brunch. Honestly, it works everywhere.
- Budget Stretch: Powdered sugar is cheap, and a tub of Cool Whip goes a long way. I’ll be real: it’s my go-to for last-minute desserts.
Step-by-Step Instructions for Cool Whip Frosting Without Pudding
This method delivers a silky-smooth frosting with minimal effort and maximum flavor impact.
Step 1: Cream the Base for Stability
In a large mixing bowl, beat the 2 tablespoons Unsalted Butter until completely smooth and pale. I start with room-temperature butter—it incorporates air better than cold butter and prevents graininess. Scrape the bowl sides with a spatula to ensure even mixing.
Add the 8 oz Cool Whip (make sure it’s fully thawed, not melted) and fold together gently with a spatula. Don’t use a mixer here—overworking the Cool Whip deflates its airy texture, which is crucial for that light, fluffy finish. The mixture should look like soft clouds.
Step 2: Incorporate the Dry Ingredients Gradually
Sprinkle in the 3 cups Powdered Sugar, about 1 cup at a time, folding after each addition. Sifted sugar dissolves seamlessly, preventing lumps. I’ve found that adding it in stages prevents a powdery mess and ensures even distribution.
After the second cup, add the 0.125 tsp Salt—it might seem minuscule, but it balances the sweetness perfectly. Continue with the remaining sugar. The frosting will thicken noticeably, but resist the urge to rush. Patience here guarantees a smooth, spreadable consistency.
Step 3: Add Flavor Boosters for Depth
Pour in the 1 tsp Vanilla Extract and 1 tsp Lemon Juice, then fold until just combined. The vanilla adds warmth, while the lemon juice brightens the flavor, cutting through the richness. Use pure vanilla extract—imitation lacks the complexity.
If using, add the 0.25 tsp Almond Extract and 2 tbsp Heavy Cream. The almond extract enhances the vanilla’s depth (a little goes a long way), and the cream stabilizes the frosting, especially if you plan to pipe it. Fold until everything is uniformly incorporated.
Step 4: Adjust and Rest for Ideal Texture
Taste and adjust—if it’s too thick, add another splash of cream, 1 teaspoon at a time. If it’s too loose, chill it for 10-15 minutes to firm up. The ideal texture should hold a peak when you lift the spatula but still spread effortlessly.
Let the frosting rest at room temperature for 5-10 minutes before using. This allows the flavors to meld and the texture to settle. You’ll know it’s ready when it’s glossy and holds its shape without slumping.
Pro Tips For Making Cool Whip Frosting Recipe Without Pudding
- Chill Your Bowl: I learned this the hard way—using a cold metal bowl keeps the Cool Whip stable while mixing, so your frosting doesn’t turn soupy before it even hits the cake.
- Soften the Butter: Leave the unsalted butter out for 30 minutes until it gives slightly when pressed—too cold and it’ll create lumps, too soft and your frosting loses structure.
- Skip the Overmixing: After adding the powdered sugar, mix just until combined; overbeating deflates the Cool Whip and turns your fluffy frosting into a dense, sad spread.
- Add Cream Gradually: Pour in the heavy cream 1 tablespoon at a time—sounds tedious, but it’s the only way to control thickness without ending up with a runny mess.
Essential Equipment for This Dish
Mixing Tools
I always use a large stainless steel mixing bowl for this frosting—it stays cold and helps maintain the Cool Whip’s structure. A silicone spatula is my go-to for folding; it’s gentle and scrapes every last bit from the bowl. 💪
Electric Mixer
While I fold by hand for control, a hand mixer on low speed works if you’re short on time. Avoid high speeds—they’ll deflate the Cool Whip. I trust my KitchenAid 5-speed for this task.
Measuring Essentials
Accurate measurements are key for consistency. I use OXO good grips measuring cups for the powdered sugar and a 1-tsp measuring spoon for extracts. Level off each measurement for precision.
Chilling Equipment
If your kitchen is warm, chill your mixing bowl and utensils for 15 minutes beforehand. This helps the frosting hold its shape. I keep a half-sheet pan in my fridge for this purpose.
Piping Supplies
For decorative touches, a star-tip piping bag creates beautiful swirls. I prefer Wilton 1M tip for cupcakes. Chill the frosting for 10 minutes before piping for cleaner edges. ✨
Storage Containers
Store leftovers in an airtight container with parchment paper pressed directly on the surface. This prevents a skin from forming. I use Glasslock containers for visibility and durability.
Nutrition Facts
Frequently Asked Questions
Can I use frozen Cool Whip directly from the freezer?
No, always thaw it completely in the fridge for 4-6 hours first. Using frozen Cool Whip will create lumps. Once thawed, gently fold it in to maintain that perfect airy texture.
Why does my frosting turn out grainy?
This usually happens when the powdered sugar isn’t sifted. Always sift 3 cups before adding, and ensure your butter is fully softened. Cold ingredients can also cause graininess.
How long can this frosting sit out at room temperature?
For food safety, don’t leave it out for more than 2 hours. After that, refrigerate immediately. The Cool Whip base makes it more stable than buttercream, but it’s still dairy-based.
Can I make this frosting ahead of time?
Yes! Prepare it up to 2 days in advance. Store in an airtight container in the fridge. Before using, let it sit at room temperature for 15 minutes and give it a quick stir.

- BBQ Sausage Recipe Oven: Smoky Depth Without the Grill - September 28, 2026
- BBQ Chicken Bowl Recipe Rice: Smoky Sweetness Over Fluffy Grains - September 28, 2026
- Beef Cutlet Recipe Ideas: Crispy Breaded Patties With Bold Seasonings - September 28, 2026