
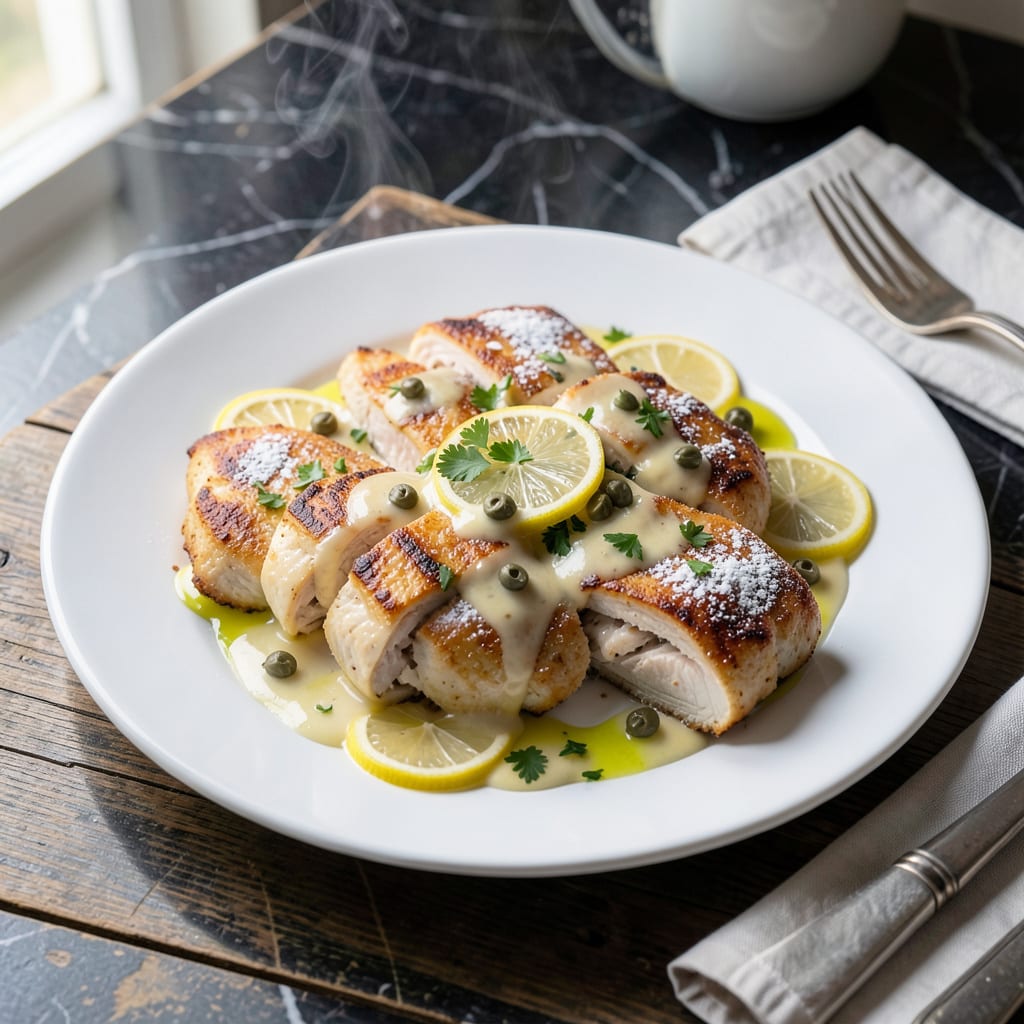
This recipe delivers tender chicken cutlets smothered in a bright lemon-caper sauce that’s both tangy and rich.
With a simple pan-searing technique and a quick sauce reduction, you’ll achieve restaurant-quality results that highlight the dish’s classic Italian-American flavors.
Ingredients for Cpk Chicken Piccata
These quality ingredients create tender chicken cutlets with bright lemon-caper sauce for a restaurant-style dish.
| Ingredient | Amount | Notes |
|---|---|---|
| Chicken Breasts 🍗 | 1 ½ lb | Boneless, skinless, pounded to 1/4-inch thickness |
| All-Purpose Flour 🌾 | ½ cup | For dredging chicken cutlets |
| Kosher Salt 🧂 | 1 tsp | Divided for seasoning |
| Freshly Ground Black Pepper 🌶️ | ½ tsp | Divided for seasoning |
| Unsalted Butter 🧈 | 4 tbsp | Divided for cooking and sauce |
| Olive Oil 🫒 | 2 tbsp | For pan-searing cutlets |
| Garlic Cloves 🧄 | 3 cloves | Minced for sauce |
| Dry White Wine 🍷 | ½ cup | Such as Pinot Grigio or Sauvignon Blanc |
| Fresh Lemon Juice 🍋 | ⅓ cup | About 2-3 lemons |
| Capers 🌿 | 3 tbsp | Drained, rinsed if salt-packed |
| Chicken Stock 🥣 | ½ cup | Low-sodium preferred |
| Fresh Parsley 🌿 | ¼ cup | Chopped, for garnish |
| Lemon Slices 🍋 | 4 slices | For serving, optional |
For the chicken, boneless, skinless breasts are essential—pound them evenly to ensure quick, even cooking. Whole Foods or Costco offer reliable quality. The butter matters here; Plugrá or Kerrygold deliver superior flavor for the sauce. Use a dry white wine you’d actually drink—avoid cooking wines with added salt.
No white wine? Substitute chicken stock at half the amount with an extra squeeze of lemon. Capers in brine? Rinse well to avoid excess saltiness. Fresh parsley adds brightness, but dried at one-third the amount works if that’s what’s on hand. For extra richness, a splash of heavy cream can be stirred into the sauce at the end.
The dish reheats well—store leftovers in an airtight container for up to 3 days in the fridge. The sauce thickens as it cools; thin with a splash of stock when reheating. Freezing isn’t recommended, as the texture of the chicken can become dry.
Why You’ll Love This Recipe
- One Pan Meal: I love that I only need a skillet and a spatula—no mountain of dishes afterward.
- Buttery Lemon Zing: The butter and briny capers create this tangy richness that makes the chicken irresistible.
- Dinner in 30: From start to finish, it’s faster than ordering takeout. Honestly, I’ve timed it.
- Leftovers? Yes Please: The flavors actually deepen overnight, so lunch the next day tastes even better.
Step-by-Step Instructions for Chicken Piccata
Master the technique for perfectly tender cutlets with a bright, tangy lemon-caper sauce.
Step 1: Prepare and Season the Chicken
Begin by pounding the 1.5 lb chicken breasts to an even ¼-inch thickness between plastic wrap. This ensures uniform cooking and prevents dry, overdone edges while the thicker parts finish. Season both sides generously with ½ tsp kosher salt and ¼ tsp freshly ground black pepper.
Dredge each cutlet in the 0.5 cup all-purpose flour, shaking off any excess. The flour creates a light crust that thickens the sauce later while keeping the chicken moist. Let the dredged cutlets rest for 5 minutes to allow the coating to adhere properly.
Step 2: Sear the Cutlets to Golden Perfection
Heat 2 tbsp olive oil and 2 tbsp unsalted butter in a large skillet over medium-high heat until the butter foams. Add the chicken in a single layer and cook undisturbed for 3-4 minutes per side until golden brown and cooked through.
The cutlets are ready to flip when they release easily from the pan. Avoid moving them too soon—this prevents a proper crust from forming. Transfer the cooked chicken to a plate and tent with foil to keep warm while you prepare the sauce.
Step 3: Build the Lemon-Caper Sauce
In the same skillet, reduce heat to medium and add the 3 minced garlic cloves. Sauté for 30 seconds until fragrant but not browned. Pour in the 0.5 cup dry white wine and deglaze the pan, scraping up all the browned bits with a wooden spoon.
Let the wine simmer for 2 minutes until reduced by half. Add the 0.33 cup fresh lemon juice, 3 tbsp capers, and 0.5 cup chicken stock. Simmer for another 3-4 minutes until the sauce thickens slightly. Stir in the remaining 2 tbsp unsalted butter until melted and fully incorporated.
Step 4: Finish and Serve
Return the chicken to the skillet and spoon the sauce over each cutlet. Simmer for 1-2 minutes to allow the flavors to meld and the chicken to absorb some of the sauce. Taste and adjust seasoning with the remaining ½ tsp kosher salt and ¼ tsp freshly ground black pepper if needed.
Garnish with the 0.25 cup chopped fresh parsley and serve immediately with the 4 lemon slices on the side. The sauce should be bright and tangy with a glossy finish, perfectly complementing the tender, juicy chicken.
Pro Tips For Making Cpk Chicken Piccata
- Pound the Chicken: Use a meat mallet or rolling pin to pound the chicken breasts to an even 1/4-inch thickness. I learned this the hard way—uneven pieces cook inconsistently, leaving some parts dry while others stay underdone.
- Season the Flour: Mix kosher salt and freshly ground black pepper directly into the all-purpose flour before dredging. Sounds weird, but it works: the seasoning sticks better and coats every bite, not just the surface.
- Skip Cold Butter: Let the unsalted butter sit at room temperature for 10-15 minutes before cooking. After burning three batches, I finally figured out that cold butter can cause the pan temperature to drop too fast, turning your golden crust into a soggy mess.
- Rest Before Serving: Tent the cooked chicken with foil and give it a solid 5 minutes to rest. My grandmother swore by this, and she was right: the juices redistribute, so your piccata stays moist, not dry.
Pro Cooking Tips for Great cpk chicken piccata
Perfect Pounding Technique
Place chicken breasts between sheets of plastic wrap and use a meat mallet or rolling pin. Start at the thickest part and work outward with firm, even strokes to reach ¼-inch thickness. This prevents dry spots and ensures even cooking throughout each cutlet. 💡
Pan Temperature Control
Heat your skillet over medium-high heat until the butter stops foaming but before it browns. Test by flicking a drop of water—it should sizzle and evaporate immediately. Too hot and your butter will burn, too cool and the chicken won’t develop that perfect golden crust.
Deglazing Like a Pro
After removing the chicken, don’t rush the deglazing step. Let the dry white wine hit the hot pan and scrape aggressively with a wooden spoon to release all those flavorful browned bits. This builds the sauce’s depth and prevents wasting any of that delicious fond. 🔥
Sauce Consistency Check
Your sauce should coat the back of a spoon but still be pourable. If it thickens too much, add a splash of chicken stock. Remember that it will continue to reduce slightly as it sits with the chicken, so pull it off the heat just before it reaches your ideal consistency.
Butter Finishing Touch
Always remove the pan from heat before whisking in the final 2 tbsp butter. This prevents the emulsion from breaking and gives you that silky, restaurant-quality finish. I learned this trick from a chef at CPK—it makes all the difference in the sauce’s texture.
Resting Matters
Let the finished dish rest for 2-3 minutes before serving. This allows the sauce to cling properly to the chicken rather than pooling on the plate. The flavors also meld during this brief rest, taking your piccata from good to extraordinary.
Nutrition Facts
Frequently Asked Questions
Can I use chicken thighs instead of breasts?
Yes, boneless thighs work but require adjusting cook time. Pound to ¼-inch thickness and sear for 4-5 minutes per side at medium-high heat. Thighs stay juicier but have a richer flavor.
What if I don’t have white wine?
Substitute ½ cup chicken stock with an extra 1 tbsp lemon juice. The acidity mimics wine’s role in balancing the sauce. Skip cooking wines—they’re too salty.
How do I prevent the sauce from breaking?
Remove the pan from heat before adding the final 2 tbsp butter. Whisk vigorously to create a smooth emulsion. Never boil the sauce after adding butter.
Can I make this ahead of time?
Yes, but reheat gently. Store cooked chicken and sauce separately in an airtight container for up to 3 days. Warm sauce first, then add chicken to prevent drying.

- BBQ Sausage Recipe Oven: Smoky Depth Without the Grill - September 28, 2026
- BBQ Chicken Bowl Recipe Rice: Smoky Sweetness Over Fluffy Grains - September 28, 2026
- Beef Cutlet Recipe Ideas: Crispy Breaded Patties With Bold Seasonings - September 28, 2026