
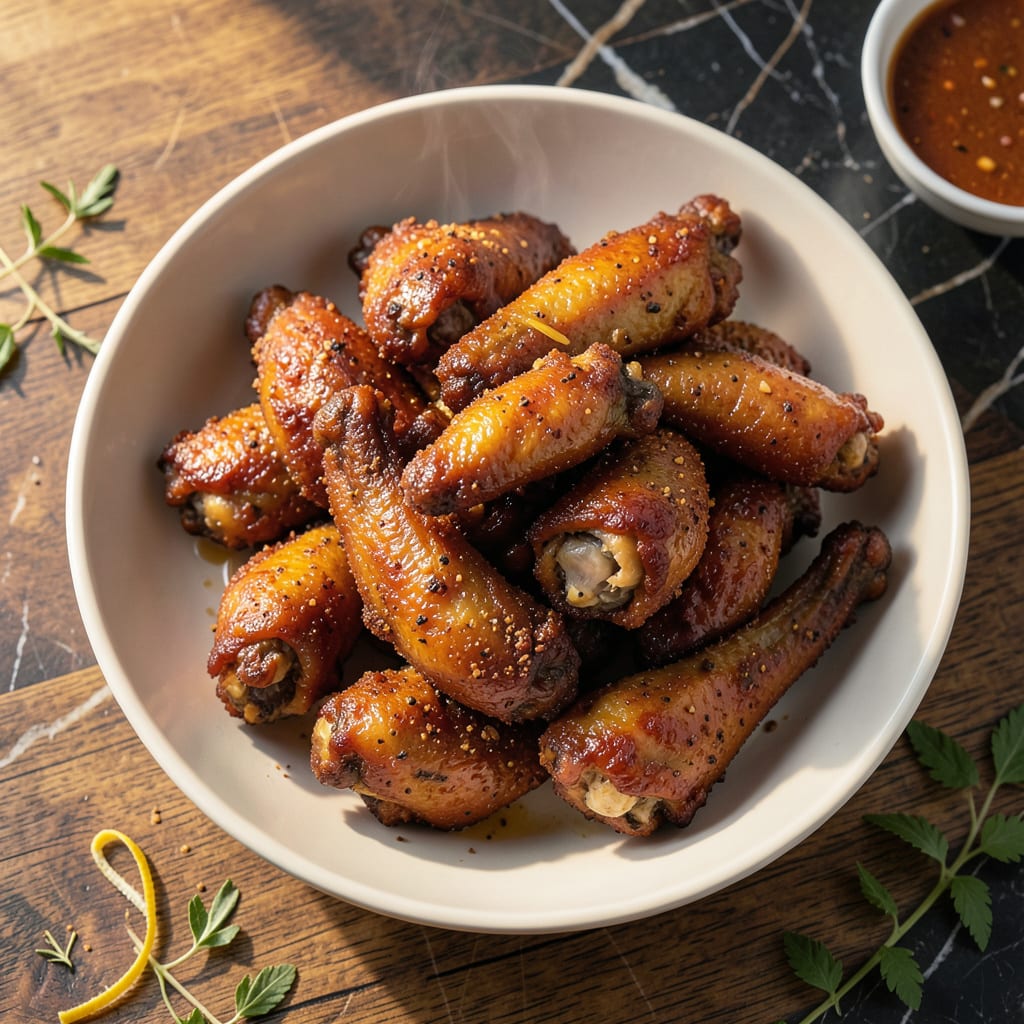
Achieving crispy chicken wings at home requires precision and patience. This method uses a double-fry technique to lock in moisture while creating an irresistibly crunchy exterior.
The first fry cooks the meat through, while the second at higher heat delivers that signature golden, shatteringly crispy texture. Season generously and serve with your favorite dipping sauces.
Ingredients for Crispy Fried Chicken Wings
Double-fry magic starts with these carefully selected ingredients for maximum crunch and flavor.
| Ingredient | Amount | Notes |
|---|---|---|
| Chicken Wings 🍗 | 2 lb | Split into drumettes and flats |
| Vegetable Oil 🫒 | 8 cups | For frying, peanut oil works too |
| Kosher Salt 🧂 | 1 tbsp | Plus more for seasoning |
| Baking Powder 🧂 | 1 tbsp | For extra crispiness |
| Garlic Powder 🧄 | 1 tsp | Freshly ground preferred |
| Onion Powder 🧅 | 1 tsp | Fine grind for even coating |
| Smoked Paprika 🌶️ | 1 tsp | Adds depth and color |
| Cayenne Pepper 🔥 | ½ tsp | Adjust to heat preference |
| Black Pepper 🌶️ | 1 tsp | Freshly ground for best flavor |
| Cornstarch 🌾 | ½ cup | For ultra-crispy coating |
| Ranch Dressing 🥛 | ½ cup | For serving, optional |
| Blue Cheese Dressing 🧀 | ½ cup | For serving, optional |
[recipeingredientscaler]
The wings are the foundation—look for plump, meaty pieces at your butcher or Costco for bulk savings. The baking powder is non-negotiable for that shatteringly crisp texture (yes, even more than cornstarch). Diamond Crystal kosher salt is the professional choice for even seasoning. Avoid pre-cut wings if possible; freshness matters for both safety and flavor.
No buttermilk for a wet brine? Baking powder dry brine works just as well. Swap vegetable oil for peanut oil (higher smoke point) or avocado oil if you prefer. The smoked paprika can be substituted with regular, but you’ll lose that subtle BBQ note. For extra heat, increase the cayenne or add crushed red pepper to the seasoning mix.
Fry in batches to avoid crowding the pot—this keeps the oil temp steady for consistent results. Leftovers (if there are any) keep in the fridge for 3-4 days, though they’re best eaten fresh. Re-crisp in a 400°F oven for 10 minutes if needed. The seasoning blend stores indefinitely in an airtight container.
Why You’ll Love This Recipe
- 5-Minute Prep: I just toss the wings with salt, baking powder, and garlic powder—no marinating, no fuss.
- That Crispy Crunch: The baking powder trick gives them that golden, crackly skin every time.
- Crowd-Pleasing Staple: I serve these at parties, game nights, or just for dinner when the kids demand wings.
- Budget-Friendly Feast: A bag of wings and pantry staples feed a hungry group without breaking the bank.
Step-by-Step Instructions for Crispy Fried Chicken Wings
Here’s the method that guarantees ultra-crispy results with every batch.
Step 1: Prepare the Seasoning Blend and Coat the Wings
In a large bowl, combine the 1 tbsp kosher salt, 1 tbsp baking powder, 1 tsp garlic powder, 1 tsp onion powder, 1 tsp smoked paprika, 0.5 tsp cayenne pepper, and 1 tsp black pepper. Whisk until evenly distributed—this blend creates the signature flavor and crispy texture.
Pat the 2 lb chicken wings completely dry with paper towels. This step is critical—any moisture prevents the coating from adhering properly. Toss the wings in the seasoning blend, ensuring every piece is evenly coated. The baking powder will create micro-bubbles during frying, enhancing the crunch.
Step 2: Apply the Cornstarch Layer and Rest
Sprinkle the 0.5 cup cornstarch over the seasoned wings. Toss gently but thoroughly until the cornstarch creates a thin, even layer. The starch absorbs surface moisture and forms the ultra-crispy shell that defines this dish.
Let the coated wings rest at room temperature for 10-15 minutes. This resting period allows the cornstarch to fully adhere and the seasoning to penetrate the meat. You’ll notice the coating becomes slightly tacky—that’s exactly what you want.
Step 3: First Fry for Even Cooking
Heat the 8 cups vegetable oil in a large, heavy pot or Dutch oven to 325°F. Use a deep-fry thermometer for precision—maintaining the correct temperature ensures even cooking without burning the exterior before the interior is done.
Fry the wings in batches to avoid overcrowding the pot, which would lower the oil temperature. Cook for 8-10 minutes until the wings are fully cooked through but not yet browned. They’ll float to the surface when done. Transfer to a wire rack to drain.
Step 4: Second Fry for Maximum Crispiness
Increase the oil temperature to 375°F. This higher heat creates the final crispy, golden-brown exterior. Fry the wings again for 3-4 minutes until they reach a deep amber color and the coating is audibly crisp when tapped with tongs.
Drain on a fresh wire rack—never paper towels, as they can make the coating soggy. The double-fry technique ensures the wings stay crispy longer, even after saucing or resting.
Step 5: Serve Immediately with Dressings
Serve the wings hot, while the coating is at its crispiest. Offer the 0.5 cup ranch dressing and 0.5 cup blue cheese dressing on the side for dipping. For maximum crunch, serve the dressings in small bowls rather than tossing the wings in them.
If you must hold the wings before serving, keep them on a wire rack in a 200°F oven for up to 15 minutes. This maintains the crispiness without overcooking. The contrast of the crunchy exterior with the juicy interior is what makes this dish unforgettable.
Pro Tips For Making Crispy Fried Chicken Wings
- Pat Wings Dry: After burning three batches, I finally figured out that even a little moisture on the wings makes the oil splatter and prevents crispiness—blot them with paper towels until bone-dry.
- Use Baking Powder: Sounds weird, but it works: tossing the wings in 1 teaspoon of baking powder per pound before frying makes the skin extra crispy without changing the flavor.
- Skip the Crowding: I learned this the hard way—overcrowding the pan drops the oil temp, and you’ll end up with soggy wings instead of that perfect crunch.
- Double Fry for Crisp: Fry once at 325°F for 8-10 minutes, rest 5 minutes, then fry again at 375°F for 3-4 minutes—this guarantees shatteringly crisp skin without drying out the meat.
Storing and Reheating crispy fried chicken wings
Refrigerator Storage
Let wings cool completely before storing—this prevents condensation that makes them soggy. Place in a single layer on a wire rack set over a baking sheet in the fridge for 3-4 hours to cool fully. Then transfer to an airtight container with paper towels to absorb moisture.
Freezer Method
For longer storage, freeze wings on a parchment-lined baking sheet for 1 hour first. This prevents them from sticking together. Then transfer to a freezer-safe bag with parchment between layers. They’ll keep for up to 3 months without losing quality. ❄️
Oven Reheating
Preheat oven to 400°F and place wings on a wire rack over a baking sheet. Heat for 10-12 minutes until the internal temperature reaches 165°F. This method restores crispiness better than any other. I always check the thickest pieces first.
Air Fryer Option
Arrange wings in a single layer in your air fryer basket. Reheat at 375°F for 4-5 minutes, shaking halfway through. The circulating air recrisps the coating beautifully. Avoid overcrowding for even results. 🔥
Saucing After Reheating
If you plan to sauce your wings, reheat them first to restore crispiness. Toss in sauce immediately after reheating while they’re hot. This prevents the coating from absorbing too much liquid and losing its crunch.
Nutrition Facts
Frequently Asked Questions
Why use baking powder in the coating?
Baking powder creates tiny air pockets in the coating, making it extra crispy. It also helps the skin brown beautifully. The alkaline nature tenderizes the meat slightly too.
How do I prevent the coating from falling off?
Pat the wings completely dry before seasoning and let them rest after coating. This ensures the cornstarch adheres properly. Frying in small batches also prevents disturbance.
Can I bake these instead of frying?
You can bake at 425°F for 45-50 minutes, flipping halfway. However, frying achieves superior crispiness. Use a wire rack on a baking sheet for best air circulation.
What oil works best for frying?
Peanut oil is ideal with its high smoke point and neutral flavor. Vegetable or canola oil work well too. Avoid olive oil as it burns at frying temperatures.

- BBQ Sausage Recipe Oven: Smoky Depth Without the Grill - September 28, 2026
- BBQ Chicken Bowl Recipe Rice: Smoky Sweetness Over Fluffy Grains - September 28, 2026
- Beef Cutlet Recipe Ideas: Crispy Breaded Patties With Bold Seasonings - September 28, 2026