
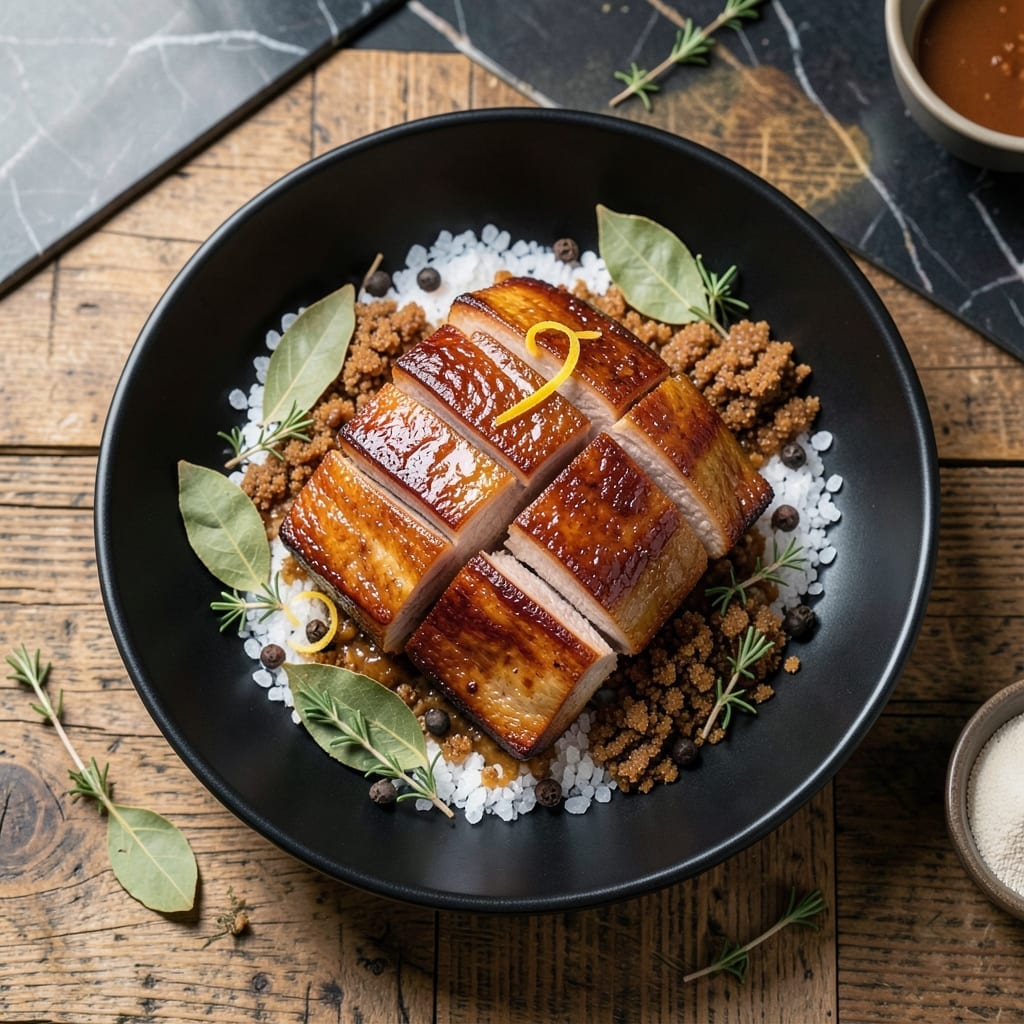
This salt-cured pork belly delivers crispy skin and tender meat with minimal effort. The curing process transforms the belly into a flavor-packed centerpiece.
A simple salt crust draws out moisture while infusing the meat with seasoning. After curing, the belly roasts to perfection with a golden, shattering crust.
What emerges is rich, succulent pork with a crispy exterior that cracks at the touch. The contrast between fatty meat and salty skin is irresistible.
Serve as a main course with pickled vegetables or as part of a charcuterie board. This method guarantees consistent, impressive results.
Ingredients for Cured Pork Belly
Salt-crusted pork belly requires just a handful of ingredients for that perfect crispy skin.
| Ingredient | Amount | Notes |
|---|---|---|
| Pork Belly 🥓 | 2 lb | Skin-on, uniform thickness |
| Kosher Salt 🧂 | 1 cup | Diamond Crystal preferred for texture |
| Brown Sugar 🍚 | ½ cup | Light or dark variety |
| Black Peppercorns 🌶️ | 1 tbsp | Freshly cracked for aroma |
| Bay Leaves 🍃 | 4 whole | Dried, whole leaves |
| Fresh Thyme 🌿 | 2 tbsp | Stems removed, chopped |
| Juniper Berries 🫒 | 1 tsp | Lightly crushed |
| Garlic Cloves 🧄 | 6 cloves | Smashed, peeled |
| Pink Curing Salt 🧂 | ¼ tsp | Prague Powder #1 essential |
| Dijon Mustard 🟡 | 2 tbsp | For crust adhesion |
| Apple Cider Vinegar 🍏 | ¼ cup | For acidity balance |
| Honey 🍯 | 2 tbsp | Optional for glaze |
The pork belly is the foundation—source skin-on, high-quality cuts from a trusted butcher like Whole Foods or Snake River Farms. Look for uniform thickness (about 1 inch) to ensure even curing. The curing salt is non-negotiable: Prague Powder #1 (sold as pink curing salt) prevents botulism while delivering that signature flavor. Diamond Crystal kosher salt is ideal for its coarse texture and clean taste (avoid iodized table salt).
No pink curing salt? Do not substitute regular salt—this is a safety issue, not just flavor. Out of brown sugar? White sugar plus 1 tbsp molasses per cup works. Juniper berries can be omitted, but they add a piney depth. For the herb blend, dried thyme at one-third the amount substitutes fresh, though fresh is preferred. The honey glaze is optional but adds a beautiful sheen—maple syrup works for a less traditional touch.
Store uncured pork belly in the fridge for 1-2 days max or freeze for up to 3 months. Once cured, the belly keeps refrigerated for 1 week before cooking. The finished dish is best served immediately but reheats well—crisps up beautifully under the broiler for leftovers.
Why You’ll Love This Recipe
- Hands-Off Curing: I just rub the pork belly with salt, sugar, and spices, then let the fridge do the work for a week.
- Sweet & Savory Balance: The brown sugar caramelizes while the kosher salt and peppercorns create that deep, complex flavor I crave.
- Feeds a Crowd: One slab serves 8-10, making it my go-to for dinner parties or Sunday family meals.
- Stretches the Budget: Pork belly is affordable, and the cure keeps it fresh for days—honestly, leftovers taste even better.
Step-by-Step Instructions for Cured Pork Belly
This method ensures a perfectly crisp exterior with rich, tender meat every time.
Step 1: Prepare the Cure Mixture
In a medium bowl, combine the 1 cup Kosher Salt, 0.5 cup Brown Sugar, coarsely crushed 1 tbsp Black Peppercorns, 4 whole Bay Leaves, 2 tbsp Fresh Thyme, lightly crushed 1 tsp Juniper Berries, and the essential 0.25 tsp Pink Curing Salt.
Mix thoroughly with your hands to distribute all the spices evenly. The curing salt is critical for both preservation and that signature pink hue. I use Diamond Crystal kosher salt for its clean texture and reliable dissolve rate during the curing process.
Step 2: Apply the Cure to the Pork Belly
Pat the 2 lb Pork Belly dry with paper towels, focusing on the skin side to remove any moisture that might inhibit the cure from adhering properly. Place the pork belly skin-side down in a non-reactive container just large enough to hold it.
Rub the cure mixture aggressively over all surfaces of the pork belly, pressing it into every crevice. The cure should completely coat the meat—you’ll use nearly all of the mixture. Add the 6 cloves Garlic Cloves to the container, tucking them around the pork belly. Cover and refrigerate for 7-10 days, flipping the pork belly daily to ensure even curing.
Step 3: Rinse and Dry the Cured Belly
After curing, remove the pork belly from the refrigerator and rinse off all the cure mixture under cold running water. This step is crucial to remove excess salt that could make the final product unpleasantly salty. Pat the belly extremely dry with fresh paper towels.
Let the pork belly air-dry uncovered in the refrigerator for 12-24 hours. This drying period allows the surface to form a tacky pellicle, which is essential for developing that coveted crispy skin during cooking. The skin should feel slightly sticky to the touch when it’s ready.
Step 4: Apply the Glaze and Roast
Preheat your oven to 300°F. Score the skin of the pork belly in a crosshatch pattern, cutting just through the skin and fat cap without penetrating the meat. This scoring helps render the fat and creates more surface area for crisping.
Mix the 2 tbsp Dijon Mustard, 0.25 cup Apple Cider Vinegar, and 2 tbsp Honey in a small bowl. Brush this glaze evenly over the skin side of the pork belly. Place the belly skin-side up on a wire rack set over a baking sheet to allow air circulation. Roast for 2-2.5 hours until the skin is deep golden brown and crispy.
Step 5: Rest and Serve
Remove the pork belly from the oven and let it rest for 15-20 minutes before slicing. This resting period allows the juices to redistribute, ensuring moist, tender meat with each bite. The internal temperature should reach 160°F during roasting.
Slice the pork belly against the grain into ½-inch thick pieces. Each slice should have a perfect ratio of crispy skin to rich, cured meat. Serve immediately while the skin is at its crispest. The combination of salty, sweet, and umami flavors makes this a standout dish.
Pro Tips For Making Cured Pork Belly
- Score the Skin: Use a sharp knife to cut shallow, even slits in the pork belly skin before curing—this helps the salt and sugar penetrate while keeping the meat from curling during cooking. I learned this the hard way after my first few attempts came out warped.
- Weigh Your Salt: For consistent results, use 1 tablespoon of kosher salt per pound of pork belly. Eyeballing it leads to uneven curing, and nobody wants a bite that’s either bland or inedibly salty.
- Skip the Plastic: Don’t cure the pork belly in a sealed plastic bag—use a non-reactive container with a plate on top to weigh it down. I ruined a batch once when the liquid from the cure leached weird flavors from the plastic.
- Rinse and Dry: After curing, rinse the pork belly under cold water to remove excess salt and sugar, then pat it very dry with paper towels. This step keeps the texture right and prevents the skin from steaming instead of crisping.
Storing and Reheating This cured pork belly
Refrigerator Storage
After curing and cooking, let your pork belly cool completely before storing. Wrap slices tightly in plastic wrap or place in an airtight container. This keeps in the fridge for up to 5 days without losing texture or flavor. 🥓
Freezer Storage
For longer storage, wrap individual slices in parchment paper then freezer bags. Squeeze out all air to prevent freezer burn. Your cured pork belly will stay fresh in the freezer for up to 3 months. Label with the date for easy tracking.
Oven Reheating
Preheat your oven to 350°F. Place slices on a wire rack over a baking sheet. Reheat for 8-10 minutes until the skin crisps up again. This method restores that perfect crunch better than any other.
Skillet Method
Heat a cast iron skillet over medium heat with no oil. Add slices skin-side down and cover for 2-3 minutes. Uncover and cook for another 1-2 minutes until heated through and crispy. ✨
Microwave Option
For quick reheating, place slices on a paper towel-lined plate. Microwave on 50% power for 30-second intervals until warm. Note this method softens the skin, so it’s best for when crispiness isn’t critical.
Serving Leftovers
Reheated pork belly makes an amazing addition to ramen or grain bowls. For charcuterie boards, serve at room temperature. The flavors actually deepen after a day in the fridge.
Nutrition Facts
Frequently Asked Questions
Can I skip the pink curing salt?
No, this is a safety requirement, not optional. Pink curing salt prevents botulism and ensures proper preservation. Regular salt cannot substitute as it lacks nitrites.
How do I know when curing is complete?
The meat should feel firm to the touch after 7-10 days. The color will change to a deeper pink, and the surface will appear slightly dried. Always cure in the fridge at 40°F or below.
Why did my skin not get crispy?
Insufficient drying time or low oven temperature are common culprits. Ensure the belly air-dries for 12-24 hours and roasts at 300°F on a wire rack for proper air circulation.
Can I use a different type of sugar?
Yes, you can swap brown sugar for white sugar plus 1 tbsp molasses. Maple syrup or honey work too, but may alter the flavor slightly. Keep the quantity the same.

- BBQ Sausage Recipe Oven: Smoky Depth Without the Grill - September 28, 2026
- BBQ Chicken Bowl Recipe Rice: Smoky Sweetness Over Fluffy Grains - September 28, 2026
- Beef Cutlet Recipe Ideas: Crispy Breaded Patties With Bold Seasonings - September 28, 2026