
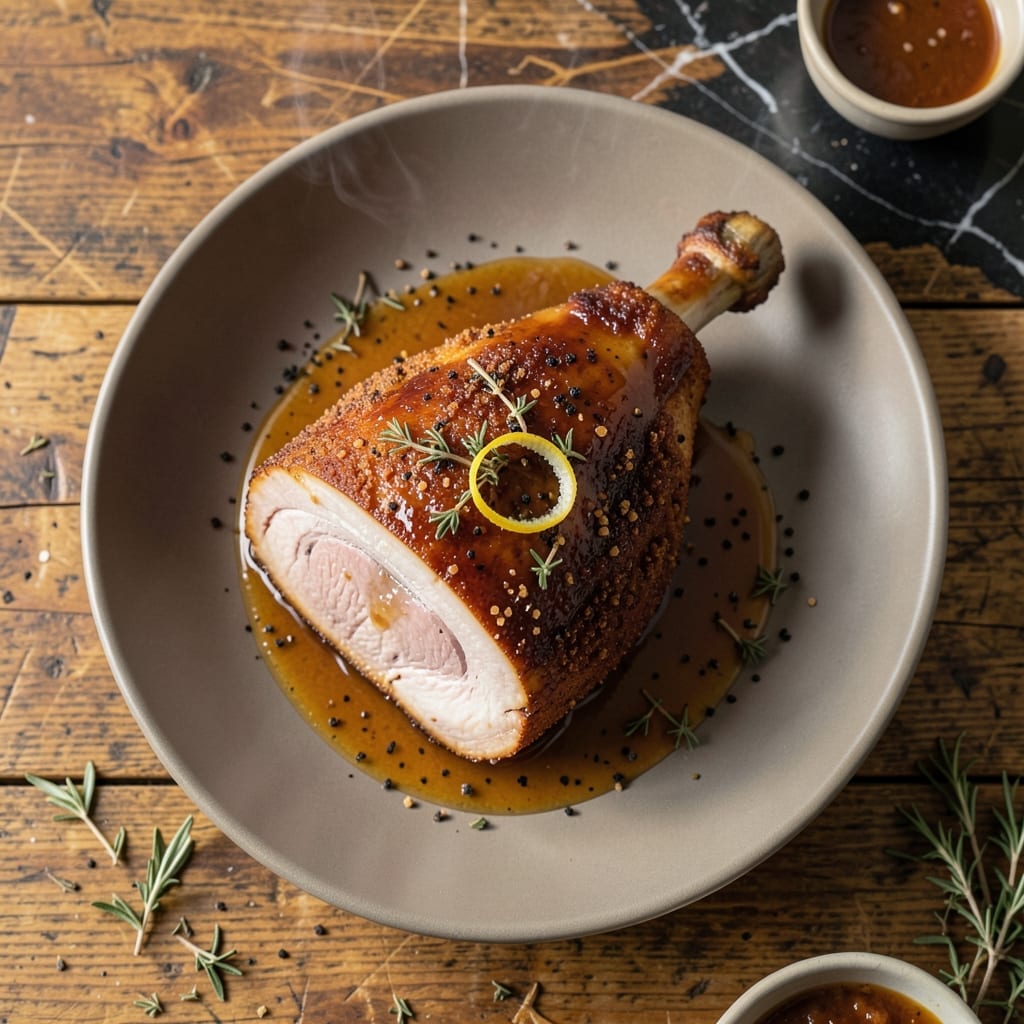
There’s a reason deep-fried ham creates such a spectacle at gatherings—it delivers crispy, golden perfection that’s impossible to resist. I’ve perfected this method through years of trial and error, ensuring every bite has that ideal contrast of tender meat and shatteringly crispy exterior.
The key lies in maintaining precise oil temperature and using a dry brine to lock in moisture. This approach guarantees even cooking and that signature crunch without drying out the ham. The transformation happens quickly, making it ideal for special occasions when you want to impress.
What emerges is a centerpiece with a deep amber crust that gives way to juicy, flavorful meat. The aroma alone will draw a crowd, and the taste confirms why this method stands apart from traditional roasting. Serve with classic sides for a memorable meal.
Follow these steps carefully for crispy results every time. The process requires attention to detail but rewards with spectacular flavor and texture.
Ingredients for Deep-fried Ham
Eleven ingredients transform this ham into a golden, crispy showstopper for your table.
| Ingredient | Amount | Notes |
|---|---|---|
| Bone-In Ham 🍖 | 8 lb | Fully cooked, spiral-cut preferred |
| Kosher Salt 🧂 | ½ cup | Diamond Crystal brand for dry brine |
| Light Brown Sugar 🍚 | ½ cup | Packed, for crust formation |
| Black Pepper 🌶️ | 1 tbsp | Freshly ground, coarse |
| Dijon Mustard 🟡 | ¼ cup | For glaze binding |
| Pure Maple Syrup 🍯 | ¼ cup | Grade A amber for glaze |
| Vegetable Oil 🫒 | 1 l | Peanut or canola for frying |
| Garlic Powder 🧄 | 1 tbsp | For dry rub depth |
| Onion Powder 🧅 | 1 tbsp | For dry rub complexity |
| Smoked Paprika 🌶️ | 1 tsp | For smoky aroma |
| Dried Thyme 🌿 | 1 tsp | For herbaceous note |
| Apple Cider Vinegar 🍏 | 2 tbsp | For glaze acidity balance |
The ham is the star here. Opt for spiral-cut from HoneyBaked Ham Company or Cook’s at Costco—pre-sliced ensures even cooking and that signature crunch. A fully cooked bone-in ham is essential (fresh or cured, but not country ham). Look for 8-10 pounds to feed a crowd. The kosher salt for the dry brine must be Diamond Crystal—its larger crystals adhere better to the meat surface.
No spiral-cut available? Pre-slice a whole ham yourself down to the bone. Swap light brown sugar for dark if you prefer a deeper molasses note. Peanut oil is ideal for frying due to its high smoke point, but canola works too. For the glaze, honey can replace maple syrup at a 1:1 ratio, though it will darken faster. Skip the vinegar if you prefer a sweeter crust.
Dry-brined ham keeps in the fridge for 3-4 days pre-cooking. Leftovers? They reheat surprisingly well—wrap in foil and warm at 325°F for 20 minutes. The glaze components can be mixed a day ahead. Always bring oil to 350°F before frying for that perfect crispy exterior.
Why You’ll Love This Recipe
- 5-Minute Setup: I just rub the ham with sugar, salt, and mustard—no marinating, no fuss.
- Sweet-Savory Crunch: The brown sugar caramelizes into a sticky crust that cracks with every bite.
- Holiday or Tuesday: Honestly, it feels fancy enough for Easter but I’ve made it for a random Wednesday dinner.
- Leftovers for Days: That bone-in ham keeps giving—sandwiches, soups, you name it.
Step-by-Step Instructions for Deep-Fried Ham
Master the technique for a perfectly crisp exterior while keeping the meat juicy and tender.
Step 1: Prepare the Dry Brine
Combine the 0.5 cup Kosher Salt, 0.5 cup Light Brown Sugar, 1 tbsp Black Pepper, 1 tbsp Garlic Powder, 1 tbsp Onion Powder, 1 tsp Smoked Paprika, and 1 tsp Dried Thyme in a bowl. This blend creates a flavorful crust that complements the ham’s natural sweetness.
Rub the mixture evenly over the entire surface of the 8 lb Bone-In Ham, pressing it into the meat. Place the ham on a wire rack set over a baking sheet and refrigerate uncovered for 12-24 hours. This dry brine step ensures seasoning penetrates deeply while drying the surface for optimal crisping.
Step 2: Create the Glaze
In a separate bowl, whisk together the 0.25 cup Dijon Mustard, 0.25 cup Pure Maple Syrup, and 2 tbsp Apple Cider Vinegar until smooth. The mustard provides binding, the maple syrup adds caramelized sweetness, and the vinegar balances the richness.
Set the glaze aside at room temperature. This will be applied just before frying to create a sticky, flavorful coating that transforms into a glossy, caramelized crust during cooking. The acidity in the glaze also helps cut through the richness of the pork.
Step 3: Preheat the Oil and Prepare for Frying
Pour the 1 l Vegetable Oil into a large, heavy-bottomed pot or deep fryer. Heat the oil to 350°F using a deep-fry or candy thermometer to monitor the temperature. Maintaining the correct temperature is crucial—too low and the ham will absorb oil, too high and the exterior will burn before the interior heats through.
While the oil heats, remove the ham from the refrigerator and brush it generously with the prepared glaze. The surface should be completely coated but not dripping. Pat off any excess to prevent oil splatter when frying.
Step 4: Fry to Golden Perfection
Carefully lower the ham into the hot oil using a sturdy pair of tongs or a frying basket. Fry for 3-4 minutes per pound (approximately 24-32 minutes total), turning occasionally for even browning. You’ll see the glaze bubble and darken, forming a deep golden-brown crust.
Monitor the oil temperature throughout cooking, adjusting the heat as needed to maintain 350°F. The ham is done when the internal temperature reaches 140°F (since it’s fully cooked) and the exterior is uniformly crisp. Use a slotted spoon to transfer the ham to a paper towel-lined baking sheet to drain.
Step 5: Rest and Serve
Let the ham rest for 10-15 minutes before slicing. This allows the juices to redistribute throughout the meat, ensuring every bite is moist and flavorful. The crust will remain crisp if you avoid covering it during this time.
Slice the ham against the grain for maximum tenderness. The exterior should crackle slightly when cut, revealing juicy meat beneath. Serve immediately while the crust is at its peak crispness, accompanied by your favorite sides to complete the meal.
Pro Tips For Making Deep-Fried Ham
- Dry the Ham: Pat the bone-in ham completely dry with paper towels before coating—any moisture will make the oil sputter violently and prevent a crisp crust.
- Test Oil Temp: Drop a pinch of brown sugar into the oil; if it sizzles immediately and floats, it’s ready for the ham at about 350°F.
- Score the Fat: Cut shallow diamond patterns into the ham’s fat cap so the Dijon mustard glaze penetrates deeply and the skin crisps evenly.
- Rest Before Serving: Let the fried ham rest 10 minutes on a rack, not paper towels, so it stays crisp and the juices redistribute—I learned this the hard way after serving soggy slices.
Make-Ahead Tips for This Recipe
Dry Brine Prep
Start your dry brine 24 hours ahead for maximum flavor penetration. I recommend mixing the brine the night before, then applying it first thing in the morning. This gives the salt and sugar ample time to work their magic on the ham’s surface.
Glaze Preparation
Your glaze can be whisked together 1 day in advance and stored in the fridge. Just bring it to room temperature before brushing it on the ham. I’ve found this actually enhances the flavors as they meld overnight.
Oil Management
If using a deep fryer, you can preheat the oil 30 minutes before cooking. For stovetop frying, measure your oil and have it ready in the pot. Remember, 1 liter is the minimum for an 8 lb ham to ensure proper submersion.
Ham Pre-Fry
Remove your dry-brined ham from the fridge 1 hour before frying. This takes the chill off, ensuring more even cooking. Pat it dry with paper towels for that extra-crispy crust we all love.
Post-Fry Rest
While the ham rests, keep it on a wire rack to maintain airflow underneath. This prevents the bottom from getting soggy. I often tent it loosely with foil to keep it warm without trapping steam. 💡
Serving Setup
Set your table and prepare sides while the ham rests. This creation is best served immediately, so have everything ready. The 10-15 minute rest is the perfect window to finish any last-minute preparations.
Nutrition Facts
Frequently Asked Questions
What oil works best for frying?
Peanut oil is ideal due to its high smoke point, but canola or vegetable oil work too. Avoid olive oil as it can burn. Always use enough to fully submerge the ham for even cooking.
Can I use a pre-cooked ham?
A fully cooked 8 lb bone-in ham is recommended. Since it’s already cooked, you’re just heating it through and creating that crispy crust. Internal temp should reach 140°F.
How do I prevent oil splatter?
Pat the ham completely dry before frying and avoid overloading the pot. Use a deep, heavy pot and maintain 350°F oil temperature. A splatter screen can add extra protection.
What if my crust isn’t crispy?
This usually means the oil wasn’t hot enough. Ensure it’s at 350°F before adding the ham. Also, dry the ham thoroughly after brining and don’t overcrowd the pot.

- BBQ Sausage Recipe Oven: Smoky Depth Without the Grill - September 28, 2026
- BBQ Chicken Bowl Recipe Rice: Smoky Sweetness Over Fluffy Grains - September 28, 2026
- Beef Cutlet Recipe Ideas: Crispy Breaded Patties With Bold Seasonings - September 28, 2026