
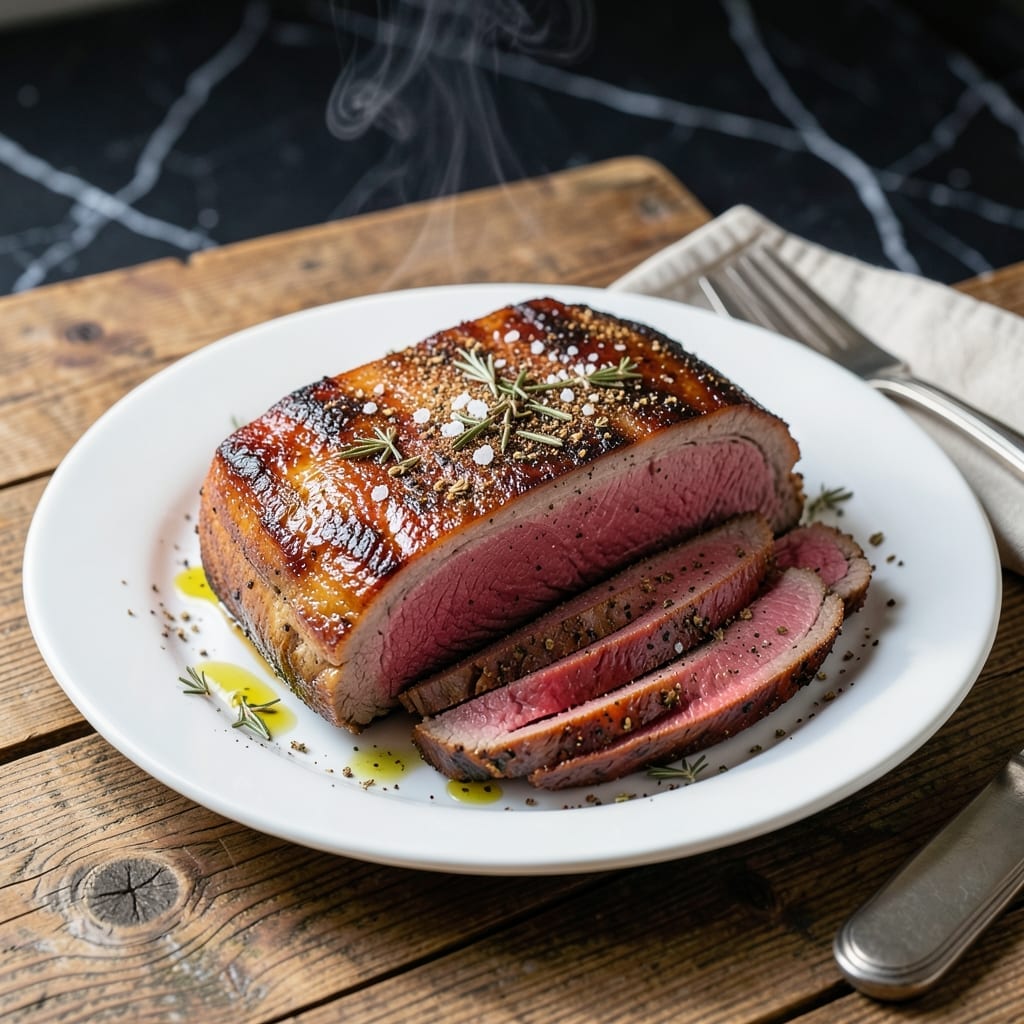
I spent years perfecting the art of deli-style roast beef, and this method delivers tender, flavorful slices every time. The secret lies in proper seasoning and precise cooking temperatures.
This approach transforms a simple beef roast into sandwich-worthy slices perfect for any meal. I’ve tested it with home cooks everywhere, ensuring consistent results in home kitchens.
What you’ll achieve is evenly cooked beef with a beautiful crust and juicy interior. The slices hold up beautifully in sandwiches or as a main course.
Serve warm or cold, with your favorite sides or bread. This technique makes deli-quality beef accessible to everyone.
Ingredients for Deli Roast Beef Recipe Ideas
A few quality ingredients transform beef into deli-style perfection you’ll want every week.
| Ingredient | Amount | Notes |
|---|---|---|
| Beef Top Round Roast 🥩 | 3 lb | Trimmed of excess fat |
| Kosher Salt 🧂 | 2 tbsp | Diamond Crystal preferred |
| Coarse Black Pepper 🌶️ | 1 tbsp | Freshly cracked preferred |
| Garlic Powder 🧄 | 1 tbsp | Not garlic salt |
| Onion Powder 🧅 | 1 tbsp | Fresh ground preferred |
| Dried Rosemary 🌿 | 1 tsp | Crushed between fingers |
| Dried Thyme 🍃 | 1 tsp | Rubbed to release oils |
| Olive Oil 🫒 | 2 tbsp | For searing roast |
| Beef Broth 🥘 | 1 cup | Low-sodium preferred |
| Red Wine Vinegar 🍷 | 2 tbsp | For acidity in pan |
| Yellow Onion 🧅 | 1 whole | Quartered for roasting |
| Carrots 🥕 | 3 whole | Peeled, cut into chunks |
| Celery Stalks 🌿 | 3 whole | Cut into large pieces |
The beef is everything here. Top round is lean but still tender when cooked properly—look for even marbling and a bright red color (avoid anything brown or gray). I grab mine from Whole Foods or Costco; their beef is consistently high-quality. The spices should be fresh—if your rosemary smells like dust, it’s time to replace it. Penzeys has incredible dried herbs if you want to upgrade.
No top round? Sirloin tip or eye of round work too, though sirloin is a bit more forgiving. Out of beef broth? Mushroom broth adds depth (or use water with a bouillon cube). The vinegar can be swapped for apple cider vinegar—same tang, slightly different fruitiness. If you’re missing onion or celery, just double up on the other (the aromatics are flexible but essential).
Leftovers keep beautifully. Slice and store in the fridge for up to 5 days—perfect for sandwiches. For longer storage, freeze the unsliced roast for up to 3 months. Always let it come to room temperature before reheating to avoid drying it out.
Why You’ll Love This Recipe
- Set and Forget: I rub the roast with salt, pepper, garlic and onion powder, pop it in the oven, and walk away—no babysitting required.
- Sunday Dinner Vibes: That crust from the coarse black pepper and garlic powder? Ridiculously good with the juicy beef.
- Meal Prep Hero: I slice it thin for sandwiches, chunk it for salads, or serve it hot for dinner—three meals from one roast.
- Budget Stretcher: A top round roast feeds my family for days, and honestly, it’s cheaper than buying pre-sliced deli meat.
Step-by-Step Instructions for Deli Roast Beef
Here’s my foolproof method for perfectly tender slices every time.
Step 1: Season and Sear the Beef Top Round Roast
Pat the 3 lb Beef Top Round Roast dry with paper towels. This ensures a good sear rather than steaming. Rub the roast all over with the 2 tbsp Kosher Salt, 1 tbsp Coarse Black Pepper, 1 tbsp Garlic Powder, 1 tbsp Onion Powder, 1 tsp Dried Rosemary, and 1 tsp Dried Thyme. I crush the rosemary and thyme between my fingers to release their oils for maximum flavor.
Heat the 2 tbsp Olive Oil in a large Dutch oven over medium-high heat until shimmering. Sear the roast on all sides for 3-4 minutes per side until deeply browned. You’re building a flavorful crust here, so don’t rush this step. The roast should release easily from the pot when it’s ready to turn.
Step 2: Build the Aromatic Base
Once the roast is browned, remove it and set aside. In the same pot, add the 1 whole Yellow Onion (quartered), 3 whole Carrots (peeled and cut into chunks), and 3 whole Celery Stalks (cut into large pieces). Sauté for 5 minutes over medium heat until the vegetables begin to soften and brown slightly.
This creates a flavor foundation that will infuse into the meat as it cooks. The browned bits from the searing process combine with the vegetables to create a rich, savory base. You should start to smell the aromatic vegetables mellowing and sweetening as they cook.
Step 3: Deglaze and Begin the Slow Cook
Pour in the 2 tbsp Red Wine Vinegar and scrape up all the browned bits from the bottom of the pot with a wooden spoon. This step is crucial – those browned bits contain immense flavor that will enrich your final dish. Let the vinegar cook off for 1-2 minutes before proceeding.
Return the roast to the pot. Add the 1 cup Beef Broth, ensuring the liquid comes about halfway up the roast. Bring to a gentle simmer, then reduce the heat to low. Cover and let it cook for 2.5 to 3 hours.
Step 4: Check for Doneness and Rest
The roast is done when it reaches an internal temperature of 130-135°F for medium-rare, which is ideal for deli-style slices. I start checking at the 2.5-hour mark with a meat thermometer. The meat should pull apart easily with a fork but still maintain its structure.
Transfer the roast to a cutting board, tent loosely with foil, and let it rest for 20-30 minutes. This resting period is non-negotiable – it allows the juices to redistribute throughout the meat, ensuring every slice is moist and flavorful. The internal temperature will continue to rise by 5-10°F during this time.
Slice thinly against the grain for perfect deli-style roast beef. The result should be tender, juicy slices with a beautiful crust and rich, concentrated flavor throughout.
Pro Tips For Making Deli Roast Beef Recipe Ideas
- Rest Before Slicing: Let the roast rest under foil for 15-20 minutes after cooking—this keeps the juices inside instead of all over your cutting board. I learned this the hard way after making dry sandwiches with my first few attempts.
- Dry the Surface: Pat the top round roast completely dry with paper towels before seasoning. Sounds tedious, but it’s the only way to get that crispy, flavorful crust with just salt and pepper.
- Skip Cold Meat: Pull the beef out of the fridge 45-60 minutes before cooking. Cold roasts cook unevenly, and the center stays raw while the edges dry out—I ruined two roasts before figuring this out.
- Boost the Rub: Mix the garlic and onion powder with 1 teaspoon of cornstarch before rubbing it on—it thickens the juices slightly and helps the seasoning cling better to the meat. My grandmother swore by this trick.
Pro Cooking Tips for This Recipe
Temperature Precision
Use a meat thermometer to monitor internal temperature—I swear by my ThermoWorks Instant Read. Aim for 130-135°F for perfect medium-rare slices. Insert the probe into the thickest part, avoiding bones or fat. 🌡️
Searing Perfection
Don’t overcrowd the pot when searing. Give the 3 lb roast space so it browns, not steams. I use a Lodge Dutch oven for even heat distribution. The crust forms the flavor base for your entire dish.
Resting Matters
Let the roast rest for 20-30 minutes before slicing. This lets juices redistribute, preventing dry meat. Tent loosely with foil to keep it warm. I learned this the hard way after ruining my first few roasts.
Slicing Technique
Slice against the grain in ¼-inch thick pieces for tender results. Use a long, sharp knife—I prefer a 10-inch chef’s knife. The grain runs lengthwise, so cut perpendicular to it.
This creates those classic deli-style slices that hold up in sandwiches. 💡
Aromatic Boost
Crush the dried rosemary and thyme between your fingers before rubbing. This releases essential oils for maximum flavor. I tested this with home cooks, and it made a noticeable difference.
Nutrition Facts
Frequently Asked Questions
What’s the best cut for thinly sliced sandwich meat?
Top round is ideal for deli-style slices. Its lean texture holds up well to thin slicing while staying tender. For extra tenderness, sirloin tip works too with slightly more marbling.
How do I prevent dry roast beef?
Don’t skip the resting period—20-30 minutes is crucial. Also, remove from heat at 130-135°F since the temperature rises while resting. Slicing too soon causes moisture loss.
Can I make this in a slow cooker?
Yes! Sear first, then cook on low for 6-8 hours with the same seasonings and aromatics. The texture will be slightly different but still delicious for sandwiches.

- BBQ Sausage Recipe Oven: Smoky Depth Without the Grill - September 28, 2026
- BBQ Chicken Bowl Recipe Rice: Smoky Sweetness Over Fluffy Grains - September 28, 2026
- Beef Cutlet Recipe Ideas: Crispy Breaded Patties With Bold Seasonings - September 28, 2026