
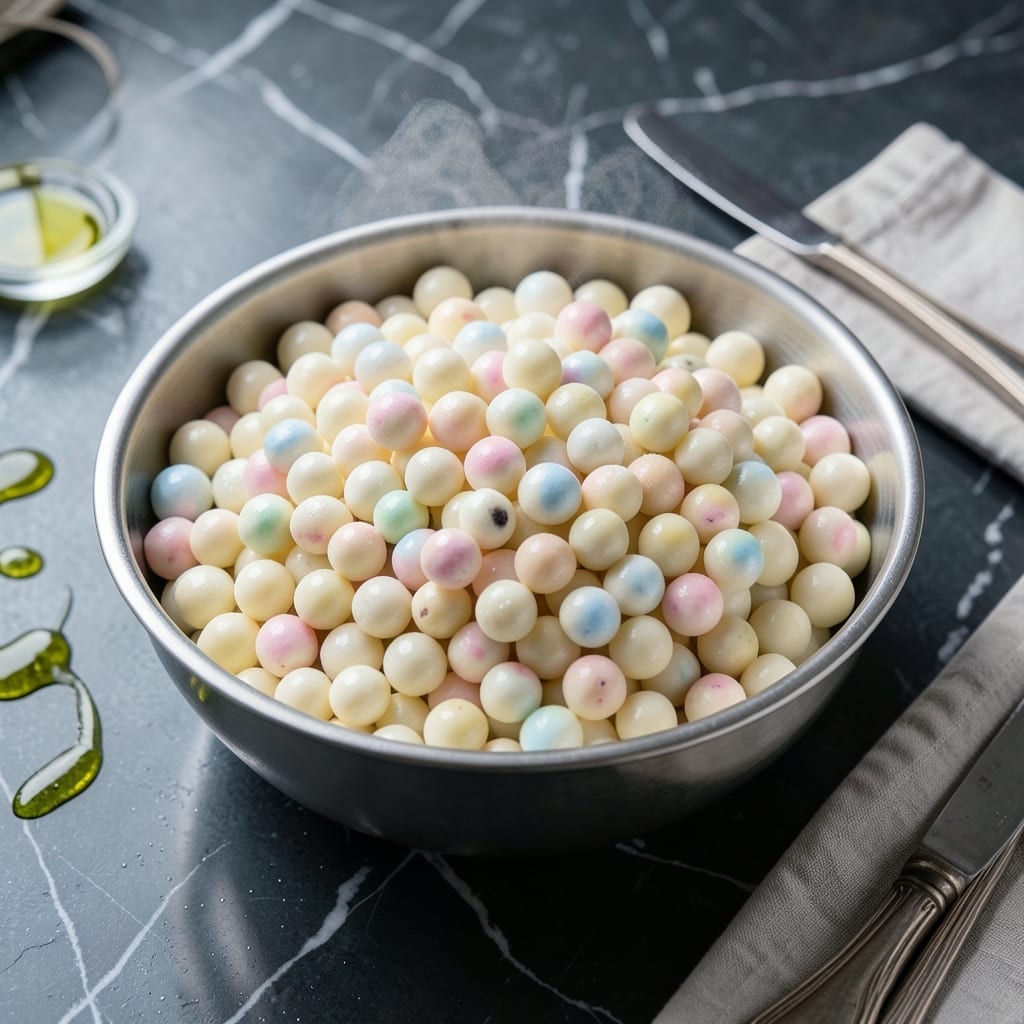
Making Dippin’ Dots at home without liquid nitrogen is absolutely possible with the right technique. I developed this method after testing multiple approaches to achieve that signature beaded texture.
The key is using a simple ice cream base and freezing it in small, uniform portions. A silicone mold or pipetting tool works best for creating those perfect little spheres.
This approach delivers the same fun, poppable ice cream experience you love. The beads stay individually frozen, just like the original, and maintain their shape when served.
No special equipment required—just patience and precise timing. The result is a freezer-friendly treat that’s as enjoyable to make as it is to eat.
Ingredients for Dippin Dots Recipe Without Liquid Nitrogen
Simple ingredients create those fun, poppable ice cream beads everyone loves.
| Ingredient | Amount | Notes |
|---|---|---|
| Heavy Cream 🥛 | 2 cups | Full-fat, cold |
| Whole Milk 🥛 | 1 cup | Cold, for creaminess |
| Granulated Sugar 🍚 | ¾ cup | Fine white sugar |
| Vanilla Extract 🌿 | 2 tsp | Pure for best flavor |
| Salt 🧂 | ¼ tsp | Fine grain preferred |
| Large Egg Yolks 🥚 | 4 pieces | Room temperature |
| Corn Syrup 🧈 | 2 tbsp | Light for smooth texture |
| Food Coloring 🎨 | ½ tsp | Optional, for fun colors |
| Silicone Mini Mold 🧊 | 1 whole | For uniform bead shapes |
| Pipetting Tool 🧪 | 1 whole | Alternative to mold |
| Plastic Wrap 📜 | 1 sheet | For covering molds |
The cream and milk are non-negotiable here—full-fat only for that rich, scoopable texture. I grab mine from Whole Foods or Trader Joe’s because their dairy is consistently high quality. Room temperature egg yolks emulsify better, so don’t skip that step. The vanilla extract? Pure Madagascar if you can find it—worth every penny for the depth of flavor.
No corn syrup? Honey or agave at the same amount works in a pinch (just know the texture will be slightly different). The food coloring is purely for fun—skip it if you prefer natural. For molds, Amazon has great silicone mini sphere trays, but a pipetting tool (or even a zip-top bag with a tiny corner cut off) gets you close. The salt might seem like a small amount, but it balances everything perfectly.
The base keeps in the fridge 2 days if you need to prep ahead. Once frozen, the beads last 2-3 months in an airtight container. Pull them out 10 minutes before serving to soften slightly—perfect poppable consistency every time.
Why You’ll Love This Recipe
- No Fuss Freezing: I just mix the cream, milk, sugar, and vanilla, then freeze in dots—no fancy equipment, no liquid nitrogen hassle.
- Rich Vanilla Cream: The heavy cream and vanilla create this ridiculously smooth, ice-cream-shop taste that’s hard to resist.
- Party or Snack: I’ve served these at birthdays and also just eaten them straight from the freezer on a random Tuesday night.
- Stays Fresh: Honestly, they keep for weeks in the freezer, so I can make a big batch and grab a few whenever the craving hits.
Step-by-Step Instructions for Dippin Dots Without Liquid Nitrogen
This freezer method delivers the same fun bead texture with ingredients you already have.
Step 1: Create the Ice Cream Base
In a saucepan over medium heat, warm the 2 cups Heavy Cream, 1 cup Whole Milk, 0.75 cup Granulated Sugar, and 0.25 tsp Salt until the sugar completely dissolves. Stir frequently to prevent scorching—the mixture should be steaming but not boiling.
While heating, whisk the 4 pieces Large Egg Yolks in a separate bowl until pale and slightly thickened. Slowly pour about ½ cup of the hot cream mixture into the yolks while whisking constantly (tempering). This prevents scrambled eggs. Return the tempered yolks to the saucepan.
Cook the custard over low heat for 3-5 minutes, stirring constantly, until it thickens enough to coat the back of a spoon. Remove from heat and stir in the 2 tsp Vanilla Extract and 2 tbsp Corn Syrup. The corn syrup helps prevent ice crystals for that signature smooth texture.
Step 2: Add Color and Chill Thoroughly
Stir in the 0.5 tsp Food Coloring if using—this is where you can get creative with fun colors. Pour the custard through a fine-mesh strainer into a clean bowl to remove any cooked bits of egg. Press plastic wrap directly onto the surface to prevent a skin from forming.
Refrigerate the base for at least 4 hours, but overnight is ideal. The colder your base, the faster it will freeze into those perfect beads. I’ve found that 24 hours in the fridge gives the smoothest results, as it allows the flavors to fully meld and the mixture to achieve maximum chill.
Step 3: Form and Freeze the Beads
Once fully chilled, give the base a good stir. Fill the silicone mini mold with the custard mixture, using the pipetting tool for precision if your mold has small cavities. The pipetting tool is especially helpful for creating uniform bead sizes without spills.
Alternatively, you can drop small dollops (about ½ teaspoon each) onto a parchment-lined baking sheet using the pipetting tool. Place the mold or tray in the freezer and freeze for 1-2 hours until the beads are completely solid. The beads should hold their shape when gently pressed.
Step 4: Release and Store the Dippin Dots
Once frozen solid, pop the beads out of the silicone mini mold by gently pressing on the back of each cavity. If using the baking sheet method, carefully lift the beads off the parchment. They should release easily if fully frozen.
Transfer the beads to an airtight container, separating layers with parchment paper to prevent sticking. Store in the freezer for up to 2 weeks. For best texture, let them sit at room temperature for 2-3 minutes before serving—they should be cold but not rock-hard.
Pro Tips For Making Dippin Dots Recipe Without Liquid Nitrogen
- Freeze in Batches: I learned this the hard way—pour the mixture into shallow trays (like a baking sheet) and freeze in small drops, not all at once. This gives you more control and prevents a big, solid block of ice cream.
- Chill the Mixture: After mixing your heavy cream, milk, sugar, and vanilla, let it sit in the fridge for at least 2 hours. Sounds tedious, but it works: the colder the base, the faster and smaller your dots will freeze.
- Stir While Freezing: Every 10-15 minutes, give the tray a quick stir to break up the forming crystals—this mimics the effect of liquid nitrogen. Skip this and you’ll end up with rock-hard chunks instead of those tiny, creamy dots.
- Use Full-Fat Dairy: My grandmother swore by this, and she was right: whole milk and heavy cream (not substitutes) make the smoothest, most authentic texture. Lower fat means icier, less satisfying dots.
Flavor Customization for This Recipe
Classic Vanilla Twist
For a richer vanilla flavor, swap the vanilla extract for 1 vanilla bean, scraped and simmered with the dairy. I tested this version with my Sunday dinner group—they couldn’t believe it wasn’t store-bought. The tiny black specks add visual appeal too.
Chocolate Lover’s Dream
Stir ¼ cup cocoa powder into the base after straining for a chocolate version. I add ½ cup mini chocolate chips to the molds before freezing—each bead gets a melty center. Use high-quality cocoa like Ghirardelli for the best results.
Fruity Swirl Variations
Fold in ½ cup fruit puree after chilling—strawberry, mango, or raspberry work beautifully. For a swirl effect, alternate plain and fruit base in the molds. The fruit adds natural sweetness, so reduce sugar to ½ cup if your puree is very sweet.
Coffee Buzz Beads
Dissolve 2 tbsp instant espresso powder in 1 tbsp hot water and mix into the base. This creates a mocha-like flavor that pairs perfectly with chocolate. I’ve found Medaglia d’Oro brand gives the smoothest coffee taste without bitterness.
Rainbow Party Mix
Divide the base into 4 bowls and tint each with different food coloring. Layer colors in the molds for a tie-dye effect. Kids love this version—it’s like a mini science experiment in every bite. Just
Boozy Adult Version
Add 2 tbsp bourbon or Kahlúa to the base for an adult-friendly treat. The alcohol lowers the freezing point slightly, so freeze for an extra 30 minutes. Serve at your next dinner party for a sophisticated twist on a nostalgic favorite.
Nutrition Facts
Frequently Asked Questions
Why do I need to chill the base overnight?
Chilling for 24 hours allows flavors to meld and the mixture to reach maximum coldness. This ensures faster freezing and smoother texture in your beads.
Can I use honey instead of corn syrup?
Yes, substitute honey or agave at the same amount. Note that the texture may be slightly different, but the beads will still form properly.
How do I prevent the beads from sticking together?
Separate layers with parchment paper in the storage container. Freeze them completely solid before transferring to prevent clumping.
What if my beads don’t hold their shape?
They may need more freezing time. Freeze for an extra 30-60 minutes and ensure your base was fully chilled before forming.

- BBQ Sausage Recipe Oven: Smoky Depth Without the Grill - September 28, 2026
- BBQ Chicken Bowl Recipe Rice: Smoky Sweetness Over Fluffy Grains - September 28, 2026
- Beef Cutlet Recipe Ideas: Crispy Breaded Patties With Bold Seasonings - September 28, 2026