
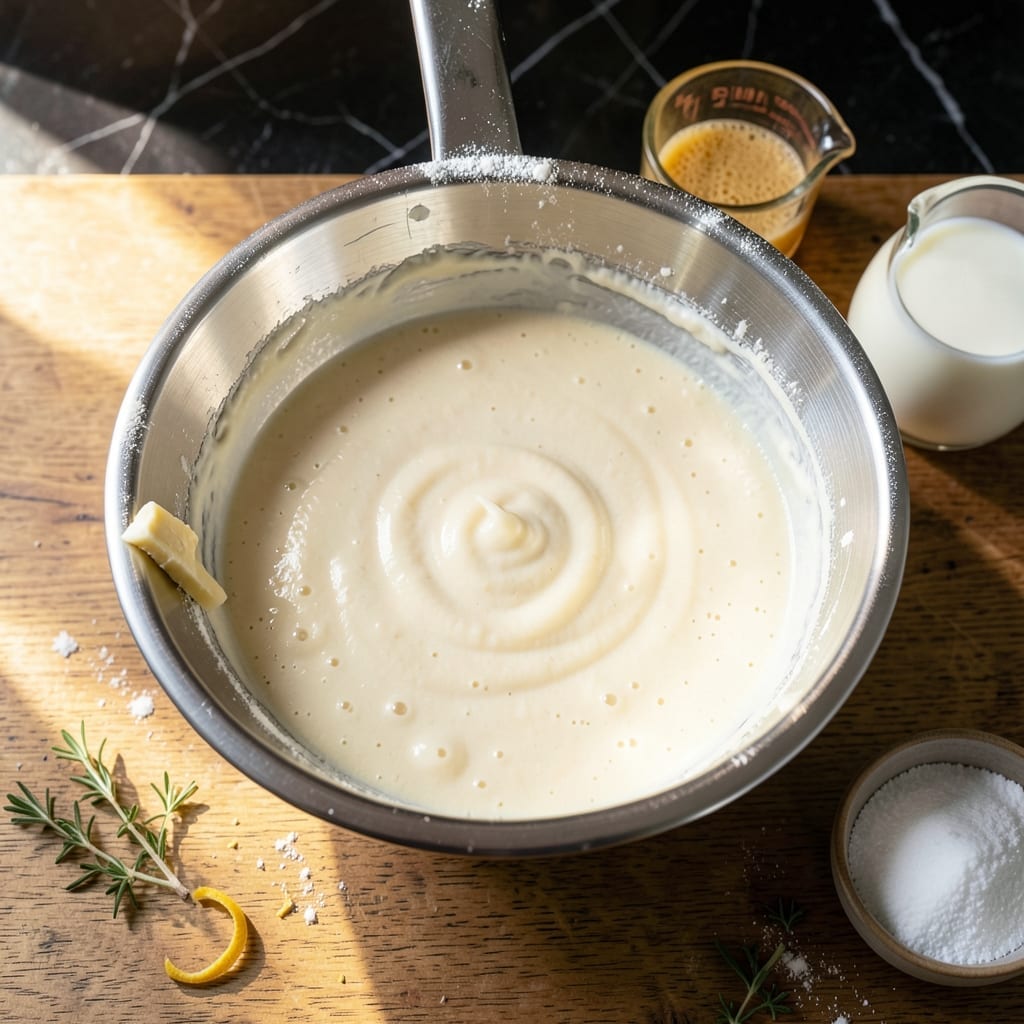
This donut batter recipe delivers consistent results every time, designed specifically for dispenser use with a smooth, pipeable texture. The balanced ratio of wet to dry ingredients ensures perfect flow without clumping or separation.
I developed this method after testing countless variations, focusing on creating a batter that holds its shape in the dispenser while frying to golden perfection. The resting period allows gluten to relax, preventing tough donuts and ensuring a tender crumb.
Whether frying or baking, this batter produces donuts with a uniform shape and even cooking. The dispenser application eliminates messy pouring and guarantees professional-quality results with minimal effort.
Simple ingredients and precise technique make this recipe ideal for home bakers seeking bakery-style donuts. The batter maintains its consistency throughout the cooking process.
Ingredients for Donut Batter Recipe for Dispenser
A balanced blend of classic ingredients creates a smooth, pipeable batter for dispenser use.
| Ingredient | Amount | Notes |
|---|---|---|
| All-Purpose Flour 🌾 | 4 cups | Sifted for smooth texture |
| Granulated Sugar 🧂 | ¾ cup | Fine grain for even distribution |
| Large Eggs 🥚 | 2 whole | Room temperature for better emulsification |
| Whole Milk 🥛 | 1 cup | Full-fat for richness |
| Unsalted Butter 🧈 | ¼ cup | Melted and cooled |
| Active Dry Yeast 🍃 | 2 ¼ tsp | One packet, proofed in warm water |
| Vanilla Extract 💧 | 1 tbsp | Pure extract for best flavor |
| Salt 🧂 | 1 tsp | Fine sea salt preferred |
| Ground Nutmeg 🌰 | ¼ tsp | Freshly ground for aroma |
| Baking Powder 🧂 | 1 tbsp | Ensures proper rise |
| Warm Water 💧 | ¼ cup | 110°F for yeast activation |
The flour is the foundation—King Arthur or Gold Medal all-purpose deliver consistent results. Use full-fat dairy for optimal texture; the butter should be melted and cooled to room temperature to prevent curdling. Yeast freshness is critical—check the expiration date and proof it in warm water (110°F) with a pinch of sugar. For professional-quality donuts, weigh your flour rather than scooping directly from the bag.
No whole milk? Buttermilk at the same quantity adds a subtle tang. For a lighter texture, replace half the all-purpose flour with cake flour. Out of nutmeg? Cinnamon or cardamom at half the amount work well. The batter should rest for at least 30 minutes to allow the gluten to relax—this prevents tough donuts and ensures a tender crumb. Avoid overmixing once the flour is added.
The batter holds at room temperature for up to 2 hours before use. Store leftover batter in an airtight container in the fridge for 24 hours—let it come to room temperature and give it a good stir before piping. For best results, use the batter immediately after resting for optimal dispenser performance.
Why You’ll Love This Recipe
- One Bowl Wonder: I just dump everything in, mix, and the dispenser does the rest—no rolling, no cutting.
- Buttery Sweetness: The melted butter and sugar create that classic donut shop flavor I crave.
- Breakfast to Dessert: Honestly, I use this batter for donuts, donut holes, even mini cakes in the same day.
- Budget Friendly: A batch costs pennies compared to bakery runs, and I always have the ingredients on hand.
Step-by-Step Instructions for Donut Batter for Dispenser
This method ensures a silky-smooth batter that pipes effortlessly through your dispenser with perfect consistency.
Step 1: Activate the Yeast and Bloom the Flavor
In a small bowl, combine the 2.25 tsp Active Dry Yeast with the 0.25 cup Warm Water. The water should be precisely 110°F—any hotter will kill the yeast, any cooler won’t activate it properly. Let it sit for 5-7 minutes until it becomes foamy and has a slightly sweet aroma.
While the yeast activates, melt the 0.25 cup Unsalted Butter and let it cool to room temperature. This prevents it from cooking the eggs when combined. The yeast mixture should double in volume and develop a creamy head—this visual cue confirms it’s alive and ready to transform your batter.
Step 2: Whisk Wet Ingredients to Emulsify
In a large mixing bowl, whisk together the 2 whole Large Eggs, 0.75 cup Granulated Sugar, melted butter, and 1 cup Whole Milk. Beat vigorously for 2-3 minutes until the mixture is pale and slightly thickened. The sugar should be fully dissolved with no visible granules.
Add the 1 tbsp Vanilla Extract and the proofed yeast mixture to the bowl. Whisk for another 30 seconds until fully incorporated. The vanilla should be evenly distributed—you’ll notice the mixture takes on a creamy, light yellow color with a slight sheen from the emulsified fats.
Step 3: Combine Dry Ingredients for Structure
In a separate bowl, sift together the 4 cups All-Purpose Flour, 1 tbsp Baking Powder, 1 tsp Salt, and 0.25 tsp Ground Nutmeg. Sifting is critical here—it aerates the flour and eliminates lumps that could clog your dispenser.
The baking powder provides immediate lift, while the yeast ensures a slow, steady rise. The nutmeg adds a subtle warmth that complements the vanilla. The mixture should look uniform with no visible specks of salt or leavening agents.
Step 4: Create the Perfect Pipeable Consistency
Gradually add the dry ingredients to the wet mixture, about 1 cup at a time, whisking gently after each addition. Stop mixing as soon as the last streaks of flour disappear—overmixing develops gluten, which makes the batter too elastic and difficult to pipe.
The finished batter should be thick but pourable, similar to pancake batter. It should ribbon off the whisk in a smooth, steady stream. If it’s too thick, add 1-2 tbsp of milk; if too thin, incorporate 1-2 tbsp more flour. Let it rest for 10 minutes to allow the flour to fully hydrate.
Step 5: Test and Adjust for Dispenser Use
Transfer the batter to your dispenser and test the flow. It should pipe smoothly without resistance or air bubbles. If it’s too stiff, thin it slightly with additional milk, 1 tsp at a time. The batter should hold its shape briefly when piped before spreading slightly.
Cover and let it rise at room temperature for 30-45 minutes until slightly puffed. The surface should look slightly bubbly, and the batter will have a light, airy quality. This final rise ensures your donuts will be light and fluffy when cooked.
Pro Tips For Making Donut Batter Recipe For Dispenser
- Chill the Batter: After mixing, refrigerate the batter for 30 minutes—I learned this the hard way when my first batch spread too thin in the dispenser. The cold thickens it just enough for perfect flow control.
- Soften the Butter: Leave the unsalted butter out for exactly 1 hour before mixing, not longer. Too soft and your batter loses structure; too hard and you’ll get lumps no dispenser can handle.
- Skip Cold Milk: Use room-temperature whole milk, or your eggs and butter will clump on contact. I burned three batches before realizing this was the culprit.
- Strain the Batter: Sounds fussy, but running the finished batter through a fine mesh sieve removes flour clumps that would clog your dispenser mid-use. My grandmother swore by this, and she was right.
Serving Suggestions for This Dish
Fresh and Warm
Serve your donuts straight from the fryer or oven while they’re still warm—they’re at their absolute best with a crisp exterior and fluffy interior. I recommend letting them cool for just 2-3 minutes on a wire rack to prevent sogginess. The aroma alone will draw everyone to the kitchen. ✨
Glaze and Top
A simple vanilla glaze made with 2 cups powdered sugar and 3 tbsp milk pairs perfectly with this batter. For variety, I love rolling warm donuts in cinnamon sugar or drizzling with a chocolate ganache for a decadent touch.
Dip and Savor
Offer small bowls of warm chocolate sauce or berry compote for dipping. I make mine with 1 cup heavy cream and 8 oz chopped dark chocolate for a silky texture. The contrast of temperatures and textures elevates each bite.
Breakfast Spread
Create a donut bar with various toppings like crushed nuts, sprinkles, or shredded coconut. I set out 5-6 small bowls and let everyone customize their treats. This works great for weekend brunches or casual gatherings.
Beverage Pairings
A hot cup of coffee or chai tea complements the sweetness beautifully. For a special treat, serve with cold milk or vanilla chai latte. I find the warmth of the donuts pairs perfectly with the richness of these drinks. 💛
Make It Special
Dust with powdered sugar or add edible gold leaf for special occasions. I use a fine-mesh sieve for even dusting. The visual appeal matches the delicious taste, making your creations look as good as they taste.
Nutrition Facts
Frequently Asked Questions
What’s the ideal consistency for dispenser batter?
It should be thick but pourable, like pancake batter. If too thick, add 1-2 tbsp milk. If too thin, mix in 1-2 tbsp flour. Test by piping a small amount—it should hold shape briefly before spreading.
How long can batter sit in the dispenser before use?
Use within 2 hours at room temperature for best results. For longer storage, refrigerate up to 24 hours, then stir well and bring to room temperature before piping.
Why does my batter clog the dispenser?
Lumps or overdeveloped gluten are likely culprits. Always sift dry ingredients and avoid overmixing. If clogging persists, thin slightly with milk until smooth.
Can I make this batter without yeast?
Yes, but texture will differ. Replace yeast with an extra 1.5 tsp baking powder for immediate rise. The donuts will be denser but still pipeable.

- BBQ Sausage Recipe Oven: Smoky Depth Without the Grill - September 28, 2026
- BBQ Chicken Bowl Recipe Rice: Smoky Sweetness Over Fluffy Grains - September 28, 2026
- Beef Cutlet Recipe Ideas: Crispy Breaded Patties With Bold Seasonings - September 28, 2026