
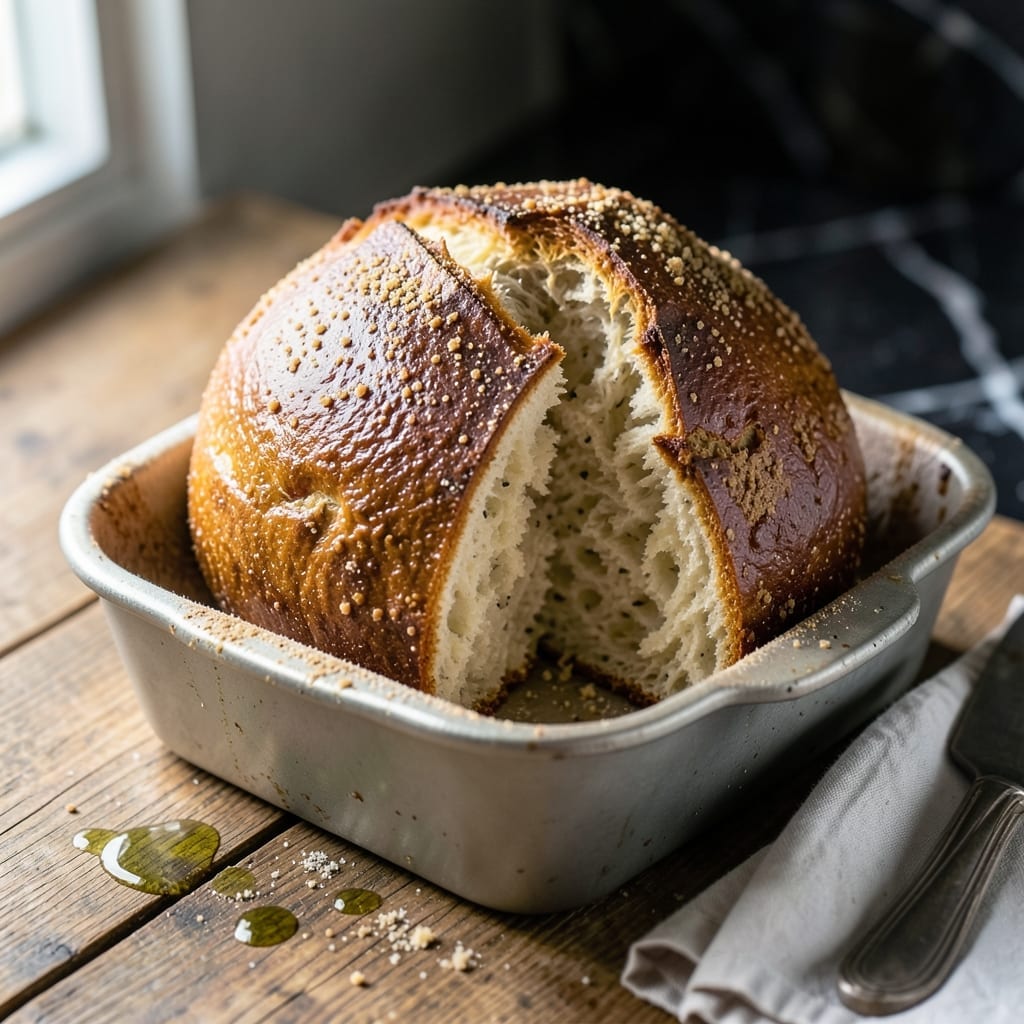
There’s something deeply satisfying about baking your own bread—especially when it turns out artisan-quality with almost no effort. This method leverages the precision of your bread maker to create a loaf with a golden crust and tender crumb.
No advanced skills are needed. Simply measure, add, and let the machine do the work. The result is a bread that rivals anything from a high-end bakery, but with the convenience of hands-off preparation.
What makes this recipe special is its balance of simplicity and excellence. The bread maker handles the kneading, rising, and baking, while you enjoy the aroma of fresh-baked bread filling your kitchen.
Perfect for sandwiches, toast, or serving warm with butter. Here’s how to make it.
Ingredients for Elite Gourmet Bread Maker
A few quality ingredients transform into an artisan loaf with almost no effort on your part.
| Ingredient | Amount | Notes |
|---|---|---|
| Bread Flour 🌾 | 3 ¼ cups | All-purpose works in a pinch |
| Warm Water 💧 | 1 ¼ cups | 110°F, not hot |
| Active Dry Yeast 🍞 | 2 ¼ tsp | One packet plus extra |
| Granulated Sugar 🍚 | 2 tbsp | Feeds the yeast |
| Kosher Salt 🧂 | 1 ½ tsp | Diamond Crystal preferred |
| Unsalted Butter 🧈 | 2 tbsp | Softened to room temperature |
| Whole Milk 🥛 | ¼ cup | Warm, not hot |
| Large Egg 🥚 | 1 whole | Room temperature |
| Honey 🍯 | 1 tbsp | Adds subtle sweetness |
| Vital Wheat Gluten 🌾 | 1 tbsp | For better texture |
| Olive Oil 🫒 | 1 tbsp | For pan preparation |
| Cornmeal 🌽 | 2 tbsp | For dusting pan |
The flour is non-negotiable here. King Arthur Bread Flour is my go-to—higher protein means better gluten development (that’s what gives you the chewy crumb). Yeast needs to be fresh—check the expiration date on the packet. Saf-Instant or Red Star are reliable brands. For the milk, whole is ideal, but 2% works (just avoid skim). The butter? Plugrá or Kerrygold if you’re splurging.
No bread flour? All-purpose plus the vital wheat gluten gets you close. Out of honey? Maple syrup or agave at the same amount. Milk can be swapped for warm water plus 1 tbsp powdered milk. The egg adds richness but can be skipped—just add 2 tbsp extra water. For a lighter loaf, use cake flour for half the bread flour (but you’ll lose some chew).
Dry ingredients can sit in your pantry for 6-12 months (yeast in the freezer lasts even longer). The loaf itself stays fresh for 3 days wrapped tightly at room temp. Freeze slices for up to 3 months—toast straight from frozen for best texture.
Why You’ll Love This Recipe
- Set and Forget: I toss in the flour, yeast, and warm water, press a button, and the bread maker does all the work.
- Crust So Good: The sugar caramelizes just enough for a golden crust with that perfect chew from the bread flour.
- Feeds the Week: One loaf means sandwiches for lunch, toast for breakfast, and garlic bread for dinner.
- Pennywise Perfection: Five simple ingredients from my pantry, and I get bakery-quality bread for the cost of a bag of flour.
Step-by-Step Instructions for Artisan Bread Maker Loaf
Here’s my tested method that delivers bakery-quality results with minimal effort.
Step 1: Prepare the Bread Pan and Wet Ingredients
Lightly grease the bread pan with the 1 tablespoon Olive Oil, then dust it evenly with the 2 tablespoons Cornmeal. This prevents sticking and adds a subtle crunch to the crust. I tap the pan gently to spread the cornmeal in an even layer, making sure to coat the sides as well.
In a small bowl, whisk together the 1.25 cups Warm Water, 0.25 cup Whole Milk, 1 whole Large Egg, and 1 tablespoon Honey until fully combined. The mixture should be smooth and slightly frothy. Using warm liquids ensures the yeast activates properly, while the egg adds richness to the crumb.
Step 2: Combine Dry Ingredients and Activate the Yeast
In the bread pan, add the 3.25 cups Bread Flour, making a well in the center. Sprinkle the 2.25 tsp Active Dry Yeast into the well, ensuring it doesn’t touch the wet ingredients yet. Around the yeast, add the 2 tablespoons Granulated Sugar, 1.5 tsp Kosher Salt, and 1 tablespoon Vital Wheat Gluten. The sugar feeds the yeast, while the salt balances the flavor and controls its activity.
Pour the wet mixture into the well, then add the 2 tablespoons Unsalted Butter on top. The butter should be softened but not melted—this ensures even distribution without making the dough greasy.
Step 3: Mix and Knead in the Bread Maker
Insert the pan into the bread maker and select the “Basic” or “White Bread” setting with a medium crust. Start the machine and let it run through the kneading cycle. After about 5 minutes, check the dough—it should form a smooth, elastic ball. If it looks too dry, add warm water 1 teaspoon at a time. If it’s too sticky, sprinkle in bread flour 1 tablespoon at a time.
The kneading process should take about 10-12 minutes. You’ll see the dough pull away from the sides of the pan and become smooth and supple. The vital wheat gluten strengthens the dough structure, giving your loaf a better rise and chewier texture.
Step 4: Proof and Bake to Golden Perfection
Once kneading is complete, the bread maker will enter the proofing cycle, which typically lasts 45-60 minutes. The dough should double in size and feel light and airy to the touch. Avoid opening the lid during this stage—drafts can cause the dough to collapse.
The baking cycle will then begin, usually lasting 30-50 minutes. You’ll know it’s done when the loaf is deep golden brown and sounds hollow when tapped lightly on the top. The internal temperature should reach 190-200°F for a fully baked loaf.
Step 5: Cool and Slice for Optimal Texture
When the bread maker signals completion, use oven mitts to carefully remove the pan. Let the loaf cool in the pan for 5 minutes, then transfer it to a wire rack. This prevents the crust from becoming soggy from trapped steam.
Allow the bread to cool completely for at least 1 hour before slicing. I know it’s tempting to dig in right away, but cooling lets the crumb set properly. Slice with a serrated knife using a gentle sawing motion to avoid squishing the loaf. The result should be a tall, tender loaf with a crisp crust and an airy, slightly sweet interior.
Pro Tips For Making Elite Gourmet Bread Maker
- Test Your Yeast: I learned this the hard way—always bloom your active dry yeast in 110°F warm water with a pinch of sugar first. If it doesn’t foam within 5-10 minutes, your bread won’t rise, no matter how good your flour is.
- Weigh Your Flour: Scooping flour with a cup can pack it down, leading to dense loaves. Use a kitchen scale for 14-16 oz per pound of bread flour—this small step actually changes the outcome.
- Skip Tap Water: Chlorine in tap water can kill yeast before it even starts. Use filtered or bottled warm water to guarantee your dough rises properly.
- Salt Last: Add kosher salt after the yeast has bloomed—direct contact with salt can inhibit activation. Sounds weird, but it works: your loaf will be lighter and more consistent.
Best Sauces and Condiments for This Recipe
Sweet Enhancements
Drizzle warm slices with local honey or Grade A maple syrup for a simple upgrade. A sprinkle of cinnamon sugar on buttered toast transforms your loaf into a morning treat. I love the contrast of sweetness against the subtle saltiness of the crust. 💛
Savory Spreads
Pair with whipped herb butter made with fresh rosemary and thyme. For a tangy twist, mix 2 tbsp softened cream cheese with 1 tsp lemon zest. These spreads highlight the bread’s gentle sweetness without overpowering it.
Dipping Delights
Serve alongside olive oil and balsamic vinegar for classic Italian flair. Add a pinch of red pepper flakes to the oil for heat. I often warm marinara sauce in a small pot for hearty dipping.
Breakfast Pairings
Use thick slices for French toast—the egg in the bread makes it extra rich. Top with fresh berries and a dusting of powdered sugar. For savory breakfast sandwiches, add scrambled eggs and sharp cheddar. 🔥
Try a peanut butter and banana combo for a quick, kid-friendly option.
Nutrition Facts
Frequently Asked Questions
What bread setting should I use?
Select the Basic or White Bread setting with a medium crust for best results. This ensures proper kneading, rising, and baking times.
Can I make this without vital wheat gluten?
Yes, but the texture will be slightly less chewy. For best results, use bread flour which already contains extra gluten.
Why did my loaf collapse after baking?
This usually means the dough over-proofed. Check your yeast freshness and ensure your liquids are 110°F, not hotter. Let it cool completely before slicing.
How do I store leftovers?
Wrap tightly in plastic or foil at room temperature for up to 3 days. For longer storage, freeze slices for up to 3 months.

- BBQ Sausage Recipe Oven: Smoky Depth Without the Grill - September 28, 2026
- BBQ Chicken Bowl Recipe Rice: Smoky Sweetness Over Fluffy Grains - September 28, 2026
- Beef Cutlet Recipe Ideas: Crispy Breaded Patties With Bold Seasonings - September 28, 2026