
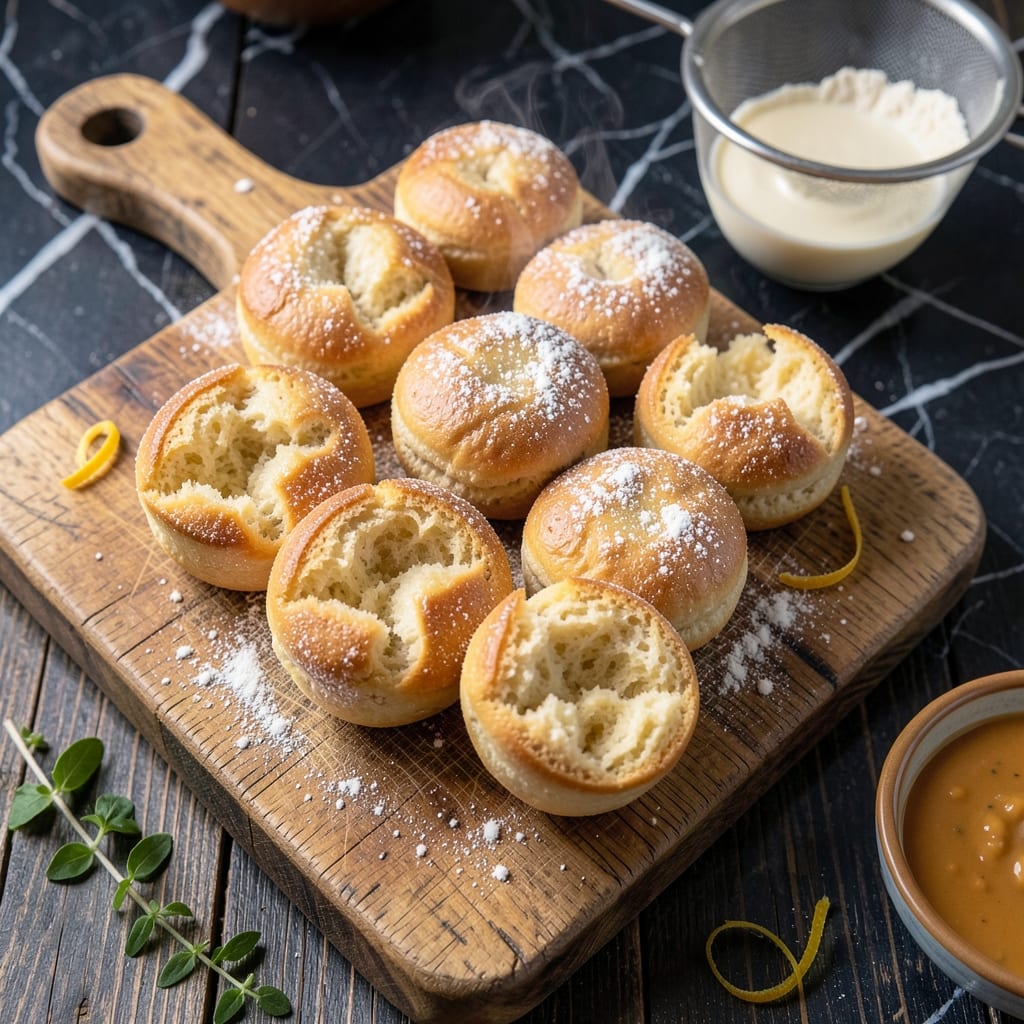
Skip the waiting game with this innovative approach to classic English muffins. This recipe eliminates yeast entirely while delivering the same light and fluffy texture you expect.
Baking powder and baking soda create the lift, producing those signature nooks and crannies without the long rise time. The dough comes together quickly with simple pantry staples.
The result is golden-brown muffins with a tender crumb and slightly crisp edges. They toast beautifully and hold up to all your favorite toppings.
Perfect for busy mornings when you crave homemade quality without the traditional time commitment. Here’s how to make them.
Ingredients for English Muffin Recipe No Yeast
Pantry staples plus a few basics create these no-yeast English muffins with ease.
| Ingredient | Amount | Notes |
|---|---|---|
| All-Purpose Flour 🌾 | 3 cups | Plus extra for dusting surface |
| Baking Powder 🧂 | 2 tbsp | Ensures proper rise and lift |
| Baking Soda 🧂 | 1 tsp | Balances acidity in dough |
| Granulated Sugar 🍚 | 1 tbsp | Enhances browning and flavor |
| Salt 🧂 | 1 tsp | Fine grain for even distribution |
| Buttermilk 🥛 | 1 cup | Warm to room temperature |
| Unsalted Butter 🧈 | 4 tbsp | Melted and slightly cooled |
| Large Egg 🥚 | 1 whole | Lightly beaten for binding |
| Cornmeal 🌽 | ½ cup | For dusting griddle surface |
| White Vinegar 💧 | 1 tbsp | Activates baking soda for lift |
| Vegetable Shortening 🧈 | 2 tbsp | For cooking on griddle |
The buttermilk is key here—use full-fat for the richest flavor. I grab mine from Whole Foods or any well-stocked grocery store. The flour should be fresh (check the date on the bag) and all-purpose works best. King Arthur is my go-to brand. Cornmeal adds that signature texture, but if you don’t have it, semolina works in a pinch (just don’t skip it entirely).
No buttermilk? Whole milk plus 1 tbsp vinegar does the trick. Swap the all-purpose flour for bread flour if you want a chewier texture. The egg can be omitted entirely—just add an extra 2 tbsp buttermilk to compensate. For a richer flavor, brown the butter before mixing. And if you’re out of vinegar, lemon juice works just as well.
The dough is best used immediately, but it can rest in the fridge for up to 12 hours. Cooked muffins keep in an airtight container for 3-4 days or freeze for 1 month. Reheat in a toaster or oven for that fresh-baked taste.
Why You’ll Love This Recipe
- No Yeast Needed: I skip the waiting around for dough to rise—just mix, shape, and cook.
- Buttery Crisp Edges: The baking powder gives them that classic nook-and-cranny texture with a subtle sweetness from the sugar.
- Breakfast or Brunch: I make a batch Sunday morning and they’re just as good toasted for busy weekday breakfasts.
- Pantry Staples Only: All-purpose flour, baking soda, and a few basics mean I can make these even when the fridge is bare.
Step-by-Step Instructions for English Muffins No Yeast
Here’s the method that delivers tall, airy muffin rounds with that signature nook-and-cranny texture.
Step 1: Create the Acid-Base Reaction
In a large mixing bowl, whisk together the 3 cups All-Purpose Flour, 2 tbsp Baking Powder, 1 tsp Baking Soda, 1 tbsp Granulated Sugar, and 1 tsp Salt. I use a fine mesh sieve for this to ensure even distribution of leavening agents—this is what gives your creation that perfect rise without yeast.
In a separate bowl, combine the 1 cup Buttermilk with the 1 tbsp White Vinegar. Let it sit for 5 minutes until slightly curdled. This mimics the tang of yeast-fermented dough while creating the chemical reaction needed for lift.
Step 2: Build the Dough with Care
Make a well in your dry ingredients and pour in the buttermilk mixture, the 4 tbsp Unsalted Butter (melted and cooled), and the 1 whole Large Egg (lightly beaten). Using a wooden spoon, gently fold everything together until just combined. The batter will be thick and slightly sticky—don’t be tempted to overmix.
Real talk: lumps are okay here. Overworking the dough develops gluten, which would make your finished product tough rather than tender. The batter should look shaggy but hold together when pressed. Let it rest for 10 minutes while you prepare your cooking surface.
Step 3: Prepare the Cooking Surface
Heat a griddle or cast iron skillet over medium-low heat. Sprinkle the 0.5 cup Cornmeal onto a plate and use it to lightly dust both sides of each muffin round. The cornmeal prevents sticking and adds that characteristic crunch to the exterior.
Add the 2 tbsp Vegetable Shortening to the griddle and let it melt completely, spreading it evenly across the surface. You want just enough to create a non-stick surface without frying the muffins. The shortening should shimmer but not smoke when ready.
Step 4: Cook to Golden Perfection
Scoop ⅓ cup portions of batter onto the prepared griddle, leaving 2 inches between each. Press down gently with the back of your measuring cup to create even rounds about ¾-inch thick. Cook for 5-7 minutes until the edges look set and the bottoms are deep golden brown.
Here’s the thing—don’t flip too early. Wait until you see bubbles forming on the surface and the edges look dry. Carefully flip each muffin and cook for another 5-7 minutes until the second side matches the first in color. The internal temperature should reach 200°F when fully cooked.
Step 5: Finish and Cool Properly
Transfer the cooked muffins to a wire rack and let them cool for at least 10 minutes before splitting. This cooling period allows the structure to set so they hold their shape when you pull them apart. I know it’s hard to resist that fresh-from-the-griddle warmth, but patience pays off.
To split, use a fork to gently pry them open horizontally rather than cutting with a knife. This preserves those beautiful nooks and crannies that make this dish so perfect for holding butter and jam. Serve warm for the ultimate experience.
Pro Tips For Making English Muffin Recipe No Yeast
- Preheat the Griddle: Get your griddle or skillet screaming hot—medium-low heat won’t cut it. I learned this the hard way after my first batch came out pale and dense.
- Don’t Overmix: Stir the batter just until the flour disappears. After making tough muffins a few times, I finally realized overworking the dough kills the texture.
- Use Fresh Leaveners: Check your baking powder and soda—if they’re older than 6 months, toss them. Sounds weird, but it works: stale leaveners mean flat, sad English muffins.
- Rest the Dough: Let the dough sit for 10 minutes before shaping. My grandmother swore by this, and she was right: it relaxes the gluten for lighter, fluffier results.
Common Mistakes When Making This Dish
Overmixing the Dough
Once you add the wet ingredients, mix just until combined. Overworking the dough develops gluten, which turns your muffins dense and tough instead of light and airy. Those lumps are fine—they’ll disappear during cooking. 💡
Skipping the Rest
Let your batter rest for 10 minutes after mixing. This allows the leavening agents to activate fully and the flour to hydrate. Skipping this step can result in flat, dense muffins that don’t rise properly.
Incorrect Heat Level
Cook on medium-low heat to ensure even cooking without burning the exterior. Too high heat will brown the outside before the inside cooks through. I use my cast iron skillet on setting 3-4 out of 10.
Flipping Too Soon
Wait until you see bubbles forming on the surface and the edges look dry before flipping. Flipping too early can cause the muffins to deflate. They should cook 5-7 minutes per side for perfect doneness.
Skipping the Cornmeal
Always dust your muffins with cornmeal before cooking. This prevents sticking and creates that signature crisp texture on the exterior. Without it, you risk tearing the muffins when flipping.
Not Cooling Properly
Resist the urge to split them immediately. Let muffins cool on a wire rack for at least 10 minutes. This allows the structure to set so they hold their shape when you pull them apart. Patience really is key here. 💪
Nutrition Facts
Frequently Asked Questions
Why use both baking powder and baking soda?
The combo creates maximum lift. Baking powder provides steady rise while baking soda reacts with the acidic buttermilk for extra height. This mimics yeast’s action.
Can I use regular milk instead of buttermilk?
Yes, but add 1 tbsp vinegar or lemon juice to 1 cup milk and wait 5 minutes. This creates a buttermilk substitute with the needed acidity.
How do I get the signature nooks and crannies?
Don’t overmix the batter and cook on medium-low heat. The uneven texture comes from the chemical reaction between the leaveners and acids. Patience is key!
Can I make these ahead of time?
The dough is best used immediately, but cooked muffins keep in an airtight container for 3-4 days. Reheat in a toaster for that fresh-baked taste.

- Beefaroni Recipe With Tomato Soup: One-Pot Nostalgic Comfort - September 28, 2026
- Bread Recipe KitchenAid Mixer: Foolproof Loaf With Perfect Rise - September 28, 2026
- BBQ Oysters Recipe Grill: Smoky Garlic Butter Bliss - September 28, 2026