
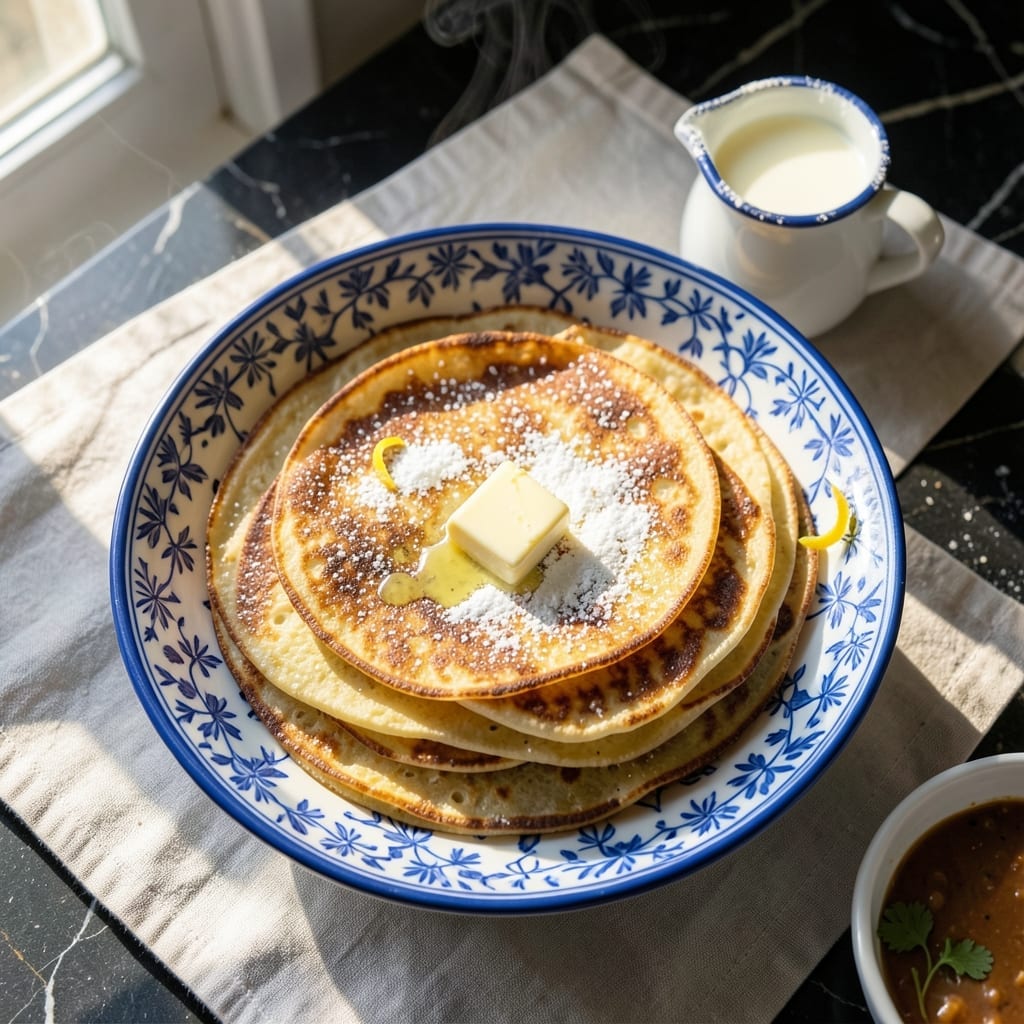
Creating authentic French crêpes at home delivers the same delicate, buttery flavor you’d find in a Parisian café. This recipe captures the essence of traditional street food with a simple, proven technique.
The result is thin, lacy pancakes with golden edges, perfect for both sweet and savory fillings. Master this method for a taste of France in your kitchen.
Ingredients for French Crepes Recipe in French
These refined ingredients create delicate, café-style crêpes with authentic French character.
| Ingredient | Amount | Notes |
|---|---|---|
| All-Purpose Flour 🌾 | 1 cup | Sifted for smooth batter |
| Granulated Sugar 🍚 | 2 tbsp | Adjust for sweetness preference |
| Sea Salt 🧂 | ¼ tsp | Fine grain preferred |
| Large Eggs 🥚 | 2 whole | Room temperature for even mixing |
| Whole Milk 🥛 | 1 ½ cups | Full-fat for richness |
| Unsalted Butter 🧈 | 3 tbsp | Melted and cooled slightly |
| Vanilla Extract 🌿 | 1 tsp | Pure extract for best flavor |
| Brandy or Rum 🍷 | 1 tbsp | Optional for depth of flavor |
| Water 💧 | ¼ cup | Adjusts batter consistency |
| Vegetable Oil 🫒 | 1 tsp | For greasing the pan |
The flour is the foundation—King Arthur or Bob’s Red Mill all-purpose delivers consistent results. For the milk, whole milk from grass-fed cows (available at Whole Foods or Trader Joe’s) adds the richness needed for that Parisian café quality. Butter should be European-style if possible, like Plugrá or Kerrygold, for superior flavor and melt. Always use room-temperature eggs to prevent the melted butter from solidifying when mixed.
No brandy? Skip it—the crêpes will still be excellent. For a non-alcoholic option, 1 tsp of orange blossom water adds a subtle floral note. The sugar can be reduced to 1 tbsp for savory applications, or omitted entirely. If avoiding dairy, oat milk or coconut milk works well, though the flavor profile will shift slightly. The vanilla extract is optional but recommended for sweet crêpes—Nielsen-Massey is a premium choice.
Batter rests best in the fridge for at least 1 hour (or up to 24 hours), allowing the flour to hydrate fully. Cooked crêpes keep in the fridge for 3 days or freeze for 1 month with parchment between layers. Reheat gently in a dry pan to restore that delicate texture.
Why You’ll Love This Recipe
- Mix & Rest: I whisk the flour, sugar, eggs, and milk in minutes, then let the batter rest—no fancy techniques, just easy prep.
- Buttery Sweetness: That hint of sugar paired with the rich whole milk makes every bite feel like a Parisian street treat.
- Endless Fillings: I stuff them with jam, Nutella, or just powdered sugar—breakfast, dessert, or a late-night snack.
- Budget Breakfast: Honestly, a handful of pantry staples turns into a meal that feeds four for pennies.
Step-by-Step Instructions for Authentic French Crepes
Master the technique that defines this classic dish with precision and tradition.
Step 1: Create the Smooth Batter Base
In a large mixing bowl, whisk together the 1 cup All-Purpose Flour, 2 tbsp Granulated Sugar, and 0.25 tsp Sea Salt until fully combined. The flour should be completely incorporated with no visible streaks.
Make a well in the center of the dry ingredients and add the 2 whole Large Eggs. Begin whisking from the center outward, gradually incorporating the flour mixture. This method prevents lumps and ensures a silky-smooth batter foundation.
Step 2: Incorporate Wet Ingredients with Care
Slowly pour in the 1.5 cups Whole Milk while continuing to whisk. The batter will initially be thick but will loosen as you add the liquid. Maintain steady whisking to keep the mixture homogeneous.
Add the 3 tbsp Unsalted Butter (melted and cooled slightly), 1 tsp Vanilla Extract, and 1 tbsp Brandy or Rum. Whisk thoroughly until the batter is completely smooth. The alcohol enhances depth of flavor, a hallmark of authentic café-style crepes.
Step 3: Adjust Consistency and Rest the Batter
Add the 0.25 cup Water and whisk to achieve a thin, fluid batter that coats the back of a spoon lightly. The consistency should resemble heavy cream. This adjustment is crucial for achieving the delicate, lace-like texture of authentic crepes.
Cover the bowl with a clean kitchen towel and let the batter rest at room temperature for 30 minutes. This rest period allows the flour to fully hydrate and any air bubbles to dissipate, resulting in a more uniform texture when cooking.
Step 4: Cook the Crepes to Golden Perfection
Heat a 10-inch nonstick skillet over medium-high heat and brush lightly with 1 tsp Vegetable Oil. The pan is ready when a drop of water sizzles and evaporates immediately upon contact.
Pour ¼ cup of batter into the center of the pan, immediately swirling to coat the bottom evenly. Cook for 1-2 minutes until the edges begin to lift and the surface appears set with a slight sheen. The first crepe often serves as a test—adjust heat as needed for subsequent ones.
Step 5: Flip and Finish with Precision
Use a thin spatula to lift the edge of the crepe, then quickly flip it with your fingers or the spatula. Cook for an additional 30-45 seconds until the underside develops light golden spots. The crepe should be delicate but sturdy enough to fold without tearing.
Transfer to a plate and repeat with the remaining batter, stacking cooked crepes with parchment paper between layers to prevent sticking. Serve immediately with traditional fillings like Nutella, fresh berries, or a sprinkle of powdered sugar for the full café experience.
Pro Tips For Making French Crepes Recipe In French
- Rest the Batter: After mixing, let the batter sit for at least 30 minutes at room temperature—this relaxes the gluten and makes the crepes more tender.
- Heat the Pan Properly: The pan should be hot enough that a drop of water sizzles and dances before you pour the batter; medium-high heat works best for that perfect golden edge.
- Use Room-Temperature Eggs: I learned this the hard way—cold eggs can make the batter lumpy, so pull them out of the fridge 20 minutes before mixing for a smoother texture.
- Swirl Immediately: As soon as the batter hits the pan, tilt and swirl it quickly to coat the bottom thinly—waiting even a few seconds makes it harder to spread evenly.
Make-Ahead Tips for This Dish
Batter Prep Ahead
Mix your crepe batter the night before and let it rest in the fridge. This gives the flour time to hydrate fully, resulting in smoother, more consistent pancakes. I always notice better texture when I prep it ahead. ⏰
Storage Basics
Store prepared batter in an airtight container for up to 24 hours in the fridge. If it thickens, just whisk in 1-2 tbsp water before using. This works perfectly for weekend brunch planning.
Cooked Crepe Storage
Stack cooled crepes with parchment paper between each one. They’ll keep in the fridge for 3 days or freeze beautifully for up to 1 month. This method prevents sticking and maintains freshness. ❄️
Reheating Tips
For fridge-stored crepes, warm them in a dry skillet over medium-low heat for 30 seconds per side. Frozen ones need no thawing—just heat directly in the pan with a touch of butter.
Freezing Strategy
Freeze crepes flat in a single layer first, then stack with parchment. This prevents them from sticking together. When ready to use, you can reheat straight from frozen—so convenient for busy mornings!
Make-Ahead Fillings
Prep your fillings separately and store them in airtight containers. Sweet fillings like berry compotes keep for 5 days, while savory options like ham and cheese are best used within 3 days. 💡
Frequently Asked Questions
What’s the ideal batter consistency?
It should be thin like heavy cream, coating the back of a spoon lightly. If too thick, add 1-2 tbsp water to adjust. Too thin? Let it rest to thicken naturally.
Can I make these without resting the batter?
Resting for 30 minutes is key for smooth texture, but 15 minutes works in a pinch. The flour needs time to hydrate for perfect results.
Why do my crepes tear when flipping?
They may need more cooking time on the first side. Wait until edges lift and the surface looks set before flipping. Use a thin spatula for support.
Can I use a blender for the batter?
A blender ensures a lump-free batter in seconds. Just pulse until smooth, then let it rest as usual.
Nutrition Facts

- BBQ Sausage Recipe Oven: Smoky Depth Without the Grill - September 28, 2026
- BBQ Chicken Bowl Recipe Rice: Smoky Sweetness Over Fluffy Grains - September 28, 2026
- Beef Cutlet Recipe Ideas: Crispy Breaded Patties With Bold Seasonings - September 28, 2026