
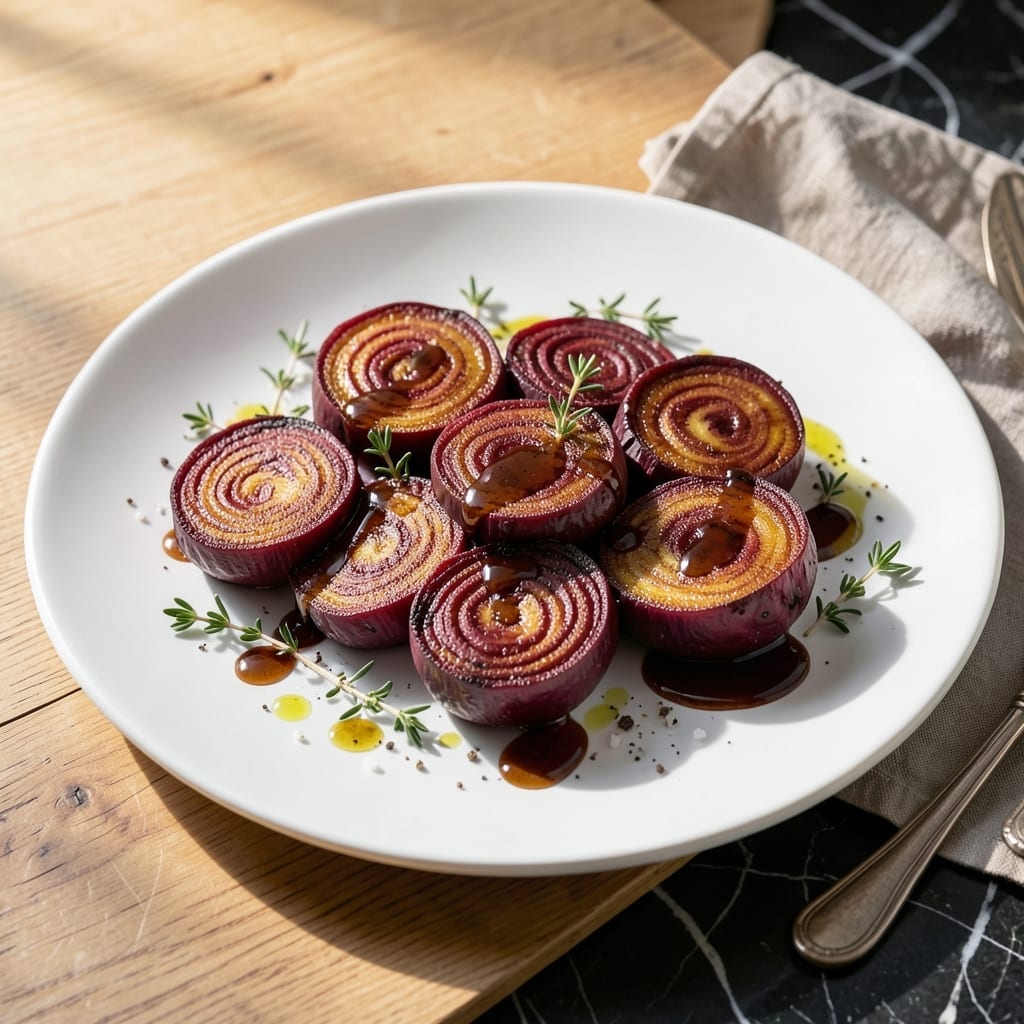
Roasting transforms fresh beets into a side dish with deep, natural sweetness and caramelized edges. This method highlights their earthy flavor without masking it.
The process is straightforward: season, roast at 400°F until tender, then finish with a touch of acidity. No peeling required until after cooking, making prep effortless.
What results is a vibrant, flavorful vegetable that pairs well with almost any main course. The edges develop a slight crunch while the centers stay tender.
Serve warm or at room temperature for a dish that’s both simple and impressive. This technique works for all beet varieties.
Ingredients for Fresh Beets
Simple ingredients transform into a vibrant, caramelized side dish with minimal effort required.
| Ingredient | Amount | Notes |
|---|---|---|
| Fresh Beets 🍠 | 2 lb | Medium-sized, scrubbed clean |
| Extra-Virgin Olive Oil 🫒 | 2 tbsp | Divided for roasting and finishing |
| Sea Salt 🧂 | 1 tsp | Fine grain preferred |
| Freshly Ground Black Pepper 🌶️ | ½ tsp | Coarse grind for texture |
| Fresh Thyme Sprigs 🌿 | 4 whole | Optional for aromatic depth |
| Balsamic Vinegar 💧 | 1 tbsp | Aged for complex flavor |
| Garlic Cloves 🧄 | 3 cloves | Minced for finishing touch |
| Orange Zest 🍊 | 1 tsp | Finely grated for brightness |
| Maple Syrup 🍁 | 1 tsp | Optional for enhanced sweetness |
| Fresh Parsley 🌿 | 2 tbsp | Chopped for garnish |
The beets are the star here. Choose medium-sized, firm beets with smooth skins and vibrant color—avoid any with soft spots or excessive greens attached. Whole Foods or farmers markets often have the freshest selection. Scrub them well but don’t peel until after roasting—this keeps the natural juices locked in. The thyme is optional but adds a subtle earthy note that complements the beets beautifully.
No fresh thyme? Dried thyme at one-third the amount works fine. For a different twist, swap the balsamic vinegar for red wine vinegar or apple cider vinegar. If you’re out of maple syrup, agave nectar or date syrup are excellent vegan alternatives. The orange zest can be omitted, but it adds a bright pop that balances the earthiness.
Roasted beets keep well in the fridge for 4-5 days in an airtight container. They’re great cold or reheated—just pop them back in the oven at 350°F for 10 minutes to revive the caramelized edges. Freezing isn’t recommended as it softens the texture too much.
Why You’ll Love This Recipe
- I’ll be real: fresh beets are cheap, and this recipe stretches them into something special without fancy additions.
- One Pan Wonder: I just toss the beets with olive oil, salt, and thyme, roast, and that’s it—no peeling until after they’re cooked.
- Earthy Perfection: The caramelized beets with that hint of thyme and pepper? Ridiculously good with just five ingredients.
- Meal Prep Star: Honestly, they keep beautifully for days and taste just as bright in salads or as a side.
Step-by-Step Instructions for Roasted Fresh Beets
Here is the precise method for transforming these earthy roots into a caramelized, tender dish.
Step 1: Prepare and Season the Beets
Preheat your oven to 400°F. While it heats, scrub the 2 lb Fresh Beets thoroughly under cold water to remove any dirt, then trim off the tops, leaving about 1 inch of stems to prevent bleeding during cooking. Pat them completely dry with a clean towel—moisture will steam rather than roast the beets.
Place the beets on a large sheet of aluminum foil. Drizzle with 1 tbsp Extra-Virgin Olive Oil, then sprinkle evenly with the 1 tsp Sea Salt and 0.5 tsp Freshly Ground Black Pepper. Add the 4 whole Fresh Thyme Sprigs for aromatic depth. Seal the foil tightly into a packet to trap steam and enhance tenderness.
Step 2: Roast Until Tender and Caramelized
Transfer the foil packet to a baking sheet and roast in the preheated oven for 45-60 minutes, depending on the size of your beets. The goal is to achieve a texture where a knife slides in with minimal resistance. For even cooking, flip the packet over halfway through the roasting time.
You’ll know they’re ready when the beets are fork-tender and the skins begin to wrinkle slightly. At this stage, the natural sugars will have started to caramelize, creating the sweet, deep flavor that defines perfectly roasted beets. Avoid opening the foil during cooking to prevent heat loss.
Step 3: Enhance with Finishing Touches
Once the beets are tender, carefully open the foil packet—steam will escape, so use caution. Transfer the beets to a cutting board and let them cool for 10 minutes until comfortable to handle. While they cool, prepare the finishing elements: mince the 3 cloves Garlic Cloves and chop the 2 tbsp Fresh Parsley.
Peel the beets by rubbing the skins off with your fingers or a paper towel—they should slip right off. Slice or quarter the beets, then transfer them to a serving dish. Drizzle with the remaining 1 tbsp Extra-Virgin Olive Oil, the 1 tbsp Balsamic Vinegar, minced garlic, 1 tsp Orange Zest, and 1 tsp Maple Syrup. Toss gently to coat evenly.
Step 4: Garnish and Serve
Sprinkle the chopped parsley over the beets, ensuring the vibrant green color contrasts beautifully with the deep red of the beets. The parsley adds a fresh, bright note that balances the earthy sweetness. Let the dish sit for 5 minutes to allow the flavors to meld together.
Serve warm or at room temperature. The beets should be tender yet still hold their shape, with a glossy sheen from the olive oil and balsamic vinegar. The edges will have a slight caramelization, delivering the promised sweetness with each bite.
Pro Tips For Making Fresh Beets
- Roast in Foil: Wrap beets tightly in foil with a drizzle of olive oil before roasting—they’ll steam in their own moisture and cook evenly without drying out. I learned this the hard way after too many chewy, uneven batches.
- Leave the Skin On: Skip peeling before cooking; the skin slips right off after roasting. Plus, it locks in flavor and keeps the beets from bleeding all over your hands.
- Don’t Overcrowd: Give each beet space on the baking sheet, or they’ll steam instead of roast. Sounds obvious, but I used to cram them in and wonder why they took forever.
- Finish with Fresh Thyme: Toss hot roasted beets with fresh thyme sprigs right out of the oven—the heat releases the herbs’ oils and actually changes the outcome. My grandmother swore by this, and she was right.
Make-Ahead Tips for This Dish
Prep Ahead Strategy
Roast the beets up to 2 days ahead and store them unpeeled in the fridge. This saves time and actually enhances their flavor as the natural sugars continue to develop. I often do this on Sunday for quick weekday meals. ⏰
Fridge Storage
Once peeled and sliced, keep roasted beets in an airtight container for 4-5 days. They stay tender and absorb flavors from any finishing touches you add later. I use Glasslock containers for best results.
Reheating Method
To revive their texture, spread beets on a baking sheet and warm at 350°F for 10-12 minutes. This restores the caramelized edges better than microwaving. Avoid overcrowding the pan for even heating.
Freezing Caution
While you can freeze roasted beets, the texture softens significantly. If you must freeze, blanch peeled beets first, then store in freezer bags for up to 3 months. Thaw in the fridge overnight before reheating. ❄️
Flavor Boost
Add the finishing touches (balsamic, garlic, zest) just before serving, not during storage. This keeps the flavors bright and prevents the beets from becoming mushy. A fresh sprinkle of parsley makes them look newly prepared.
Nutrition Facts
Frequently Asked Questions
Should I peel beets before or after roasting?
Always after roasting. The skin helps trap moisture and flavor during cooking, and it slips off easily once tender. Peeling beforehand can cause bleeding and loss of texture.
Why do my roasted beets taste bitter?
Bitterness often comes from undercooking or using old beets. Roast until fully tender at 400°F for 45-60 minutes, and choose fresh, firm beets for the best flavor.
Can I roast beets without foil?
Yes, but use a baking dish with a tight lid or cover with parchment paper. Foil traps steam for even cooking, but other methods work if sealed properly.
How do I prevent the color from bleeding?
Leave 1 inch of stems intact and avoid cutting until after roasting. This keeps the natural juices contained for vibrant, clean slices.

- BBQ Sausage Recipe Oven: Smoky Depth Without the Grill - September 28, 2026
- BBQ Chicken Bowl Recipe Rice: Smoky Sweetness Over Fluffy Grains - September 28, 2026
- Beef Cutlet Recipe Ideas: Crispy Breaded Patties With Bold Seasonings - September 28, 2026