
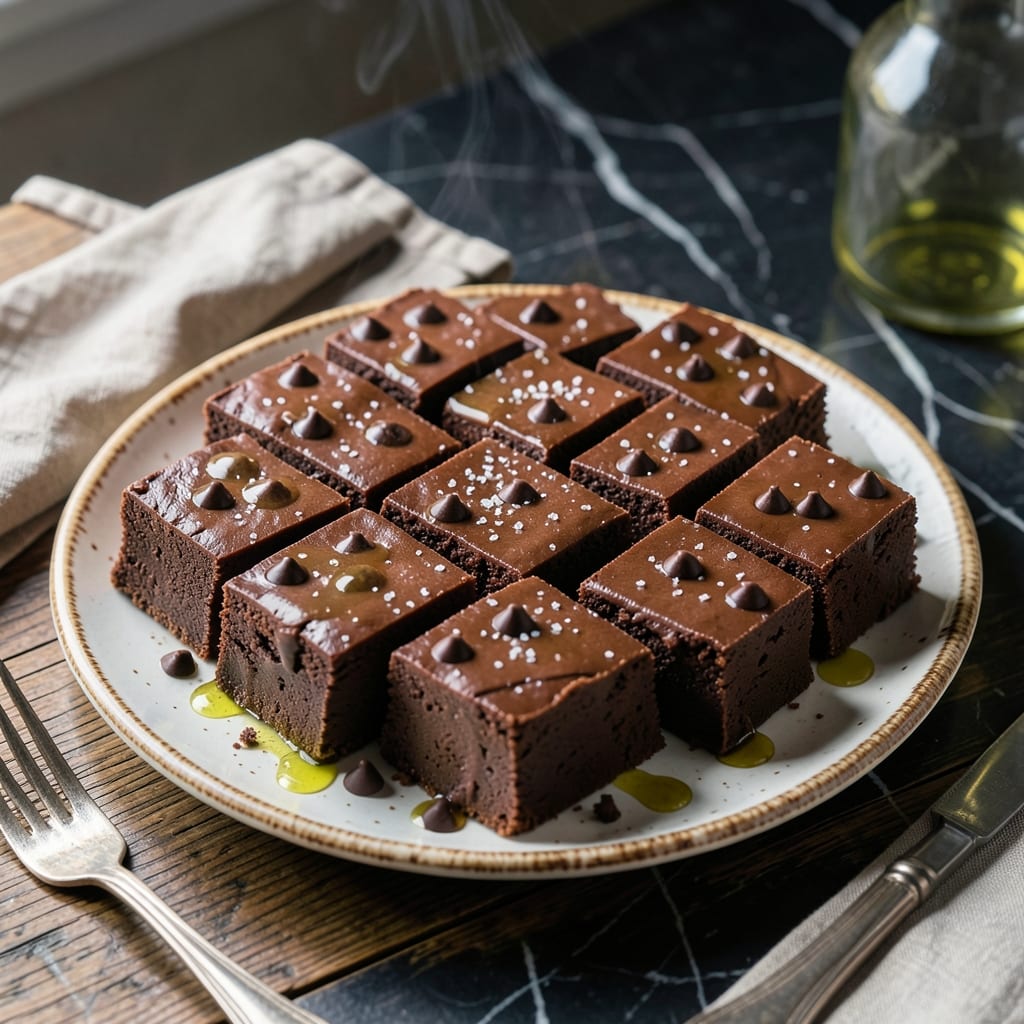
This one-bowl fudge delivers rich chocolate indulgence with minimal effort and maximum flavor. The secret lies in sweetened condensed milk, which creates an impossibly creamy texture without the need for tempering or candy thermometers.
With just 5 ingredients and 10 minutes of active prep, you’ll have smooth, velvety fudge that melts in your mouth. The condensed milk binds everything together while adding a luscious sweetness that balances the deep cocoa notes.
No special equipment is required—just a bowl, a spoon, and a bit of patience while it sets. The result is a decadent treat that rivals any candy shop confection, with a texture that’s both firm and delightfully fudgy.
Perfect for gifting, holiday treats, or satisfying a sudden chocolate craving. Here’s how to make it.
Ingredients for Fudge Recipe Condensed Milk
Five ingredients. One bowl. Decadent fudge every time.
| Ingredient | Amount | Notes |
|---|---|---|
| Semi-Sweet Chocolate Chips 🍫 | 12 oz | High-quality for best texture |
| Sweetened Condensed Milk 🥛 | 14 oz | 1 standard can |
| Unsalted Butter 🧈 | ½ cup | 1 stick, cut into pieces |
| Vanilla Extract 🌿 | 1 tsp | Pure extract preferred |
| Fine Sea Salt 🧂 | ¼ tsp | Balances sweetness |
The chocolate chips are doing most of the work here. Ghirardelli or Guittard give the best melt and snap—avoid the cheap waxy stuff. Sweetened condensed milk is non-negotiable (can’t swap regular milk + sugar, trust me). Eagle Brand is the standard at most grocery stores. Butter should be good quality—Kerrygold or Land O’Lakes if you’re being picky (worth it for the flavor).
No semi-sweet chips? Bittersweet at 60% cocoa works too—just taste before chilling and add a pinch more salt if needed. For a nutty twist, fold in 1 cup toasted pecans or walnuts at the end. Vanilla extract can be swapped for almond extract at half the amount for a different vibe. The salt is flexible—flaky sea salt on top adds a fancy finish.
Store in an airtight container at room temp for 2 weeks, or freeze for 3 months (if it lasts that long). Slice before storing so it’s ready to grab. Humidity is the enemy—keep it cool and dry.
Why You’ll Love This Recipe
- One Bowl Magic: I just dump the chocolate chips, condensed milk, and butter in a bowl, melt, and pour—no fancy equipment needed.
- Rich Chocolate Fix: The semi-sweet chips and condensed milk create this deep, velvety chocolate flavor that’s impossible to resist.
- Gift in Minutes: I’ve wrapped this fudge for teachers, neighbors, and last-minute hostess gifts—it always disappears fast.
- Stays Fresh for Days: A batch lasts me over a week in the fridge, and honestly, it tastes even better the next day.
Step-by-Step Instructions for Fudge with Condensed Milk
Here’s the method. Simple, foolproof, and ready in minutes.
Step 1: Melt the Chocolate and Butter Together
In a medium saucepan, combine the 12 oz Semi-Sweet Chocolate Chips and 0.5 cup Unsalted Butter cut into pieces. I like to use a heavy-bottomed pan here to prevent scorching. Cook over low heat, stirring constantly with a silicone spatula.
The mixture will start to melt slowly—keep stirring until it’s completely smooth and glossy. This should take about 5-7 minutes. Don’t rush by turning up the heat; chocolate burns easily. You’ll know it’s ready when no chunks remain and the mixture looks like a thick, shiny liquid.
Step 2: Incorporate the Sweetened Condensed Milk
Pour in all of the 14 oz Sweetened Condensed Milk and stir vigorously to combine. The mixture will thicken noticeably as the condensed milk blends with the melted chocolate. I’ve found that using a whisk at this stage helps create an ultra-smooth texture without lumps.
Continue cooking over low heat for another 3-4 minutes, stirring constantly. Watch for the mixture to become thick and pull away slightly from the sides of the pan. It should look like a rich, glossy chocolate pudding at this point. If it seems too thick, don’t add anything—it will loosen slightly as it cools.
Step 3: Add Flavorings and Test Consistency
Remove the pan from heat and immediately stir in the 1 tsp Vanilla Extract and 0.25 tsp Fine Sea Salt. The vanilla deepens the chocolate flavor, while the salt cuts through the sweetness perfectly. Stir for 30 seconds until fully incorporated.
Taste a small amount on a spoon—it should be rich, sweet, and slightly warm with a velvety texture. If it’s grainy, you may have overheated the chocolate earlier. Real talk: at this stage, if it looks smooth and tastes good, you’ve succeeded so far.
Step 4: Set the Fudge in the Pan
Quickly pour the hot fudge mixture into a prepared 8×8-inch baking dish lined with parchment paper. Use an offset spatula to spread it evenly into all corners. Work fast—the mixture begins to set as it cools.
Let it sit at room temperature for 2 hours to firm up completely. Don’t be tempted to refrigerate it; this can make the texture grainy. You’ll know it’s ready when the top is matte rather than glossy and a knife inserted comes out with only a few moist crumbs.
Step 5: Cut and Serve the Fudge
Once fully set, lift the fudge out of the pan using the parchment paper and transfer to a cutting board. Use a sharp knife to cut into 1-inch squares. For clean cuts, wipe the knife with a hot, damp cloth between slices.
Store the fudge in an airtight container at room temperature for up to 2 weeks. Each piece should have a smooth, creamy interior with a slight sheen on top. The flavor continues to develop over time, becoming even richer after a day or two.
Pro Tips For Making Fudge Recipe Condensed Milk
- Melt Low and Slow: Use a double boiler or microwave in 20-second bursts—chocolate scorches fast, and burnt fudge is a sad mistake I learned the hard way.
- Use Quality Chocolate: Skip the cheap chips; higher cocoa percentage in your semi-sweet chocolate makes richer, smoother fudge every time.
- Don’t Rush the Set: Let it firm up at room temp for at least 2 hours—cutting too soon gives you a sticky mess instead of clean squares.
- Add Salt Last: Sprinkle fine sea salt on top just before the final set; it enhances the sweetness without making the whole batch taste salty.
Essential Equipment for fudge recipe condensed milk
Saucepan Selection
I always use a heavy-bottomed saucepan to prevent scorching—All-Clad stainless steel is my go-to. A 2-quart size gives enough room for stirring without spills. Avoid nonstick; the chocolate needs direct heat for even melting.
Silicone Spatula
A heat-resistant silicone spatula is essential for scraping every bit of chocolate from the pan. I prefer OXO brand with a flexible head. The flat edge helps fold ingredients together smoothly.
Mixing Whisk
When adding condensed milk, switch to a balloon whisk to break up lumps. A 10-inch whisk reaches all corners of the pan. Stainless steel holds up best over time.
Baking Dish
An 8×8-inch glass baking dish works perfectly for spreading the fudge evenly. I line mine with parchment paper for easy removal. The glass helps monitor the setting process from the sides.
Offset Spatula
An offset spatula ensures the fudge is level in the pan. I use a 9-inch metal one—it glides smoothly and cleans up easily. The angled blade gets into corners effortlessly. 💡
Cutting Tools
For clean cuts, I swear by a long serrated knife dipped in hot water between slices. A 12-inch bread knife works well. Wipe the blade with a damp cloth for sharp edges every time.
Nutrition Facts
Frequently Asked Questions
Can I use evaporated milk instead?
No, sweetened condensed milk is essential for both sweetness and creaminess. Evaporated milk lacks the sugar content needed to create the right texture and flavor. Stick with the standard 14 oz can for best results.
Why did my fudge turn out grainy?
Graininess usually means the chocolate overheated or cooled too quickly. Always melt over low heat and avoid refrigerating while setting. Stirring constantly prevents scorching.
How long does it keep?
Stored in an airtight container at room temperature, it stays fresh for up to 2 weeks. For longer storage, freeze for up to 3 months and thaw overnight.

- Pav Bhaji Recipe Food Lab: Mumbai Street Food Magic at Home - October 6, 2026
- Peach Jelly Recipe Without Pectin: Naturally Set Sweet Spread - October 6, 2026
- Pasta Salad Recipe With Zesty Italian Dressing: Bright Herb-Kissed Medley for Picnics - October 6, 2026