
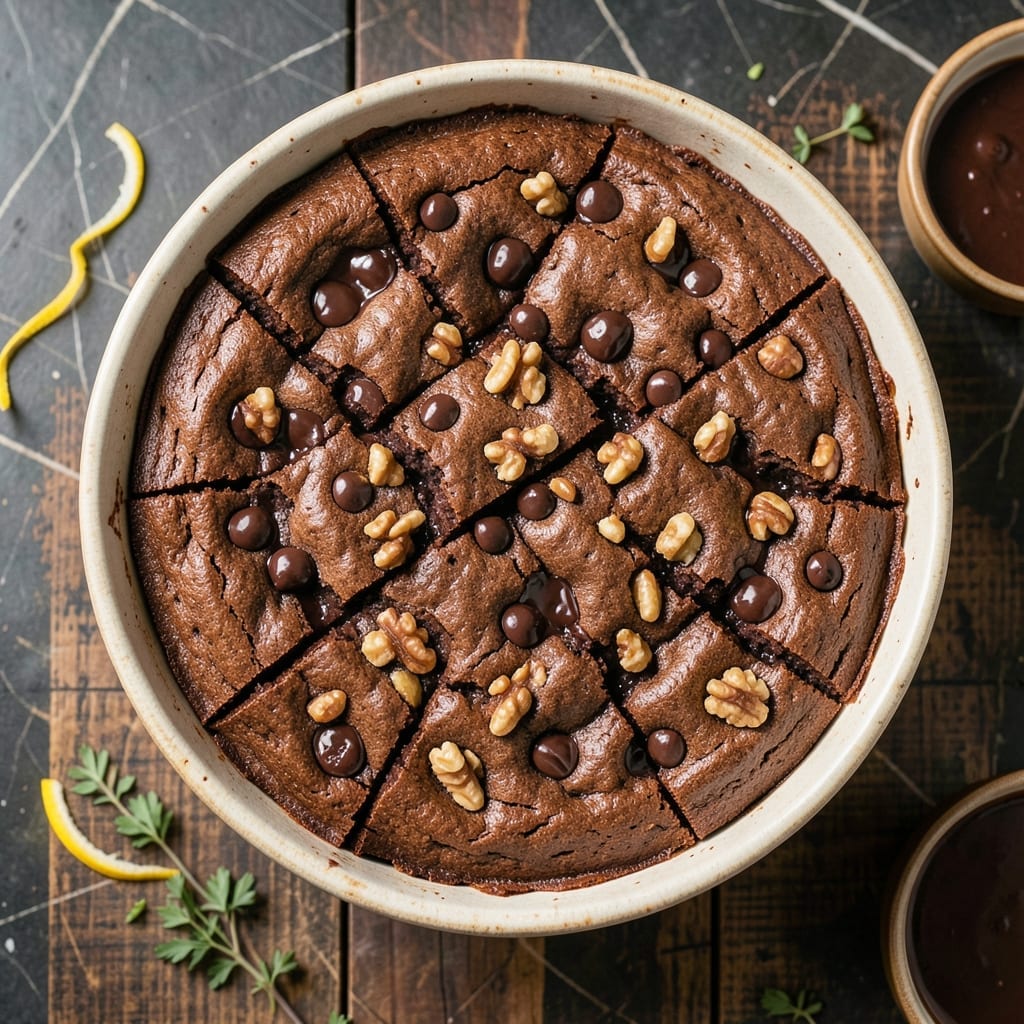
I’ve tested countless brownie mixes, but the Ghirardelli box from Costco consistently delivers fudgy, rich results with minimal effort. The generous size makes it perfect for feeding a crowd or meal prepping treats for the week.
This mix requires just a few pantry staples—eggs, oil, and water—to transform into dense, chocolatey squares with a crackly top. The instructions are straightforward, ensuring restaurant-quality texture every time.
Baking at the right temperature and timing is key to achieving that ideal balance of gooey center and slightly crisp edges. The Costco box offers great value, yielding a large batch without sacrificing quality.
Whether you prefer them warm with ice cream or cooled and sliced, these brownies satisfy every chocolate craving. Here’s how to make them perfectly.
Ingredients for Ghirardelli Brownie Recipe Box Costco
Just the brownie mix plus a handful of pantry basics. Costco’s big box yields plenty.
| Ingredient | Amount | Notes |
|---|---|---|
| Ghirardelli Double Chocolate Brownie Mix 🍫 | 1 box | Costco size, 21.3 oz |
| Large Eggs 🥚 | 2 whole | Room temperature preferred |
| Vegetable Oil 🫒 | ¾ cup | Or melted coconut oil |
| Water 💧 | ¼ cup | Cold tap water fine |
| Semi-Sweet Chocolate Chips 🍫 | 1 cup | Optional for extra richness |
| Chopped Walnuts 🌰 | ½ cup | Optional, lightly toasted |
| Vanilla Extract 🌿 | 1 tsp | Pure extract recommended |
| Salt 🧂 | ¼ tsp | Enhances chocolate flavor |
The Ghirardelli mix from Costco is the star—look for the 21.3 oz box in the baking aisle. It’s pricier than generic brands but worth every penny for that deep chocolate flavor. I always grab the double chocolate version (the one with the dark chocolate chunks). The eggs should be room temperature for even mixing—just set them out 30 minutes before baking.
No vegetable oil? Melted butter or coconut oil works perfectly. Skip the chips if you prefer plain brownies, or swap in white chocolate for contrast. Want crunch? Pecans or hazelnuts instead of walnuts. The vanilla extract is optional but adds depth (I use McCormick’s pure vanilla). For extra fudgy texture, chill the batter 20 minutes before baking.
The mix keeps in the pantry for months unopened. Once baked, brownies stay fresh in an airtight container for 5 days. Freeze individual squares for up to 3 months—microwave 20 seconds to revive that warm, gooey magic.
Why You’ll Love This Recipe
- One Bowl Wonder: I just dump the Ghirardelli mix, eggs, oil, and water in a bowl, stir, and fold in the chocolate chips—no fancy steps.
- Rich Chocolate Bomb: That double chocolate mix plus extra semi-sweet chips gives you layers of fudgy depth in every bite.
- Party or Midnight Snack: I’ve served these at birthdays and eaten half the pan alone at 11 p.m.—they work for both.
- Budget-Friendly Batch: The Costco box makes a big tray for pennies per serving, and they taste like bakery brownies.
Step-by-Step Instructions for Ghirardelli Double Chocolate Brownies
Here’s the method that transforms this mix into bakery-worthy brownies with crackly tops and fudgy centers.
Step 1: Combine Wet Ingredients for Maximum Flavor
In a large mixing bowl, whisk together the 0.75 cup Vegetable Oil, 2 whole Large Eggs, 0.25 cup Water, and 1 tsp Vanilla Extract until fully emulsified. I find that using room temperature eggs creates a smoother batter that incorporates more air.
The mixture should become pale and slightly thickened, with no visible oil separation. This emulsification is crucial—it ensures the fat distributes evenly throughout the brownies, creating that signature fudgy texture without greasy pockets.
Real talk: if your oil separates at this stage, whisk more vigorously. The emulsion should hold for at least 30 seconds when you stop mixing.
Step 2: Incorporate Dry Mix and Seasoning
Gradually add the 1 box Ghirardelli Double Chocolate Brownie Mix to your wet ingredients, folding gently with a silicone spatula until just combined. You’ll notice the batter transforms from liquid to thick and glossy—this is the chocolate doing its magic.
Sprinkle in the 0.25 tsp Salt and fold once more. I’ve found that this small amount of salt doesn’t just enhance the chocolate flavor—it actually makes the sweetness taste more complex and balanced. The batter will be dense and slightly sticky.
Stop mixing as soon as you see no more dry streaks. Overworking at this stage develops gluten in the flour, which would make your brownies cakey instead of fudgy.
Step 3: Fold in Chocolate Chips and Nuts for Texture
Gently fold in the 1 cup Semi-Sweet Chocolate Chips and 0.5 cup Chopped Walnuts using the spatula. Distribute them evenly throughout the batter, but don’t press too hard—you want visible chunks on top for that professional bakery appearance.
The chocolate chips will soften slightly as they sit in the batter, creating pockets of gooey chocolate in the finished brownies. For the walnuts, if you’ve toasted them lightly beforehand (as suggested in the ingredients), they’ll add a subtle crunch that contrasts beautifully with the dense brownie base.
Here’s the thing—if the batter seems too thick to fold the add-ins evenly, let it rest for 5 minutes before continuing. This gives the flour time to hydrate fully.
Step 4: Bake to Crackly Perfection
Spread the batter evenly into a greased 9×13-inch baking pan, using the spatula to smooth the top. The batter will be thick—almost like fudge—and may require pressing down slightly to reach the corners of the pan.
Bake in a preheated 325°F oven for 30-35 minutes. The key visual cue is when the edges pull away slightly from the pan and the top develops a thin, crackly crust. A toothpick inserted in the center should come out with a few moist crumbs, not wet batter.
Don’t be tempted to overbake—these will continue setting as they cool. The center should still have a slight jiggle when you remove them from the oven, like a well-set pudding. This ensures that maximum fudginess we’re after.
Let them cool completely in the pan on a wire rack for at least 1 hour before cutting. I know it’s torture to wait, but this cooling period allows the structure to set properly so they cut into clean squares rather than crumbly chunks.
Pro Tips For Making Ghirardelli Brownie Recipe Box Costco
- Preheat the Pan: I learned this the hard way—always preheat your oven for 10-15 minutes before baking. The Ghirardelli mix needs that stable heat to rise evenly and avoid a gummy center.
- Use Melted Butter: After burning three batches, I finally figured out that swapping vegetable oil for melted butter makes the brownies richer and chewier—just use the same amount.
- Don’t Overmix: Stir the batter just until the dry bits disappear. Overmixing develops gluten, and your brownies will turn out tough instead of fudgy.
- Add Extra Chips: Sounds weird, but it works: toss in an extra ½ cup of semi-sweet chocolate chips on top before baking. It guarantees gooey pockets in every bite.
Essential Equipment for Great ghirardelli brownie recipe box costco
Mixing Bowl
I always use a large stainless steel mixing bowl for this recipe—it’s sturdy and gives plenty of room for whisking. A 2-quart bowl is the sweet spot for the Costco-sized box. Avoid glass bowls; they can be slippery and don’t allow for aggressive whisking.
Whisk and Spatula
A balloon whisk is my go-to for the wet ingredients—it incorporates air beautifully. For folding in the dry mix, a silicone spatula with a stiff edge works perfectly. I love OXO’s Good Grips line for both tools.
Baking Pan
The recipe calls for a 9×13-inch baking pan, and I swear by USA Pan’s bakeware with its nonstick coating and reinforced edges. Line it with parchment paper for easy removal. A light-colored pan prevents over-browning on the bottom. 💡
Measuring Tools
Accurate measurements matter with baking. I use Pyrek’s glass measuring cups for the liquids and OXO’s angled measuring cup for the oil. For the salt and vanilla, a 1-tsp measure from any basic set works fine.
Cooling Rack
A wire cooling rack is essential for proper airflow underneath the pan. I place my 9×13-inch pan directly on a stainless steel rack to cool evenly. This prevents the bottom from getting soggy as the brownies set.
Optional Add-Ins
If you’re adding the optional chocolate chips or walnuts, a small offset spatula helps spread the thick batter evenly. I also keep a bench scraper handy for cutting perfect squares once cooled.
Nutrition Facts
Frequently Asked Questions
How many batches does the Costco box make?
The Costco-sized 21.3 oz box makes one large batch in a 9×13-inch pan, yielding about 16 brownies. It’s perfect for parties or meal prep for the week.
Can I use melted butter instead of oil?
Yes! Replace the 0.75 cup oil with an equal amount of melted butter for richer flavor. Just ensure it’s cooled slightly before mixing to avoid cooking the eggs.
Why do my brownies turn out cakey?
Overmixing the batter or using too much flour can cause this. For fudgy texture, fold just until combined and avoid adding extra ingredients that might alter the ratio.
How can I make them extra fudgy?
Chill the batter for 20 minutes before baking. This helps create a denser texture. Also, slightly underbaking (by 2-3 minutes) keeps them gooey.

- BBQ Sausage Recipe Oven: Smoky Depth Without the Grill - September 28, 2026
- BBQ Chicken Bowl Recipe Rice: Smoky Sweetness Over Fluffy Grains - September 28, 2026
- Beef Cutlet Recipe Ideas: Crispy Breaded Patties With Bold Seasonings - September 28, 2026