
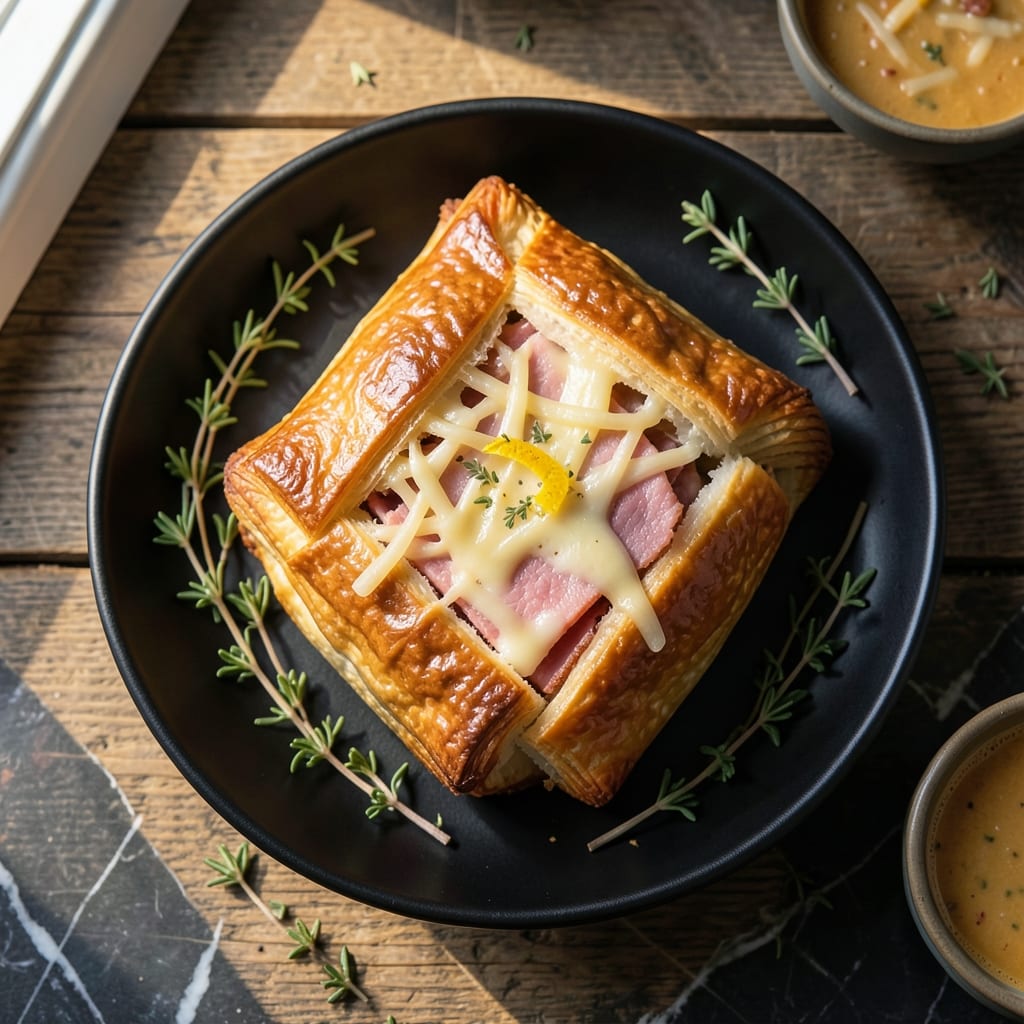
I’ve tested countless handheld variations in my kitchen to develop these homemade stuffed pastries. The key is a flaky, golden crust that holds its shape without cracking.
Unlike store-bought versions, these allow complete control over fillings and quality. Whether sweet or savory, the process remains simple and foolproof with a few pro tips.
Each bite delivers a satisfying contrast of textures—crisp exterior giving way to a warm, gooey center. The possibilities for fillings are nearly endless.
Perfect for quick meals, lunchboxes, or entertaining. This method ensures consistent results every time.
Ingredients for Hot Pocket Recipe Ideas
Flaky crust, gooey centers, and total control over what goes inside these handhelds.
| Ingredient | Amount | Notes |
|---|---|---|
| All-Purpose Flour 🌾 | 2 cups | Plus extra for dusting |
| Unsalted Butter 🧈 | ½ cup | Cold, cubed for flakiness |
| Ice Water 💧 | ⅓ cup | For pie dough consistency |
| Salt 🧂 | ½ tsp | Fine sea salt preferred |
| Shredded Cheddar Cheese 🧀 | 1 ½ cups | Sharp for best flavor |
| Cooked Ham 🍖 | 1 cup | Diced into small pieces |
| Pizza Sauce 🍅 | ¾ cup | Thick, not watery |
| Mozzarella Cheese 🧀 | 1 cup | Freshly shredded melts best |
| Green Bell Pepper 🌶️ | ½ whole | Diced finely for filling |
| Yellow Onion 🧅 | ¼ whole | Minced for even distribution |
| Garlic Cloves 🧄 | 2 cloves | Minced for depth of flavor |
| Dijon Mustard 🟡 | 1 tbsp | For a tangy kick |
| Egg 🥚 | 1 whole | For egg wash finish |
| Black Pepper 🌶️ | ¼ tsp | Freshly ground preferred |
| Dried Oregano 🌿 | ½ tsp | For Italian flavor profile |
The flour is your foundation—King Arthur all-purpose is my go-to for that perfect balance of structure and tenderness. Butter needs to stay cold until you’re ready to work it in (that’s how you get those flaky layers). I grab my unsalted butter from Costco in bulk and freeze it in sticks so it’s always on hand. For the cheese, skip the pre-shredded stuff (it’s coated in anti-caking agents)—block cheddar and fresh mozzarella melt like a dream.
No ham? Cooked chicken or turkey works just as well. Want it vegetarian? Sautéed mushrooms and spinach are a great swap. For the pizza sauce, Rao’s is my store-bought pick, but homemade with San Marzano tomatoes is even better. The bell pepper and onion can be swapped for any veggies you’ve got—zucchini, olives, or even sun-dried tomatoes add a nice punch. Fresh herbs? Toss in some basil for extra aroma.
Dough keeps in the fridge for 2 days or freezes for 3 months (just thaw overnight before using). Fillings can be prepped ahead and stored separately for 3-4 days. Once assembled, these freeze beautifully—pop them straight from freezer to oven. Perfect for meal prep or surprise guests.
Why You’ll Love This Recipe
- No-Fuss Dough: I love that the crust comes together with just flour, butter, and ice water—no yeast, no waiting, no stress.
- Cheesy Surprise: That gooey cheddar center hitting the flaky pastry? It’s the kind of bite that makes you close your eyes.
- Lunchbox Hero: Between us, these are my secret for packing something warm and filling that actually gets eaten.
- Budget Stretcher: A handful of pantry staples and a block of cheese feed my family for days without breaking the bank.
Step-by-Step Instructions for Homemade Hot Pockets
Here’s the method I use to create these handhelds with a flaky crust and gooey filling.
Step 1: Prepare the Dough Base
In a food processor, pulse the 2 cups All-Purpose Flour and 0.5 tsp Salt to combine. Add the 0.5 cup Unsalted Butter (cold and cubed) and pulse until the mixture resembles coarse crumbs with pea-sized butter pieces visible. This texture ensures a flaky crust.
With the processor running, drizzle in the 0.33 cup Ice Water through the feed tube until the dough just begins to come together. It should hold when pressed but not form a smooth ball. Turn it out onto a lightly floured surface, divide into two equal portions, shape into discs, and refrigerate for 30 minutes.
Step 2: Create the Flavorful Filling
In a bowl, combine the 1.5 cups Shredded Cheddar Cheese, 1 cup Mozzarella Cheese, 1 cup Cooked Ham, 0.75 cup Pizza Sauce, 0.5 whole Green Bell Pepper (diced finely), 0.25 whole Yellow Onion (minced), 2 cloves Garlic Cloves (minced), 1 tbsp Dijon Mustard, 0.25 tsp Black Pepper, and 0.5 tsp Dried Oregano. Mix thoroughly until all ingredients are evenly distributed.
The filling should be thick and cohesive—if it feels too wet, add a bit more shredded cheese to bind it. This combination delivers that classic pizza flavor profile in every bite.
Step 3: Assemble and Seal the Handhelds
On a floured surface, roll out one dough disc to about ⅛-inch thickness. Using a knife or pizza cutter, trim into rectangles roughly 6×4 inches each. You should get about 4 rectangles per disc.
Place ¼ cup of the filling in the center of each rectangle. Lightly brush the edges with water, then fold the dough over the filling to create a pocket. Press the edges firmly with a fork to seal completely—this prevents any filling from leaking during baking.
Step 4: Bake to Golden Perfection
Preheat your oven to 375°F. Line a baking sheet with parchment paper. Arrange the assembled pockets on the sheet, then brush the tops with a beaten 1 whole Egg for a golden finish. Using a sharp knife, cut a small slit in the top of each to allow steam to escape.
Bake for 25-30 minutes until the crust is golden brown and the filling is bubbling. Rotate the pan halfway through for even browning. Let them cool for 5 minutes before serving—the filling will be extremely hot right out of the oven.
Pro Tips For Making Hot Pocket Recipe Ideas
- Chill the Dough: After mixing the flour, butter, and ice water, let the dough rest in the fridge for at least 30 minutes—I learned this the hard way after my first few pockets burst open in the oven.
- Dry the Cheese: Pat the shredded cheddar with a paper towel before stuffing to remove excess moisture, or you’ll end up with soggy pockets instead of crisp ones.
- Seal Tightly: Press the edges with a fork and a little extra water to glue them shut, or the filling will leak out and make a mess in your oven.
- Use Cold Butter: Keep the butter ice-cold when cutting it into the flour—this makes the dough flaky instead of tough, and yes, it’s worth the extra effort.
Health Benefits of These Flavors
Nutrient-Packed Crust
Homemade dough offers more fiber and nutrients than store-bought alternatives. Using King Arthur all-purpose flour provides 8g protein per cup and essential B vitamins. The cold butter method creates flaky layers without added preservatives. I always feel better knowing exactly what’s in my crust. 💪
Protein Powerhouse
The filling delivers a serious protein boost—1.5 cups cheddar and 1 cup mozzarella provide about 25g protein per serving. Combined with the 1 cup ham, each handheld becomes a complete protein source that keeps you full for hours.
Calcium and Bone Health
Cheese fillings are naturally rich in calcium—one serving provides about 30% of your daily needs. This supports strong bones and teeth, especially important for growing kids. The mozzarella also contributes phosphorus, which works with calcium for maximum absorption.
Vitamin-Rich Vegetables
The green bell pepper and onion in the filling add essential vitamins. Bell peppers provide vitamin C (more than oranges per ounce!) and vitamin A for immune support. Onions contribute antioxidants that support heart health.
Healthy Fat Balance
While these are indulgent, the fats come from quality sources. The butter in the crust provides vitamin K2, while the cheese offers conjugated linoleic acid (CLA), which may have anti-inflammatory benefits. Moderation is key, but these fats are more nutritious than processed alternatives.
Customizable Nutrition
One of my favorite aspects is controlling the nutrition. Swap in whole wheat flour for more fiber, or add spinach or mushrooms to boost vitamins. Even using turkey ham reduces sodium while maintaining flavor. This flexibility lets you tailor each pocket to your dietary needs. ✨
Nutrition Facts
Frequently Asked Questions
Can I make the dough ahead of time?
Yes! The dough can be refrigerated for up to 2 days or frozen for 3 months. Thaw overnight in the fridge before rolling and assembling.
What’s the best way to seal them shut?
Press edges firmly with a fork after brushing with water. This creates a tight seal and prevents filling from leaking during baking.
Can I bake from frozen?
Add 5-10 minutes to the baking time. No need to thaw first—just bake at 375°F until golden brown.
How do I prevent a soggy crust?
Make sure your filling isn’t too wet. If needed, add extra shredded cheese to bind it. Also, cut slits in the top to let steam escape.

- BBQ Sausage Recipe Oven: Smoky Depth Without the Grill - September 28, 2026
- BBQ Chicken Bowl Recipe Rice: Smoky Sweetness Over Fluffy Grains - September 28, 2026
- Beef Cutlet Recipe Ideas: Crispy Breaded Patties With Bold Seasonings - September 28, 2026