
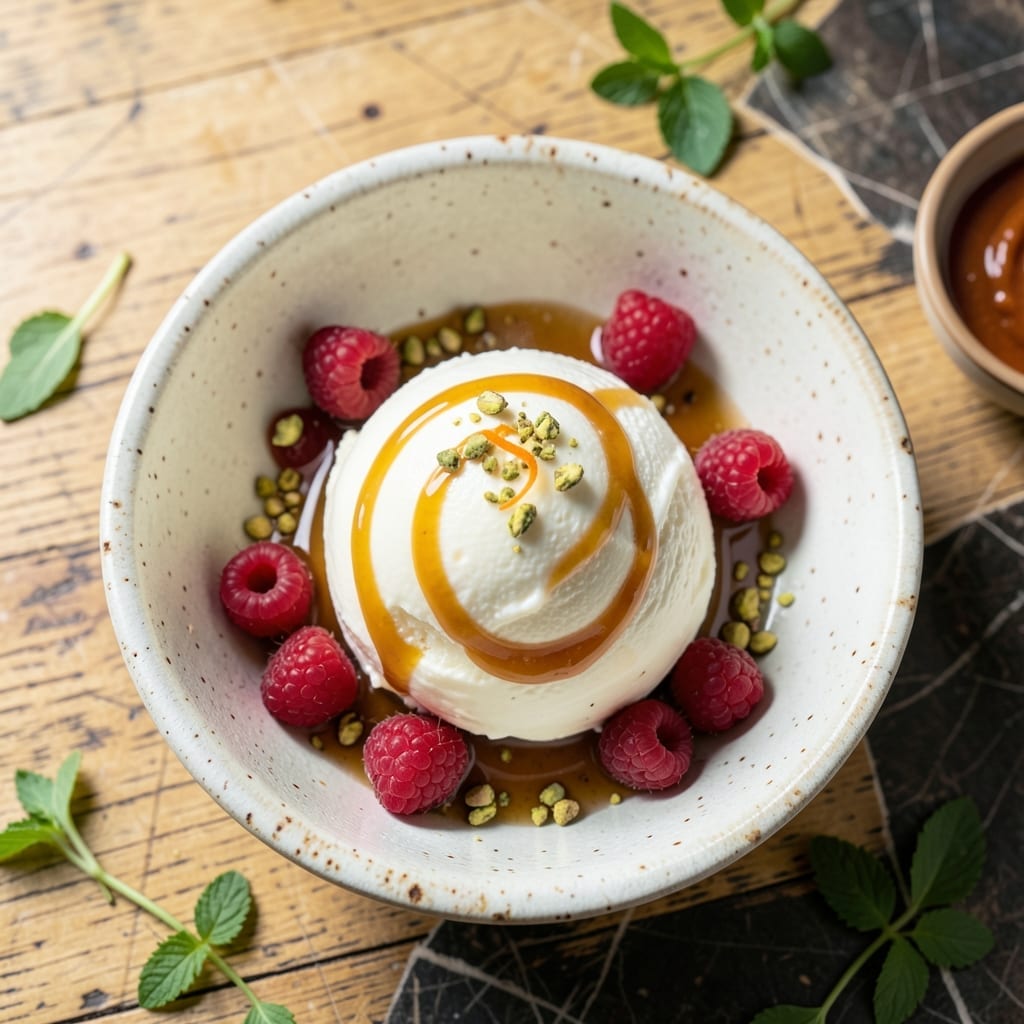
There’s nothing quite like the satisfaction of scooping into a bowl of ultra creamy homemade ice cream you made yourself.
This proven technique uses a simple custard base and careful churning to achieve that perfect smooth texture every time. No special equipment beyond an ice cream maker is required.
The result is rich, velvety ice cream with a depth of flavor that store-bought versions simply can’t match. Small batches ensure freshness and quality in every bite.
With this method, you control the sweetness, mix-ins, and overall quality. The process is straightforward yet delivers professional results.
Ingredients for Ice Cream
Rich custard base ingredients deliver that signature velvety texture you crave in every scoop.
| Ingredient | Amount | Notes |
|---|---|---|
| Heavy Cream 🥛 | 2 cups | Full-fat for richness |
| Whole Milk 🥛 | 1 cup | Do not substitute low-fat |
| Granulated Sugar 🍚 | ¾ cup | Fine white sugar preferred |
| Large Egg Yolks 🥚 | 6 whole | Pasture-raised for color |
| Pure Vanilla Extract 🌿 | 2 tsp | Not imitation vanilla |
| Table Salt 🧂 | ¼ tsp | Enhances all flavors |
| Unsalted Butter 🧈 | 2 tbsp | Melted, for custard base |
| Heavy Pinch of Fine Sea Salt 🧂 | 1 pinch | For finishing |
| Optional Mix-Ins 🍫 | 1 cup | Chopped nuts, chocolate, or fruit |
The dairy quality is paramount here. Organic heavy cream and whole milk from Whole Foods or your local co-op provide the fat content essential for ultra-creamy results. Pasture-raised egg yolks (available at Trader Joe’s) add richness and that beautiful golden color—avoid older eggs as they lose emulsifying power. The vanilla should be pure extract, not artificial, for depth of flavor that synthetic versions can’t match.
Need to adjust? Half-and-half at a 1:1 ratio can replace the milk in a pinch, though the texture will be slightly less luscious. For a lighter version, 2% milk works at half the quantity, but expect a less decadent mouthfeel. If you’re avoiding raw eggs, pasteurized eggs are a safe substitute. The sugar can be swapped for superfine sugar for even smoother integration into the custard base.
The custard base keeps in the fridge for 24 hours before churning—actually improves flavor. Churned ice cream holds for 1 week in an airtight container, though it’s best enjoyed within 3 days. For longer storage, press plastic wrap directly onto the surface to prevent ice crystals (worth the extra minute).
Why You’ll Love This Recipe
- No Fuss Base: I love that it’s just cream, milk, sugar, yolks, and vanilla—no hunting for weird ingredients.
- Velvet Smooth: The egg yolks give it that rich, custardy texture that store-bought can’t touch.
- Freezer Friendly: Honestly, it keeps beautifully for up to two weeks, so I always have some on hand.
- Crowd Pleaser: Between us, even my picky nephew asks for seconds when I make this.
Step-by-Step Instructions for Ice Cream
Master the custard base technique and you will achieve an incomparably smooth, rich texture in this homemade treat.
Step 1: Heat the Dairy and Sugar
In a medium saucepan, combine the 2 cups Heavy Cream, 1 cup Whole Milk, and 0.75 cup Granulated Sugar over medium heat. Stir frequently with a silicone spatula to dissolve the sugar completely—this prevents graininess in the final product.
Continue heating until the mixture just begins to simmer at the edges. You will see tiny bubbles forming around the perimeter of the pan and a slight steam rising from the surface. Remove from heat immediately at this stage to prevent scorching. This process should take 5-7 minutes.
Step 2: Temper the Egg Yolks
In a separate bowl, whisk the 6 whole Large Egg Yolks with the 0.25 tsp Table Salt until the mixture turns pale yellow and slightly thickens. This is your custard base, which will create the ultra-creamy texture promised in the title.
Slowly pour about 1 cup of the hot cream mixture into the egg yolks while whisking constantly. This tempering process raises the egg temperature gradually, preventing curdling. Once incorporated, pour the tempered egg mixture back into the saucepan with the remaining cream mixture.
Step 3: Cook the Custard to Thickness
Return the saucepan to medium-low heat and add the 2 tbsp Unsalted Butter. Cook the custard, stirring constantly with a wooden spoon, until it thickens enough to coat the back of the spoon. This should take 8-10 minutes.
To test for doneness, run your finger through the custard on the spoon. If the path holds its shape without running together, the custard is ready. At this point, remove from heat and stir in the 2 tsp Pure Vanilla Extract. Be careful not to overcook, as this can cause the custard to curdle.
Step 4: Chill and Churn
Strain the custard through a fine-mesh sieve into a clean bowl to remove any cooked bits of egg, ensuring a silky-smooth texture. Press plastic wrap directly onto the surface of the custard to prevent a skin from forming. Refrigerate until completely cold, at least 4 hours or preferably overnight.
Once chilled, pour the custard into your ice cream maker and churn according to the manufacturer’s instructions, typically 20-25 minutes. The mixture should resemble soft-serve ice cream when done. For a firmer texture, transfer to a lidded container and freeze for at least 2 hours.
Step 5: Add Mix-Ins and Finish
If using, fold in the 1 cup Optional Mix-Ins during the last 5 minutes of churning. This ensures even distribution without overworking the ice cream. For best results, chop any large mix-ins like fruit or chocolate into small, uniform pieces.
Before serving, sprinkle with the Heavy Pinch of Fine Sea Salt to enhance all the flavors. Let the ice cream sit at room temperature for 5-10 minutes before scooping to make it easier to serve. The result will be an ultra-creamy, indulgent homemade treat with professional-quality texture.
Pro Tips For Making Ice Cream
- Temper the Eggs: Slowly whisk the hot cream mixture into the yolks, a little at a time—I learned this the hard way after scrambling a batch from dumping it all in at once.
- Chill Before Churning: Let the custard cool completely in the fridge, at least 4 hours (overnight is even better). Sounds tedious, but it prevents ice crystals and gives you that creamy texture.
- Use Full-Fat Dairy: Skip the low-fat milk or half-and-half substitutes; the high fat content in whole milk and heavy cream is what makes the ice cream rich and smooth.
- Add Vanilla Last: Stir in the vanilla extract after the custard cools slightly—adding it to boiling liquid can make the flavor harsh instead of deep and aromatic.
Dietary Considerations for These Flavors
Dairy-Free Alternatives
For lactose intolerance, swap full-fat coconut milk for the heavy cream and use oat milk instead of whole milk. The coconut adds natural sweetness, so reduce sugar by 2 tbsp. I’ve found Thai Kitchen coconut milk works best for richness. 💪
Egg-Free Version
Replace the egg yolks with 3 tbsp cornstarch mixed with ¼ cup cold milk. Whisk into the warm dairy mixture and cook until thickened. This creates a custard-like texture without eggs. The result is slightly less rich but still creamy.
Sugar Substitutes
For a lower glycemic option, use ¾ cup monk fruit sweetener or erythritol in place of granulated sugar. Note that sugar alcohols can create a slightly icy texture, so add 1 tbsp vodka to lower the freezing point and maintain smoothness.
Vegan Adaptation
Combine 2 cups coconut cream, 1 cup almond milk, and ½ cup cashew butter for the base. Use 1 tbsp tapioca starch as a thickener instead of eggs. Churn as usual, but expect a softer texture that firms up in the freezer. ✨
Gluten-Free Note
This recipe is naturally gluten-free as written. Just ensure all mix-ins, like cookie dough or brownie bits, are certified gluten-free. Brands like Enjoy Life make safe options. Always check labels for hidden gluten in flavorings or additives.
Lower-Fat Option
Use 1 cup heavy cream and 2 cups 2% milk to reduce fat content by about 30%. The texture will be less decadent but still satisfying. For best results, add 1 extra egg yolk to compensate for the reduced fat.
Nutrition Facts
Frequently Asked Questions
Do I need an ice cream maker?
While an ice cream maker gives the best texture, you can freeze the custard in a shallow dish. Stir vigorously every 30 minutes for 3-4 hours to break up ice crystals. It won’t be as smooth but still delicious!
Can I use a different sweetener?
Yes, but sugar substitutes may affect texture. For best results, use ¾ cup of alternative sweetener and add 1 tbsp vodka to keep it creamy. Avoid liquid sweeteners like honey.
Why is my ice cream icy?
This usually means the custard wasn’t chilled long enough before churning or overchurned. Ensure it’s completely cold (preferably overnight) and follow your machine’s time guidelines.
How long does homemade ice cream last?
Store in an airtight container with plastic wrap pressed on the surface. It stays fresh for up to 1 week, but it’s best enjoyed within 3 days for peak creaminess.

- BBQ Sausage Recipe Oven: Smoky Depth Without the Grill - September 28, 2026
- BBQ Chicken Bowl Recipe Rice: Smoky Sweetness Over Fluffy Grains - September 28, 2026
- Beef Cutlet Recipe Ideas: Crispy Breaded Patties With Bold Seasonings - September 28, 2026