
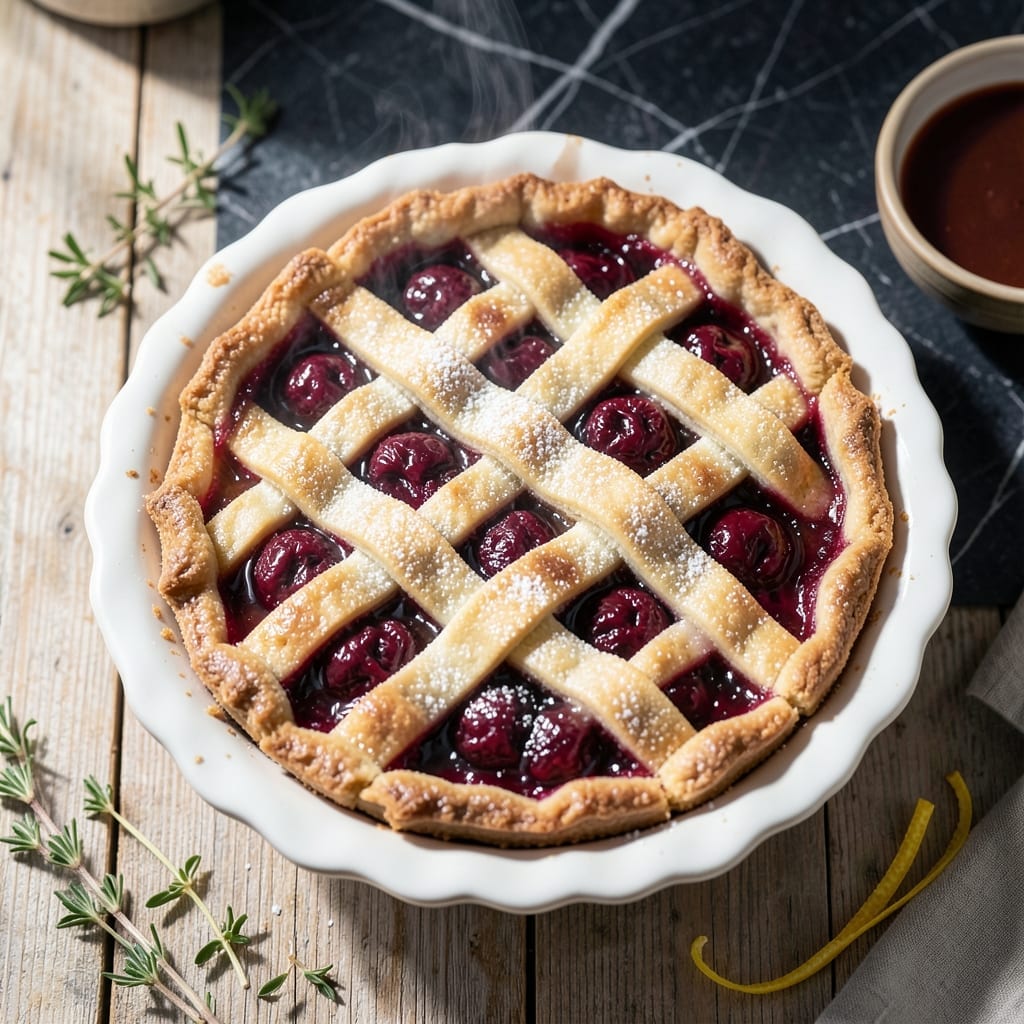
There’s nothing like a homemade pie with a flaky crust and vibrant cherry filling. This recipe delivers a perfect balance of sweet and tart flavors, with a golden, tender pastry that shatters at the touch.
The filling uses Lucky Leaf pie cherries for convenience without sacrificing quality. A simple blend of sugar and cornstarch thickens the juices, creating a glossy, rich consistency that holds its shape when sliced.
Blind-baking the bottom crust prevents sogginess, while a well-ventilated top ensures the filling sets properly. The result is a pie with layers of texture—crisp, buttery crust and a luscious, fruit-packed center.
Ideal for holidays or weekend baking, this pie impresses every time.
Ingredients for Lucky Leaf Cherry Pie
Quality ingredients create that perfect flaky crust and vibrant sweet-tart cherry filling everyone loves.
| Ingredient | Amount | Notes |
|---|---|---|
| All-Purpose Flour 🌾 | 2 ½ cups | Plus extra for dusting surface |
| Unsalted Butter 🧈 | 1 cup | Chilled and cubed for flakiness |
| Granulated Sugar 🍚 | ¼ cup | Divided for crust and filling |
| Salt 🧂 | 1 tsp | Fine sea salt preferred |
| Ice Water 💧 | ⅓ cup | Approximately 5-6 tbsp total |
| Lucky Leaf Pie Cherries 🍒 | 2 cans | 21 oz each, undrained |
| Cornstarch 🌾 | ⅓ cup | For thickening filling |
| Granulated Sugar 🍚 | ¾ cup | For cherry filling sweetness |
| Lemon Juice 🍋 | 1 tbsp | Freshly squeezed preferred |
| Almond Extract 🌰 | ½ tsp | Enhances cherry flavor |
| Unsalted Butter 🧈 | 1 tbsp | For dotting filling |
| Egg 🥚 | 1 whole | For egg wash finish |
The crust demands cold ingredients. Land O’Lakes unsalted butter gives consistent flakiness, and King Arthur flour provides reliable structure. Chill your mixing bowl and pastry cutter for 15 minutes beforehand (worth the extra minute). The butter must stay in visible pea-sized pieces before adding water—this creates those coveted flaky layers. For the filling, Lucky Leaf premium pie cherries offer superior texture and flavor compared to generic brands.
No almond extract? Vanilla extract at double the amount works though the flavor profile shifts slightly. For a thicker filling, increase cornstarch to half a cup. The egg wash can be replaced with heavy cream or milk for a different sheen. If using frozen cherries, thaw and drain completely first (or your crust will be soggy). Trader Joe’s carries excellent frozen tart cherries as an alternative.
The assembled pie freezes beautifully for up to 2 months. Baked pies keep at room temperature for 2 days or refrigerated for 5 days. Always cool completely before slicing—this prevents the filling from running. Leftovers reheat best in a 300°F oven for 15 minutes to restore crust crispness.
Why You’ll Love This Recipe
- One Bowl Wonder: I just dump the flour, butter, sugar, and ice water in one bowl, mix, and boom—crust done. No fancy tools, no mess.
- Buttery Sweetness: That flaky crust with the sugar-kissed filling? Ridiculously good. The butter makes it taste like a bakery pie.
- Holiday Hero: Between us, this is my go-to for potlucks. Everyone thinks I slaved over it, but it’s my little secret.
- Budget Friendly: A bag of flour, some butter, and canned cherry filling—feeds a crowd for pennies. I’ll be real: it’s my favorite cheap thrill.
Step-by-Step Instructions for Cherry Pie
Master the technique for a buttery crust and perfectly thickened filling that never weeps.
Step 1: Prepare the Pie Crust
In a large bowl, combine the 2.5 cups All-Purpose Flour, 0.25 cup Granulated Sugar, and 1 tsp Salt. Cut in the 1 cup Unsalted Butter (chilled and cubed) using a pastry blender or your fingers until the mixture resembles coarse crumbs with pea-sized butter pieces visible.
Gradually add the 0.33 cup Ice Water, 1 tablespoon at a time, mixing just until the dough comes together. Overworking develops gluten, which makes the crust tough rather than flaky. Form the dough into two equal disks, wrap in plastic, and chill for 1 hour.
Step 2: Make the Cherry Filling
In a saucepan, combine the 2 cans Lucky Leaf Pie Cherries (undrained), 0.75 cup Granulated Sugar, 0.33 cup Cornstarch, 1 tbsp Lemon Juice, and 0.5 tsp Almond Extract. Stir until the cornstarch dissolves completely—this prevents lumps in your filling.
Cook over medium heat, stirring constantly, until the mixture thickens to the consistency of pudding and becomes deep red and glossy. This takes about 8-10 minutes. Remove from heat and stir in the 1 tbsp Unsalted Butter until melted. Let cool completely before assembling the pie.
Step 3: Assemble and Crimp the Pie
On a lightly floured surface, roll one dough disk into a 12-inch circle. Transfer to a 9-inch pie dish, pressing gently into the bottom and sides. Trim the edges to leave a ½-inch overhang. Spoon the cooled cherry filling into the crust, mounding slightly in the center.
Roll the second dough disk into another 12-inch circle. Place it over the filling, then trim to match the bottom crust’s overhang. Fold the edges under and crimp decoratively with your fingers or a fork. Cut 4-5 slits in the top crust to allow steam to escape.
Step 4: Bake to Golden Perfection
Preheat your oven to 375°F. Brush the top crust with a light coating of 1 whole Egg beaten with 1 tablespoon water. This creates a beautiful golden sheen. Place the pie on a baking sheet to catch any drips and bake for 45-50 minutes.
The pie is done when the crust is deep golden brown and the filling bubbles visibly through the vents. If the edges brown too quickly, cover them with foil or a pie shield. Let the pie cool for at least 2 hours before slicing to allow the filling to set completely.
Pro Tips For Making Lucky Leaf Cherry Pie
- Chill the Dough: Pop your dough in the fridge for at least 30 minutes before rolling—after ruining two crusts by skipping this, I learned it prevents shrinking and keeps the butter from melting too soon.
- Use Ice-Cold Water: Sounds obvious, but I mean actually ice-cold, like with a few cubes still floating in it. This keeps the butter firm so your crust stays flaky.
- Don’t Overwork Flour: Mix just until the dough comes together. I used to knead it like bread and ended up with a tough, chewy crust every time.
- Vent the Top Crust: Cut a few slits in the top crust before baking—my first pie exploded cherry filling everywhere because I forgot this step.
Serving Suggestions for This lucky leaf cherry pie
Classic Presentation
Serve warm slices on white plates to highlight the deep red filling. A dusting of powdered sugar through a fine sieve adds elegance. I always garnish with fresh mint leaves for a pop of color. 💛
Ice Cream Pairing
Vanilla bean ice cream is the perfect companion—its cool creaminess balances the pie’s sweet-tart filling. Use a 1:1 ratio of pie to ice cream. For extra flair, drizzle with caramel sauce before serving.
Whipped Cream Option
Lightly sweetened whipped cream works beautifully for a lighter touch. I add ½ tsp almond extract to the cream to echo the filling’s flavor. Dollop generously on each slice.
Beverage Pairings
A cold glass of whole milk is classic, but hot coffee enhances the pie’s depth. For adults, a dry Riesling or sparkling rosé cuts through the richness. 🍷
Holiday Serving
For gatherings, serve with a scoop of vanilla and a sprig of fresh thyme. The herb’s earthiness complements the cherries. Always slice with a sharp knife dipped in hot water for clean cuts.
Nutrition Facts
Frequently Asked Questions
Can I use fresh cherries instead of canned?
Yes, but you’ll need about 4 cups pitted fresh cherries. Cook them with 1/4 cup extra sugar and 2 tbsp more cornstarch since fresh fruit releases more juice.
Why did my filling turn out runny?
This usually means the filling wasn’t thickened enough before baking. Be sure to cook it until it reaches pudding-like consistency. Also, let the pie cool completely (2+ hours) before slicing.
How do I prevent a soggy bottom crust?
Blind-bake the bottom crust for 10 minutes before adding filling. Also, brush the crust with a thin layer of beaten egg white before adding the filling to create a moisture barrier.
Can I make this pie ahead of time?
The pie keeps well at room temperature for 2 days or refrigerated for 5 days. For best results, reheat in a 300°F oven for 15 minutes to restore crust crispness.

- BBQ Sausage Recipe Oven: Smoky Depth Without the Grill - September 28, 2026
- BBQ Chicken Bowl Recipe Rice: Smoky Sweetness Over Fluffy Grains - September 28, 2026
- Beef Cutlet Recipe Ideas: Crispy Breaded Patties With Bold Seasonings - September 28, 2026