
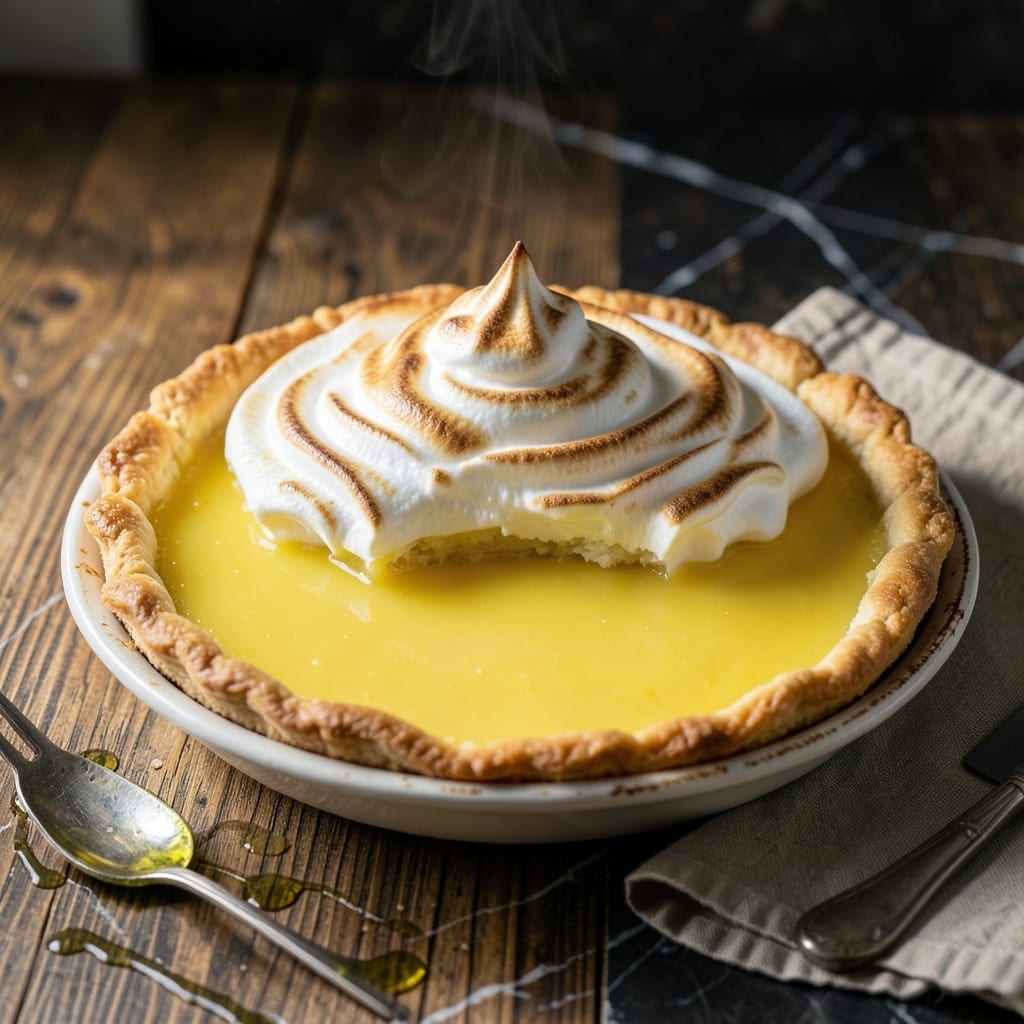
There’s something timeless about a well-made lemon meringue pie, and this version delivers on every level. The filling strikes the perfect balance between sweet and tart, while the meringue topping bakes up light and airy.
I’ve refined this recipe to ensure the filling sets properly without being overly dense. The key is cooking it just long enough to thicken but not so much that it loses its vibrant lemon flavor.
The meringue is where many recipes fall short, but this one stays tall and never weeps. A few professional techniques make all the difference in achieving that cloud-like texture.
Serve it chilled for clean slices or slightly warm for a comforting treat. This pie is a true crowd-pleaser.
Ingredients for Lucky Leaf Lemon Meringue Pie
Simple ingredients create a pie with vibrant citrus flavor and airy meringue perfection.
| Ingredient | Amount | Notes |
|---|---|---|
| Pie Crust 🥧 | 1 whole | Pre-baked 9-inch, store-bought or homemade |
| Lemon Pie Filling 🍋 | 1 can | Lucky Leaf brand, 15 oz |
| Granulated Sugar 🍚 | ¾ cup | Divided for filling and meringue |
| Cornstarch 🌾 | 3 tbsp | For thickening filling |
| Water 💧 | 1 ½ cups | For mixing with filling |
| Large Egg Yolks 🥚 | 3 whole | For enriching filling |
| Unsalted Butter 🧈 | 2 tbsp | For richness in filling |
| Fresh Lemon Juice 🍋 | ¼ cup | For brightness in filling |
| Lemon Zest 🍋 | 1 tbsp | Freshly grated for flavor |
| Large Egg Whites 🥚 | 4 whole | Room temperature for meringue |
| Cream of Tartar 🧂 | ½ tsp | Stabilizes meringue |
| Vanilla Extract 🌿 | ½ tsp | Pure for best flavor |
| Salt 🧂 | ¼ tsp | Balances sweetness |
The pie crust matters—Pillsbury refrigerated is my go-to for convenience, but a homemade butter crust takes this to the next level. The Lucky Leaf filling base is thick and reliable, but fresh lemon juice and zest are non-negotiable for that bright, authentic flavor. Use Meyers lemons if you can find them (sweeter, less bitter). Butter should be unsalted so you control the salt content precisely.
No cornstarch? Arrowroot powder at the same amount works fine. Out of cream of tartar? Lemon juice or white vinegar at half the amount stabilizes the meringue. Egg whites must be room temperature—cold ones won’t whip up properly. For extra shine, add 1/4 tsp of xanthan gum to the meringue. If your filling seems too thin after mixing, let it sit for 5 minutes before cooking—it’ll thicken slightly.
The pie keeps well in the fridge for 3-4 days (cover with a cake dome or inverted bowl to protect the meringue). For longer storage, freeze the filling separately from the crust and meringue, then assemble and bake when ready. Always chill completely before slicing—clean pieces every time.
Why You’ll Love This Recipe
- One-Bowl Wonder: I just dump the lemon pie filling, sugar, and cornstarch into a single bowl, whisk, and it’s ready for the crust—no fuss.
- Tart Meets Sweet: That zingy lemon filling against the buttery crust and fluffy meringue? Honestly, it’s the balance I crave every time.
- Dinner to Dessert: It’s my go-to for Sunday suppers or a last-minute potluck dish—always disappears first.
- Stretches a Buck: A can of Lucky Leaf filling plus a store-bought crust? I’ll be real: it tastes homemade for pennies.
Step-by-Step Instructions for Lemon Meringue Pie
This method ensures a bright, tangy filling and a mile-high meringue that holds its shape perfectly.
Step 1: Prepare the Lemon Filling
In a medium saucepan, whisk together the 1 can Lemon Pie Filling, 0.75 cup Granulated Sugar, 3 tbsp Cornstarch, and 1.5 cups Water until smooth. Place over medium heat and cook, stirring constantly, until the mixture thickens and comes to a full boil.
Once boiling, stir for an additional 1 minute to ensure the cornstarch is fully activated and the filling reaches a pudding-like consistency. Remove from heat and immediately stir in the 3 whole Large Egg Yolks, 2 tbsp Unsalted Butter, 0.25 cup Fresh Lemon Juice, and 1 tbsp Lemon Zest until the butter is melted and everything is well combined.
Step 2: Fill the Pre-Baked Crust
Pour the hot filling into the 1 whole Pie Crust, spreading it evenly with a spatula. The filling should be thick enough to hold its shape without pooling excessively in the center. Smooth the top to create an even base for the meringue.
Let the filling sit while you prepare the meringue. This gives it time to cool slightly, which helps prevent the meringue from separating or weeping later. The filling should still be warm but not scalding when you add the topping.
Step 3: Whip the Meringue to Stiff Peaks
In a clean, grease-free bowl, combine the 4 whole Large Egg Whites, 0.5 tsp Cream of Tartar, and 0.25 tsp Salt. Using an electric mixer, beat on medium speed until frothy, then gradually increase to high speed as the mixture thickens.
Once soft peaks form, add the remaining Granulated Sugar (about ¼ cup) and 0.5 tsp Vanilla Extract slowly while continuing to beat. Whip until the meringue forms stiff, glossy peaks—this means when you lift the beaters, the meringue holds its shape without drooping.
Step 4: Top and Seal the Pie
Spread the meringue over the warm filling, starting at the edges of the crust and working inward to create a seal. This prevents the meringue from pulling away from the crust as it bakes. Use the back of a spoon to create decorative swirls or peaks in the meringue.
Bake at 350°F for 12-15 minutes until the meringue is golden brown. Watch closely during the last few minutes to avoid over-browning. The peaks should be lightly toasted, and the filling should be set with no visible jiggle.
Step 5: Cool and Serve
Remove the pie from the oven and let it cool to room temperature on a wire rack. This cooling step is crucial—it allows the filling to fully set and the meringue to stabilize. Slicing too soon will cause the filling to run and the meringue to collapse.
Once completely cooled, refrigerate for at least 2 hours before serving. Chill it uncovered to prevent condensation from forming on the meringue. Serve cold for clean slices with a perfect balance of tangy filling and airy meringue.
Pro Tips For Making Lucky Leaf Lemon Meringue Pie
- Pre-Bake the Crust: Blind-bake your pie crust for 8-10 minutes at 375°F before adding the filling—this prevents the soggy bottom I struggled with for years.
- Thicken Slowly: When cooking the lemon filling, whisk constantly over medium heat until it reaches a pudding-like thickness; it’ll take about 7-10 minutes but rushing it risks a runny pie.
- Cool Before Topping: Let the lemon filling cool for at least 15 minutes before adding meringue—hot filling will melt the meringue and leave you with a weepy mess.
- Seal the Edges: Press the meringue tightly against the crust edges with a spatula to create a seal; this stops it from shrinking and pulling away during baking.
Perfect Pairings for This Dish
Beverage Pairings
This pie’s bright citrus shines with a chilled Moscato d’Asti, its effervescence cutting through the sweetness. For coffee lovers, serve with espresso—the bitterness complements the tart lemon beautifully. A Earl Grey tea with bergamot notes enhances the citrus flavors. 🍷
Dessert Wines
A Sauternes from Bordeaux offers honeyed richness that balances the pie’s acidity. Riesling ice wine provides intense sweetness and acidity, mirroring the filling’s tang. Serve these slightly chilled in 6-ounce portions to avoid overwhelming the palate.
Non-Alcoholic Options
Sparkling lemonade with fresh mint feels refreshing and thematic. For creaminess, pair with vanilla chai latte—the warm spices contrast the citrus. I love serving coconut water for a light, tropical touch. ✨
Complementary Sides
Fresh raspberries or blackberries add a tart contrast and vibrant color. Dust them with powdered sugar and serve in ½-cup portions. A scoop of vanilla bean ice cream on the side never fails to impress.
After-Dinner Pairings
For a cohesive experience, offer dark chocolate truffles with 70% cacao—their bittersweet depth pairs wonderfully. A small cheese board with brie and honeycomb creates an elegant finish. 💛
Nutrition Facts
Frequently Asked Questions
Can I use a different brand of pie filling?
Yes, but adjust the sugar since other brands may be sweeter. Lucky Leaf has a balanced tartness that works perfectly with this recipe.
Why does my meringue weep after baking?
This usually happens if the filling wasn’t hot enough when topped or the meringue wasn’t cooked thoroughly. Ensure the filling is warm and bake the meringue at 350°F for 12-15 minutes.
Can I make this pie ahead of time?
Prepare it up to a day in advance and refrigerate. For best results, add the meringue just before baking and serving.

- BBQ Sausage Recipe Oven: Smoky Depth Without the Grill - September 28, 2026
- BBQ Chicken Bowl Recipe Rice: Smoky Sweetness Over Fluffy Grains - September 28, 2026
- Beef Cutlet Recipe Ideas: Crispy Breaded Patties With Bold Seasonings - September 28, 2026