
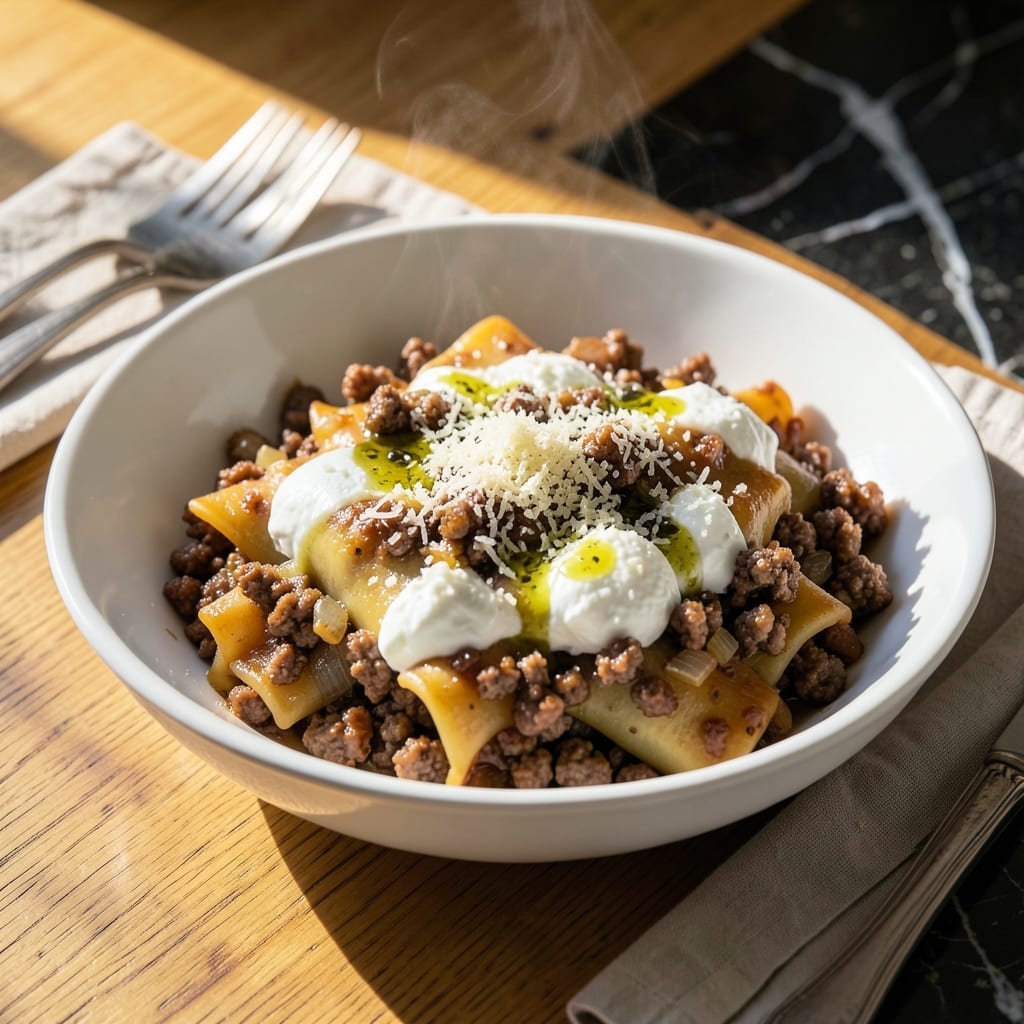
This meat filling transforms manicotti into a perfect centerpiece for any family dinner. I developed it after years of testing different ratios to achieve the ideal balance of richness and texture.
Ground beef and pork create a hearty base, while fresh herbs and parmesan add layers of flavor. The filling holds its shape when piped into the pasta tubes, ensuring each bite delivers consistent quality.
When baked, the manicotti emerges with a golden top and a filling that’s moist without being soggy. The meat mixture cooks evenly, creating a satisfying contrast with the tender pasta.
This recipe produces a dish that’s impressive enough for guests but practical for weeknight cooking. The flavors meld beautifully during baking.
Ingredients for Manicotti Filling Recipe with Meat
Rich ground meats, fresh herbs, and creamy cheeses create this luxurious pasta filling.
| Ingredient | Amount | Notes |
|---|---|---|
| Ground Beef 🥩 | 1 lb | 80/20 fat ratio preferred |
| Ground Pork 🥩 | ½ lb | Mild flavor, not sausage |
| Onion 🧅 | 1 whole | Finely diced, yellow preferred |
| Garlic Cloves 🧄 | 3 cloves | Minced for even distribution |
| Parmesan Cheese 🧀 | 1 cup | Freshly grated from wedge |
| Ricotta Cheese 🧀 | 1 cup | Whole milk for creaminess |
| Mozzarella Cheese 🧀 | 1 cup | Shredded, low-moisture preferred |
| Large Egg 🥚 | 1 whole | For binding filling |
| Fresh Parsley 🌿 | ¼ cup | Finely chopped, flat-leaf variety |
| Fresh Basil 🌿 | ¼ cup | Chopped, for aromatic depth |
| Dried Oregano 🍃 | 1 tsp | Mediterranean variety preferred |
| Salt 🧂 | 1 tsp | Kosher or sea salt |
| Black Pepper 🌶️ | ½ tsp | Freshly ground preferred |
| Olive Oil 🫒 | 2 tbsp | Extra-virgin for sautéing |
The meat blend is non-negotiable for optimal texture. Ground chuck (80/20) provides necessary fat while ground pork shoulder adds moisture without gaminess. Source from Whole Foods or a trusted butcher for consistent quality. The Parmesan should be Parmigiano-Reggiano—look for the rind marking to verify authenticity. Fresh ricotta from the deli case outperforms tub varieties significantly.
Substituting beef with turkey reduces richness considerably. For pork-free versions, veal or additional beef works at one-to-one ratio. Dried herbs can replace fresh at one-third the quantity, but rehydrate in warm water first. Pecorino Romano offers a sharper alternative to Parmesan. The egg binds the filling—1/4 cup breadcrumbs plus 2 tbsp water can substitute if needed.
Prepared filling keeps refrigerated for 24 hours or frozen for 3 months. Thaw overnight in the fridge before using. For make-ahead convenience, assemble manicotti completely and refrigerate up to 12 hours before baking. Always bring filling to room temperature before piping for easiest handling.
Why You’ll Love This Recipe
- Minimal Chopping Required: I just dice one onion and mince a few garlic cloves—no fancy prep here.
- Umami Bomb: The beef and pork blend with parmesan creates that rich, savory depth I crave in every bite.
- Feeds a Crowd: One batch fills two trays of manicotti, so it’s my go-to for Sunday dinner with the whole family.
- Leftovers for Days: Honestly, it tastes even better the next day, and it freezes beautifully for lazy nights.
Step-by-Step Instructions for Manicotti Filling With Meat
Master these precise steps to create a rich, perfectly balanced filling for your stuffed pasta.
Step 1: Sauté Aromatics Until Fragrant
Heat the 2 tbsp olive oil in a large skillet over medium heat. Add the 1 whole onion and cook for 5-6 minutes until it becomes translucent and begins to soften. The onion should release its sweet aroma without browning.
Add the 3 cloves garlic cloves and sauté for an additional 30-45 seconds until fragrant. Be careful not to let the garlic burn—it should turn just slightly golden at the edges. This aromatic base will infuse the entire filling with deep, savory notes.
Step 2: Brown the Meat Thoroughly
Increase heat to medium-high and add the 1 lb ground beef and 0.5 lb ground pork to the skillet. Break the meat into small pieces with a wooden spoon and cook for 8-10 minutes until no pink remains.
The meat should be well-browned, with a deep golden crust forming on the edges. This caramelization process develops complex flavors that will elevate your filling. Drain any excess fat if more than 1 tbsp remains, leaving just enough to keep the mixture moist.
Step 3: Combine Cheeses and Herbs
In a large mixing bowl, combine the 1 cup ricotta cheese, 1 cup parmesan cheese, 1 cup mozzarella cheese, 1 whole large egg, 0.25 cup fresh parsley, 0.25 cup fresh basil, 1 tsp dried oregano, 1 tsp salt, and 0.5 tsp black pepper.
Mix thoroughly until all ingredients are evenly incorporated. The egg acts as a binder, while the combination of cheeses creates a rich, creamy texture with layers of flavor from sharp parmesan to mild mozzarella.
Step 4: Integrate Meat and Aromatics
Add the cooked meat and onion mixture to the cheese bowl. Fold everything together gently but thoroughly, ensuring the meat is evenly distributed throughout the cheese mixture. The filling should hold together when pressed but remain slightly tacky.
Let the mixture rest for 5 minutes before using. This allows the flavors to meld and the egg to begin binding the ingredients. The filling should be cool enough to handle but still warm to the touch for optimal stuffing consistency.
Step 5: Test and Adjust Seasoning
Take a small portion of the filling and microwave for 20 seconds to taste. Adjust seasoning if needed, though the combination of parmesan and herbs should provide sufficient flavor.
The perfect filling will be rich but balanced, with the meat’s savoriness complementing the cheeses’ creaminess. The herbs should add freshness without overpowering. Your creation is now ready to be piped into manicotti shells for baking.
Pro Tips For Making Manicotti Filling Recipe With Meat
- Brown the Meat Well: Cook the ground beef and pork until deeply browned, not just gray—this builds flavor that carries through the filling. I learned this the hard way after making bland manicotti one too many times.
- Sauté Onions First: Start the onions before the garlic, letting them soften for 5-7 minutes on medium heat. Sounds tedious, but raw onions in the filling ruin the texture.
- Drain Excess Fat: After browning, drain all but about 1 tablespoon of fat from the pan—too much grease makes the filling soggy and heavy.
- Grate Fresh Parmesan: Skip the pre-grated stuff and use a block of Parmesan you grate yourself. The texture is better, and it melts into the filling instead of clumping.
Pro Cooking Tips for Great manicotti filling recipe with meat
Prevent Soggy Pasta
Par-cook manicotti shells for exactly 6 minutes in salted boiling water, then shock in ice water. This stops cooking immediately and firms up the pasta so it can withstand the filling without tearing. Trust me, this changed everything for me after years of soggy results. 💪
Chill the Filling
Always refrigerate the meat mixture for 20-30 minutes before stuffing. This firms up the fat and makes piping much cleaner. I use a large star tip on my piping bag for even distribution. The filling should hold its shape when squeezed.
Even Stuffing
Fill each tube about ¾ full to prevent overflow during baking. Use a small spoon to gently press filling to the ends. I learned this trick from my grandmother—it ensures every bite has the perfect meat-to-cheese ratio.
Sauce Layering
Spread 1 cup marinara on the bottom of your baking dish before adding stuffed shells. This prevents sticking and adds moisture. Top with another 2 cups sauce and 1 cup shredded mozzarella for that golden finish.
Rest Before Slicing
Let baked manicotti rest for 10-15 minutes after removing from the oven. This allows the filling to set and makes serving cleaner. I always tent with foil during this time to keep it warm.
Temperature Check
Bake at 375°F until the internal temperature reaches 165°F and the top is bubbly. Use an instant-read thermometer in the center of a shell. This ensures the meat is fully cooked without drying out. 🌡️
Nutrition Facts
Frequently Asked Questions
Can I use ground turkey instead of beef?
Yes, but the flavor profile will be milder. Use dark meat turkey for best results, and add an extra ½ tsp salt to compensate. The texture will be slightly less rich than the beef-pork blend.
How do I keep the filling from falling out?
Chill the mixture for 20-30 minutes before stuffing. Fill shells only ¾ full and let rest 10 minutes after baking. This helps the filling set properly.
What’s the best way to stuff the shells?
Use a piping bag with a large star tip for easiest filling. Alternatively, cut a corner off a ziplock bag. This gives you better control than spooning.
Can I make this ahead and freeze?
Assemble completely (unbaked) and freeze up to 3 months. Thaw overnight in the fridge before baking. Add 5-10 minutes to baking time if cooking from frozen.

- BBQ Sausage Recipe Oven: Smoky Depth Without the Grill - September 28, 2026
- BBQ Chicken Bowl Recipe Rice: Smoky Sweetness Over Fluffy Grains - September 28, 2026
- Beef Cutlet Recipe Ideas: Crispy Breaded Patties With Bold Seasonings - September 28, 2026