
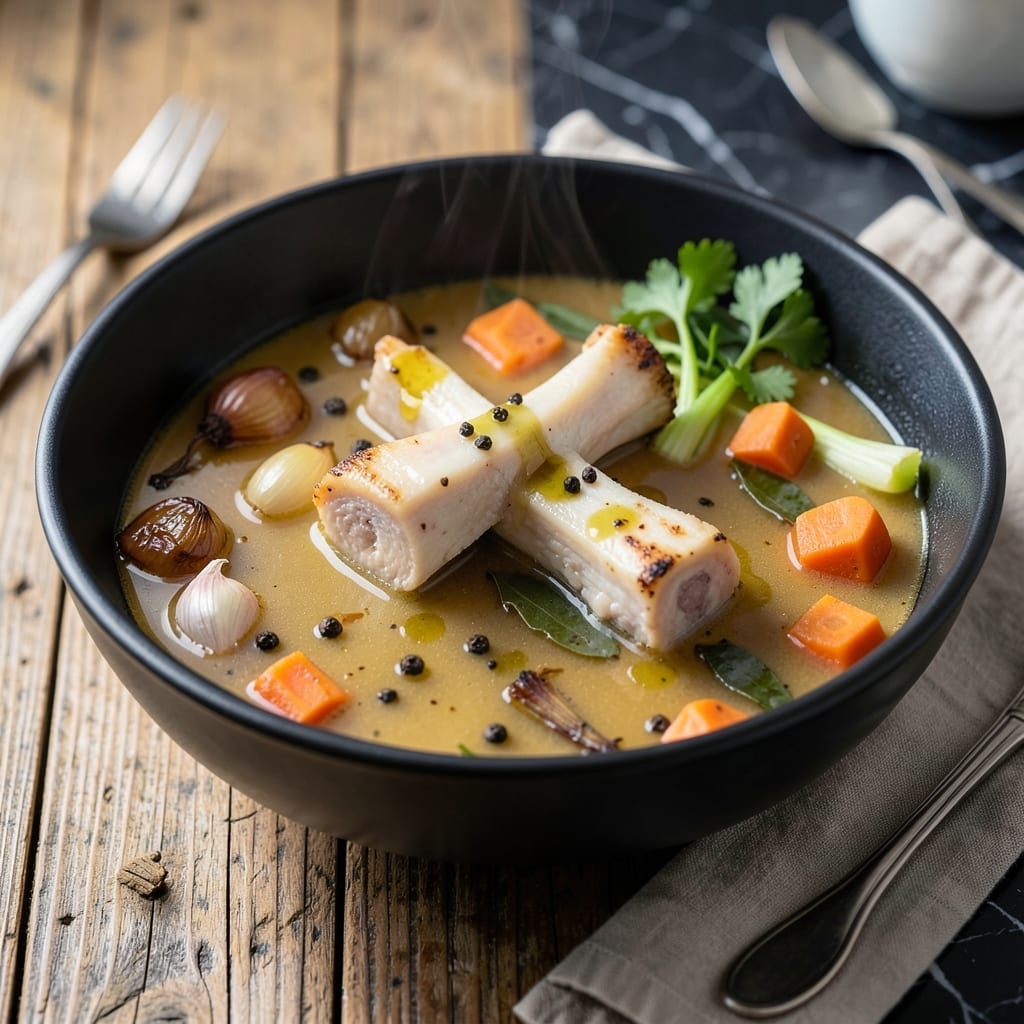
This marrow bone broth represents the pinnacle of nourishment and flavor, achieved through a slow, deliberate simmering process. The result is a deeply rich, perfectly balanced liquid gold that has sustained cultures for generations.
I developed this method after years of experimentation to extract maximum gelatin and minerals from the bones. The key lies in the low, steady heat and proper skimming technique to maintain clarity and depth of flavor.
What emerges after 12-24 hours is a velvety broth with a complex, meaty taste that forms the foundation for soups, sauces, or simple sipping. The bones release their essence completely, creating a nourishing elixir that supports gut health and overall wellness.
Serve it straight, use it as a cooking base, or store for future meals. Here’s how to make this time-honored staple.
Ingredients for Marrow Bone Broth
Simple ingredients transform into liquid gold with time and patience.
| Ingredient | Amount | Notes |
|---|---|---|
| Beef Marrow Bones 🦴 | 3 lb | Split lengthwise for maximum exposure |
| Yellow Onions 🧅 | 2 whole | Quartered, skin on for color |
| Carrots 🥕 | 3 whole | Cut into large chunks |
| Celery Stalks 🌿 | 3 whole | Including leafy tops |
| Garlic Cloves 🧄 | 6 cloves | Smashed, skin on |
| Bay Leaves 🍃 | 2 whole | Dried, for aromatic depth |
| Black Peppercorns 🌶️ | 2 tbsp | Whole, lightly crushed |
| Apple Cider Vinegar 🍏 | ¼ cup | Helps extract minerals from bones |
| Cold Water 💧 | 4 cups | Enough to cover bones by 2 inches |
| Sea Salt 🧂 | 1 tbsp | Adjust to taste after simmering |
| Fresh Thyme Sprigs 🌿 | 5 whole | Optional, for added herbal notes |
| Fresh Parsley 🌿 | ¼ cup | For garnish when serving |
The bones are everything here. Look for grass-fed beef marrow bones at a trusted butcher or specialty shop like Whole Foods—they have the richest flavor and highest gelatin content. Ask for them pre-cut (split lengthwise) to expose the marrow, which maximizes extraction. Avoid pre-packaged bones from the grocery store if they look gray or have an off smell. Freshness matters for depth of flavor.
No marrow bones? Beef knuckle or oxtail bones work as substitutes (though the flavor profile shifts slightly). Out of apple cider vinegar? Lemon juice or white vinegar in the same amount does the trick. The vegetables are flexible—leeks or parsnips can replace carrots or celery. For a deeper color, roast the bones and veggies first (400°F for 30 minutes).
Broth keeps 5 days in the fridge or 6 months frozen. Skim fat after chilling for a cleaner finish. Strain through a fine-mesh sieve and store in airtight containers. The flavor intensifies overnight, so it’s even better the next day.
Why You’ll Love This Recipe
- Set And Forget: It’s just dumping bones, onions, carrots, and celery into a pot and letting the slow simmer do the work.
- Rich, Deep Flavor: The marrow melts into the broth, and the garlic adds this cozy warmth I can’t get enough of.
- Meal Prep Magic: I make a big batch on Sunday and use it for soups, risottos, or just sipping all week long.
- Penny-Wise Comfort: Beef marrow bones are cheap, and one pot gives me quarts of broth—way better than store-bought.
Step-by-Step Instructions for Marrow Bone Broth
This method extracts maximum flavor and nutrients from every ingredient with careful timing and technique.
Step 1: Roast the Beef Marrow Bones and Vegetables
Preheat your oven to 400°F. Arrange the 3 lb beef marrow bones on a baking sheet along with the 2 whole quartered yellow onions, 3 whole carrots cut into large chunks, 3 whole celery stalks, and 6 cloves smashed garlic cloves (all with skin on).
Roast for 30-40 minutes until the bones are deep golden brown and the vegetables develop caramelized edges. This step intensifies the flavor and ensures a rich, complex broth. The marrow should begin to soften but not fully render out.
Step 2: Prepare the Aromatics and Combine Ingredients
Lightly crush the 2 tbsp black peppercorns with the flat side of a knife. Transfer the roasted bones and vegetables to a large stockpot. Add the crushed peppercorns, 2 whole bay leaves, 5 whole fresh thyme sprigs, and 0.25 cup apple cider vinegar.
The vinegar helps extract minerals from the bones during simmering. Pour in the 4 cups cold water, ensuring the bones are covered by 2 inches. If needed, add additional water to reach this level.
Step 3: Simmer for Deep Flavor Extraction
Bring the mixture to a boil over high heat, then reduce to a low simmer. Skim off any foam or impurities that rise to the surface during the first 30 minutes. This keeps the broth clear and clean-tasting.
Partially cover the pot and simmer for 12-24 hours. The longer the simmer, the more gelatin and nutrients are extracted. The broth should develop a deep amber color and a rich, aromatic scent. Add the 1 tbsp sea salt halfway through cooking, adjusting to taste at the end.
Step 4: Strain and Finish the Broth
Carefully strain the broth through a fine-mesh sieve into a large bowl, discarding the solids. Let it cool slightly, then skim off any excess fat from the surface if desired. For a clearer broth, you can strain it again through a cheesecloth-lined sieve.
Stir in the 0.25 cup fresh parsley just before serving for a bright, fresh finish. The parsley adds a subtle herbal note without overpowering the rich bone broth flavor. Serve hot, or store in airtight containers for up to 5 days in the refrigerator or 6 months in the freezer.
Pro Tips For Making Marrow Bone Broth
- Roast the Bones First: I learned this the hard way—raw marrow can make your broth greasy. Toss the bones in a 400°F oven for 20-30 minutes until golden to deepen the flavor and render out excess fat.
- Skim the Scum: The first 30 minutes of simmering bring impurities to the surface. Grab a fine-mesh skimmer and remove that gray foam—your broth will be clearer and cleaner.
- Use Cold Water: Sounds weird, but it works: Start your bones in cold water and bring it up to a simmer slowly. This pulls more gelatin and flavor from the bones than dumping them into boiling water.
- Add Vinegar: My grandmother swore by this, and she was right: A splash of apple cider vinegar—about 2 tablespoons—helps break down the bones and extract more minerals into the broth.
Storing and Reheating This marrow bone broth
Refrigerator Storage
Cool your broth completely before transferring to airtight glass jars—I use Ball mason jars for easy tracking. Store in the fridge at 40°F or below for up to 5 days. The fat will solidify at the top, making it easy to skim off. ❄️
Freezer Storage
For longer storage, pour cooled broth into quart-sized freezer bags or silicone ice cube trays. Lay bags flat to save space and freeze for up to 6 months. Leave 1 inch of headspace for expansion. Label with the date for freshness tracking.
Stovetop Reheating
Gently reheat on the stove over medium-low heat until it reaches a simmer. Avoid boiling, which can break down the gelatin. If the broth seems thick, add ¼ cup water and stir. This method preserves the rich, velvety texture. 🔥
Microwave Reheating
For quick portions, microwave in 1-minute intervals at 70% power, stirring between each. A 16-ounce serving typically takes 2-3 minutes to reach 165°F. Cover with a microwave-safe lid or damp paper towel to prevent splattering.
Thawing Frozen Broth
Move frozen broth to the fridge 12-24 hours before use for safe thawing. For quicker results, submerge the sealed bag in cold water, changing it every 30 minutes. Never thaw at room temperature to prevent bacterial growth.
Reviving Flavor
If reheated broth tastes flat, add a pinch of sea salt or a splash of apple cider vinegar. These small additions can restore the depth of flavor. I always keep a few extra bay leaves on hand for this purpose.
Nutrition Facts
Frequently Asked Questions
Do I need to roast the bones first?
Yes, roasting at 400°F for 30-40 minutes deepens the flavor and color. It caramelizes the natural sugars in the bones and vegetables, creating a richer final product. Skip this step only if making a quick version.
Can I use a slow cooker instead?
Set it to low for 12-24 hours. The gentle, consistent heat works perfectly for extracting gelatin. Just ensure bones are fully submerged and skim foam during the first hour.
How do I know when it’s done?
The broth should be deep amber and slightly viscous when cooled. Bones will appear brittle and easily break apart. If it lacks richness, simmer 4-6 hours longer.
Why is my broth cloudy?
Cloudiness often comes from boiling too vigorously or not skimming impurities initially. For clearer results, maintain a gentle simmer and skim foam during the first 30 minutes.

- BBQ Sausage Recipe Oven: Smoky Depth Without the Grill - September 28, 2026
- BBQ Chicken Bowl Recipe Rice: Smoky Sweetness Over Fluffy Grains - September 28, 2026
- Beef Cutlet Recipe Ideas: Crispy Breaded Patties With Bold Seasonings - September 28, 2026