
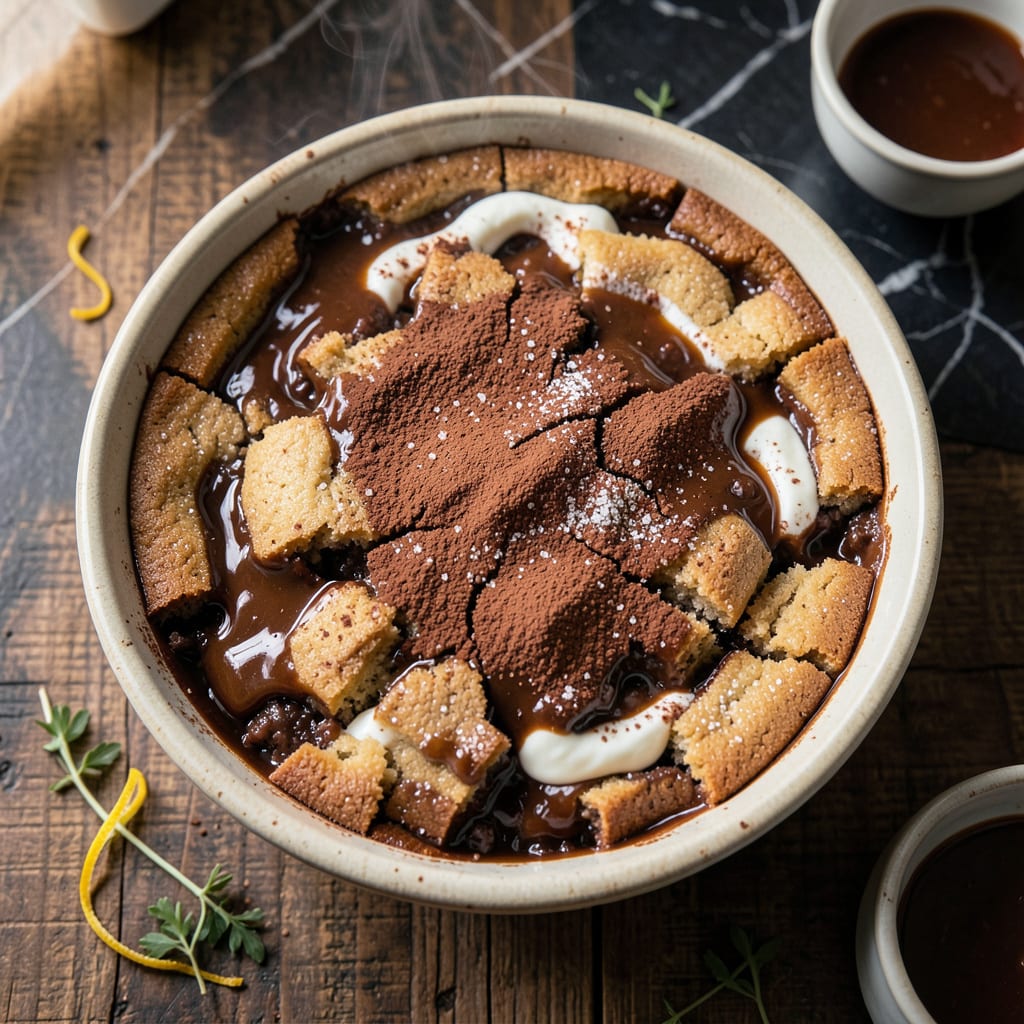
There’s a reason this chocolate cobbler has been passed down for generations. It delivers a perfectly cake-like top with a molten center that flows like lava when served warm.
With just a handful of pantry staples and 40 minutes in the oven, you’ll create a dessert that tastes like it came from a professional bakery. The contrast of textures makes every bite unforgettable.
Ingredients for Meme’s Chocolate Cobbler
A handful of pantry staples transforms into this showstopping dessert with minimal effort.
| Ingredient | Amount | Notes |
|---|---|---|
| All-Purpose Flour 🌾 | 1 ½ cups | Sifted for lighter texture |
| Granulated Sugar 🍚 | 1 ½ cups | Divided for batter and topping |
| Unsweetened Cocoa Powder 🍫 | ½ cup | Dutch-process preferred for richness |
| Baking Powder 🧂 | 2 tsp | Ensures proper rise |
| Salt 🧂 | ½ tsp | Balances sweetness |
| Whole Milk 🥛 | 1 cup | Room temperature for even mixing |
| Unsalted Butter 🧈 | ½ cup | Melted for batter |
| Vanilla Extract 🌿 | 2 tsp | Pure extract for best flavor |
| Light Brown Sugar 🍯 | 1 cup | Packed, for gooey center |
| Hot Water 💧 | 2 cups | For molten chocolate layer |
[recipeingredientscaler]
The cocoa powder is doing heavy lifting here. Hershey’s Special Dark or Ghirardelli gives that deep chocolate flavor you want. Don’t skimp on quality—cheap cocoa tastes chalky (and nobody wants that). The milk can be swapped for buttermilk if you’ve got it lying around, but regular is just fine. Butter should be real deal—margarine won’t cut it for that rich, cakey top.
No Dutch-process cocoa? Natural cocoa works too, just add a pinch more baking powder to help with rise. Out of brown sugar? White sugar plus a tablespoon of molasses gets you close. The vanilla is worth using the good stuff—McCormick or Nielsen-Massey if you’re feeling fancy. And if you’re worried about the center being too gooey, trust me, it’s supposed to be.
This keeps 3-4 days at room temp, but honestly it’s best eaten warm the day it’s made. Leftovers? Reheat in the microwave with a scoop of ice cream on top (don’t skip this part).
Why You’ll Love This Recipe
- One Bowl Wonder: I love that I can mix the flour, sugar, cocoa, and baking powder right in the baking dish—no extra bowls to wash.
- Warm Chocolate Bliss: That first bite of gooey cocoa goodness with a crisp top layer? It’s like a hug in dessert form.
- Potluck MVP: Honestly, it’s my go-to for gatherings because it feeds a crowd and everyone asks for the recipe.
- Budget-Friendly Treat: A handful of pantry staples turns into a showstopper—no fancy ingredients required.
Step-by-Step Instructions for Chocolate Cobbler
This method delivers that signature gooey center with a perfect cake-like top every time.
Step 1: Prepare the Dry Ingredients and Wet Mixture
In a medium bowl, whisk together the 1.5 cups All-Purpose Flour, 1.5 cups Granulated Sugar, 0.5 cup Unsweetened Cocoa Powder, 2 tsp Baking Powder, and 0.5 tsp Salt. Sift if your flour is lumpy—this ensures a lighter texture in the finished cobber.
In a separate bowl, combine the 1 cup Whole Milk, 0.5 cup Unsalted Butter, and 2 tsp Vanilla Extract. Make sure the butter is fully melted and the milk is at room temperature. This prevents the melted butter from solidifying when it hits the cold milk.
Step 2: Combine and Spread the Batter
Gradually pour the wet mixture into the dry ingredients while stirring gently. Mix just until combined—don’t overmix or you’ll develop gluten, which makes the cake layer tough instead of tender. The batter will be thick but pourable.
Transfer the batter to a 9×13-inch baking dish and spread it evenly with a spatula. Don’t worry if it looks thick—this is exactly how it should be. The batter will spread slightly as it bakes, creating that perfect cake-like top layer.
Step 3: Create the Molten Chocolate Layer
In a small bowl, mix the 1 cup Light Brown Sugar with the 0.5 cup Unsweetened Cocoa Powder. Sprinkle this mixture evenly over the top of the batter. Use your fingers to gently press it down so it adheres to the batter—this prevents it from sliding off when you add the liquid.
Carefully pour the 2 cups Hot Water over the entire surface. Don’t stir—just let the water settle into the cocoa-sugar layer. You’ll see it start to bubble slightly as it hits the hot water, which is exactly what you want.
Step 4: Bake to Perfection
Bake in a preheated 350°F oven for 30-35 minutes. You’ll know it’s done when the top looks set and slightly springy to the touch, like a cake, and the edges are starting to pull away from the sides of the dish.
The magic happens during baking: the hot water creates a self-saucing layer beneath the cake, giving you that signature gooey chocolate center. Resist the urge to overbake—you want the center to remain slightly jiggly, as it will continue to set as it cools.
Step 5: Rest and Serve Warm
Remove from the oven and let it rest for 10-15 minutes before serving. This allows the sauce to thicken slightly and the layers to set. If you cut into it too soon, you’ll have a runny mess instead of distinct layers.
Serve warm in bowls with a scoop of vanilla ice cream or a dollop of whipped cream. The contrast of the warm, gooey chocolate sauce with the cool, creamy topping is what makes this dish truly special. Each spoonful should deliver a bit of cake, a bit of sauce, and pure chocolate bliss.
Pro Tips For Making Meme’S Chocolate Cobbler
- Preheat the Oven: I learned this the hard way—always preheat to 350°F before mixing your batter. The cobbler rises properly when the oven’s hot from the start.
- Sift the Cocoa: After losing a batch to clumpy cocoa, I now sift it with the flour and baking powder. No lumps, just smooth chocolate flavor in every bite.
- Skip Packed Brown Sugar: Sounds weird, but stick to granulated sugar—packed brown sugar can make the topping too dense. The recipe works best with what’s listed.
- Check at 25 Minutes: My first attempt burned because I trusted the full bake time blindly. Start checking at 25 minutes—it’s done when the edges pull away slightly.
Storing and Reheating This memes chocolate cobbler
Room Temperature Storage
This cobbler keeps beautifully at room temperature for 2-3 days in an airtight container. I use a glass dish with a snap-on lid to maintain freshness. The flavors actually deepen as it sits, making leftovers just as delightful. 💡
Refrigerator Storage
For longer storage, refrigerate in a covered container for up to 5 days. The cold will thicken the sauce, but it reheats beautifully. Be sure to let it sit at room temperature for 15-20 minutes before reheating for even warming.
Microwave Reheating
Place a single portion in a microwave-safe bowl and heat on 50% power for 30-45 seconds. Stir, then continue in 15-second bursts until warmed through. The sauce will loosen as it heats, restoring that gooey texture.
Oven Reheating
For the best results, cover the dish with aluminum foil and warm at 300°F for 10-15 minutes. This method revives the cake-like top while keeping the center saucy. I always add a scoop of ice cream right before serving. ❄️
Freezing Tips
While I don’t recommend freezing (the texture changes), you can freeze portions for up to 1 month in freezer-safe containers. Thaw overnight in the fridge before reheating. The cake layer may be slightly denser but still delicious.
Nutrition Facts
Frequently Asked Questions
Can I use a smaller baking dish?
Yes, but adjust the baking time. An 8×8-inch dish will need 35-40 minutes at 350°F. The batter will be thicker, so check for doneness with a toothpick.
Why is my cobbler dry on top?
Overbaking is usually the culprit. Pull it out when the center is still slightly jiggly—it sets as it cools. Also, ensure you’re using the full 2 cups hot water for the molten layer.
Can I make this ahead of time?
Assemble the dish, cover, and refrigerate for up to 24 hours before baking. Add 5-10 minutes to the baking time if starting cold.

- BBQ Sausage Recipe Oven: Smoky Depth Without the Grill - September 28, 2026
- BBQ Chicken Bowl Recipe Rice: Smoky Sweetness Over Fluffy Grains - September 28, 2026
- Beef Cutlet Recipe Ideas: Crispy Breaded Patties With Bold Seasonings - September 28, 2026