
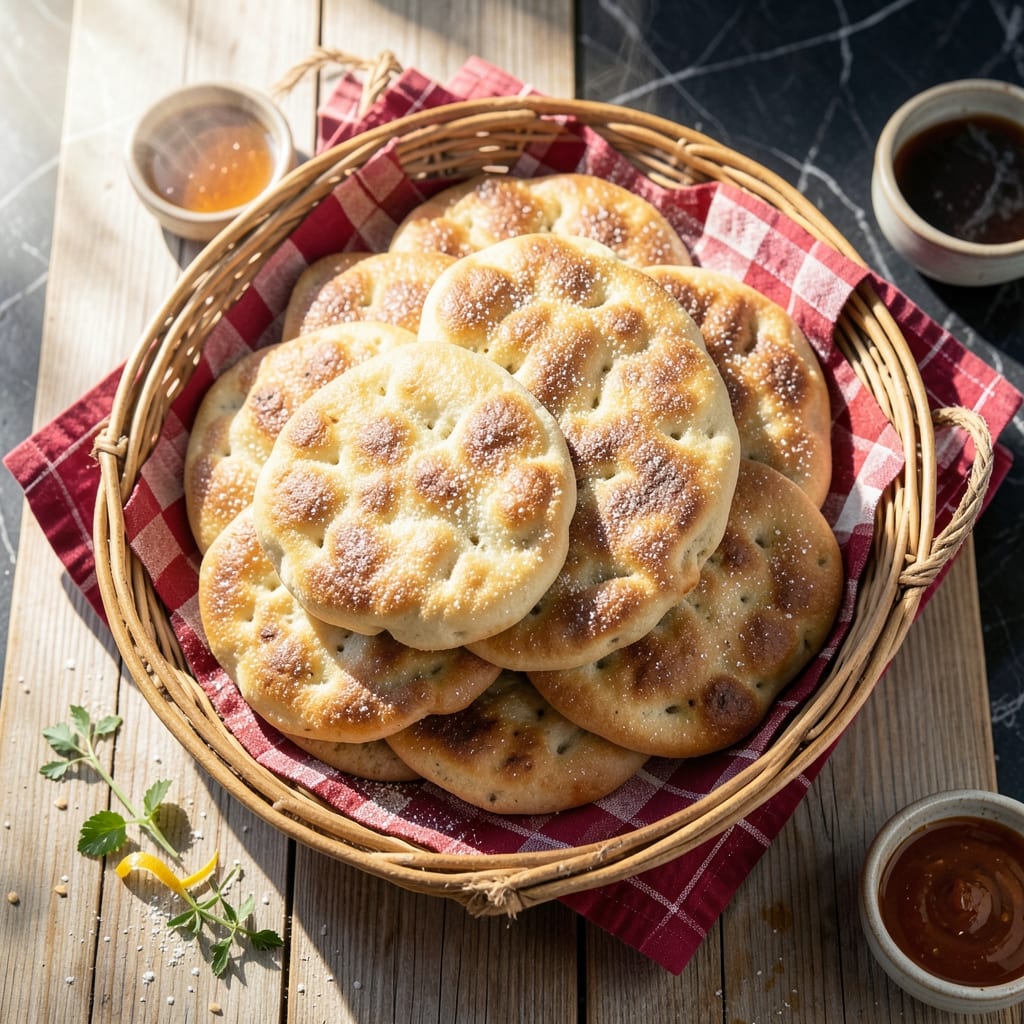
This yeast-leavened fry bread delivers pillowy texture with a golden crust in minutes. I developed this method after testing dozens of variations to achieve authentic results at home.
The yeast makes all the difference, creating airy, cloud-like bread that’s light inside yet sturdy enough to hold toppings. Simple ingredients transform through precise proofing and frying into something extraordinary.
You’ll achieve perfectly golden rounds with a tender crumb that’s ideal for tacos or sweet toppings. The process requires patience but rewards with restaurant-quality results every time.
Serve warm for the best experience. This recipe honors tradition while making it accessible for home kitchens.
Ingredients for Native American Fry Bread Recipe with Yeast
Simple pantry staples transform into golden, pillowy bread with just the right lift.
| Ingredient | Amount | Notes |
|---|---|---|
| Active Dry Yeast 🍞 | 1 package | 2 1/4 tsp equivalent |
| Warm Water 💧 | 1 cup | 110°F to activate yeast |
| All-Purpose Flour 🌾 | 4 cups | Plus extra for dusting |
| Granulated Sugar 🍚 | 1 tbsp | Feeds the yeast |
| Salt 🧂 | 1 tsp | Fine grain preferred |
| Baking Powder 🧂 | 1 tbsp | For extra lift |
| Vegetable Shortening 🧈 | 2 cups | For frying, melted |
| Powdered Sugar 🍬 | ¼ cup | Optional for dusting |
| Ground Cinnamon 🌿 | 1 tsp | Optional for sweet version |
| Honey 🍯 | ¼ cup | Optional for drizzling |
The yeast is non-negotiable for that authentic texture—Fleischmann’s or Red Star are reliable brands available at any supermarket. Use bread flour if you want even more lift (the higher protein helps), but all-purpose works perfectly. The shortening must be solid at room temperature—Crisco is the classic choice. Warm water should feel like bathwater on your wrist, not hot enough to kill the yeast.
No yeast? This isn’t the same bread, but baking powder alone at 2 tbsp will give you a quick version (just don’t expect the same airy texture). Skip the sugar if you prefer savory bread. For sweet toppings, maple syrup or agave can replace honey. The shortening can be swapped for lard if you’re going traditional (rendered pork fat was the original), or vegetable oil in a pinch.
Dough can rest at room temperature for up to 2 hours before frying. Fry in batches and keep warm in a 200°F oven on a rack. Best eaten fresh, but leftovers keep 2-3 days sealed. Reheat in a dry skillet to revive the crispness.
Why You’ll Love This Recipe
- No-Knead Magic: I just mix yeast, warm water, flour, and a pinch of sugar—no fancy techniques, and the dough practically makes itself.
- Pillowy Perfection: That first bite of crispy, golden bread giving way to a soft, airy center? Honestly, it’s the reason I keep making this.
- Feeds the Crowd: I fry up a big batch for powwows or weeknight dinners, and it disappears faster than I can stack the plates.
- Pennywise Comfort: Between us, this costs less than a loaf of bread at the store and tastes a hundred times better.
Step-by-Step Instructions for Native American Fry Bread With Yeast
Master the technique for light, golden bread with a crisp exterior and soft interior.
Step 1: Activate the Yeast and Prepare the Dough
In a large bowl, dissolve the 1 package Active Dry Yeast and 1 tbsp Granulated Sugar in 1 cup Warm Water heated to 110°F. The water should feel warm to the touch but not hot—too high a temperature will kill the yeast.
Let the mixture sit for 5-7 minutes until it becomes frothy and bubbly, indicating the yeast is active. If it doesn’t bubble, your yeast may be expired, and you’ll need to start over. Stir in the 4 cups All-Purpose Flour, 1 tsp Salt, and 1 tbsp Baking Powder until a shaggy dough forms.
Step 2: Knead and Rest the Dough
Turn the dough onto a lightly floured surface and knead for 5-7 minutes until smooth and elastic. The dough should be slightly tacky but not sticky—add a little more flour if needed, one tablespoon at a time.
Place the dough in a lightly greased bowl, cover with a damp towel, and let it rise in a warm, draft-free place for 1 hour or until doubled in size. This resting period allows the yeast to work its magic, creating air pockets for a light, pillowy texture.
Step 3: Shape and Rest the Dough Rounds
Punch down the risen dough to release the air, then divide it into 8 equal portions. Roll each portion into a ball, then flatten into a ½-inch thick round. Place the rounds on a floured surface, cover with a towel, and let them rest for 15-20 minutes.
This second rest relaxes the gluten, making the dough easier to stretch and ensuring even cooking. The rounds will puff slightly as they rest, giving you a head start on that signature fry bread thickness.
Step 4: Fry to Golden Perfection
In a deep, heavy-bottomed skillet, heat 2 cups Vegetable Shortening over medium-high heat to 375°F. Use a deep-fry thermometer to monitor the temperature—consistent heat is key to even cooking without burning.
Carefully slide one or two dough rounds into the hot shortening, being careful not to overcrowd the pan. Fry for 1-2 minutes per side until deep golden brown and puffed. Use tongs to flip the dough, ensuring both sides cook evenly. Transfer the cooked bread to a paper towel-lined plate to drain excess oil.
Step 5: Serve Warm with Optional Toppings
Serve the fry bread warm, while the exterior is still crisp. For a sweet version, dust with 0.25 cup Powdered Sugar or drizzle with 0.25 cup Honey. For a savory twist, mix 1 tsp Ground Cinnamon into the powdered sugar before dusting.
The bread should be light and airy inside with a crisp, golden exterior. The contrast of textures is what makes this dish irresistible. Enjoy immediately for the best experience—fry bread is at its peak fresh out of the oil.
Pro Tips For Making Native American Fry Bread Recipe With Yeast
- Test Your Yeast: Always bloom the active dry yeast in warm water (110°F) with a pinch of sugar first—if it doesn’t foam in 5 minutes, your bread won’t rise. I learned this the hard way after wasting a whole batch of flour.
- Don’t Overwork Dough: Mix just until the flour comes together; over-kneading makes fry bread tough. Sounds weird, but it works: the shaggier the dough, the fluffier the finished bread.
- Use Fresh Oil: Fry in oil that’s 350-375°F and replace it if it starts smoking or looking dark. After burning three batches, I finally figured out that old oil gives fry bread a bitter taste.
- Let It Rest: Give the shaped dough a 10-minute rest before frying—this relaxes the gluten for a puffier texture. My grandmother swore by this, and she was right: skipping it means dense, flat bread.
Common Mistakes When Making Great native american fry bread recipe with yeast
Yeast Activation Errors
Using water that’s too hot will kill your yeast. I learned this the hard way with 120°F water—always aim for 110°F, which should feel like warm bathwater. If your mixture doesn’t bubble after 7 minutes, your yeast may be expired. 💡
Overworking the Dough
Kneading too long develops excess gluten, making your bread tough instead of pillowy. Stop once the dough is smooth and elastic after 5-7 minutes. Remember, this isn’t bread loaf dough—it should stay slightly tacky.
Inconsistent Oil Temperature
Frying at too low a temperature (below 350°F) creates greasy bread. Too high (above 400°F) burns the outside before cooking through. Use a deep-fry thermometer to maintain 375°F for perfect golden rounds.
Skipping the Rest
Rushing the 1-hour rise or 15-20 minute final rest results in dense bread. The yeast needs time to create those air pockets that make fry bread light. I set a timer—patience pays off with that perfect texture.
Crowding the Pan
Frying too many rounds at once lowers the oil temperature. Cook just 1-2 pieces at a time in your skillet. This ensures even cooking and that beautiful puff. Overcrowding also makes flipping difficult and dangerous. 🔥
Ignoring Drainage
Place cooked bread on paper towels immediately after frying. This absorbs excess oil, keeping your rounds crisp rather than soggy. I use a wire rack over paper towels for even better air circulation.
Nutrition Facts
Frequently Asked Questions
Can I use instant yeast instead of active dry?
Yes, swap active dry for instant yeast in equal amounts. Skip the 5-7 minute activation step and mix it directly with dry ingredients. Instant yeast works faster, so reduce the first rise to 45 minutes.
Why does my bread turn out dense?
Dense bread usually means the yeast didn’t activate or the dough didn’t rest enough. Ensure water is 110°F and allow the full 1-hour rise. Over-kneading can also cause this.
What’s the best oil for frying?
Vegetable shortening is traditional for its high smoke point and flavor. Vegetable or peanut oil work too. Maintain 375°F for even cooking. Avoid olive oil—it burns at frying temps.
Can I make this ahead of time?
Shape and rest the dough rounds, then refrigerate up to 24 hours. Let them sit at room temperature for 30 minutes before frying. Fresh is best, but this works in a pinch.

- BBQ Sausage Recipe Oven: Smoky Depth Without the Grill - September 28, 2026
- BBQ Chicken Bowl Recipe Rice: Smoky Sweetness Over Fluffy Grains - September 28, 2026
- Beef Cutlet Recipe Ideas: Crispy Breaded Patties With Bold Seasonings - September 28, 2026